
HP StorageWorks 1510i Modular Smart Array installation and user guide (383070-002, July 2008)

• The priority that the rebuild is given over normal I/O operations (you can change the priority
setting through the Array Configuration Utility (ACU), Storage Management Utility (SMU), or MSA
Command Line Interface (MSA-CLI).
• The amount of I/O activity during the rebuild operation
• The rotational speed of the hard drives
• The availability of drive cache
• The brand, model, and age of the drives
• Theamountofunusedcapacityonthedrives
• The number of drives in the array (for RAID 5 and RAID ADG)
Allow approximately 15 minutes per gigabyte for the rebuild process to be completed. This figure is
conservative, and newer drive models usually require less time to rebuild.
System performance is affected during the rebuild, and the system is unprotected against further drive
failure until the rebuild has finished. Therefore, replace drives during periods of low activity when possible.
CAUTION:
IftheOnlineLEDofthereplacementdrivestopsblinkingandtheamberFaultLEDglows,orifotherdrive
LEDs in the array go out, the replacement drive has failed and is producing unrecoverable disk errors.
Remove and replace the failed replacement drive.
When automatic data recovery has finished, the Online LED of the replacement drive stops blinking
and begins to glow steadily.
If ADR process aborts, restart the storage system and allow ADR to begin again. If ADR fails again,
back up all data on the system, do a surface analysis (using your diagnostics utility), and restore the
data from backup.
Failure of another drive during rebuild
If a non-correctable read error occurs on another physical drive in the array during the rebuild process,
the Online LED of the replacement drive stops blinking and the rebuild abnormally terminates.
If this situation occurs, restart the server and the storage system. The system may temporarily become
operational long enough to allow recovery of unsaved data. In any case, locate the faulty drive, replace
it, and restore data from backup.
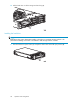
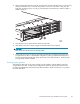
Replacing a hard drive
Before you begin
CAUTION:
• Before removing a component or blank from an operational device, make sure that you have the
replacement part or blank available. Removing a component or blank impacts the airflow pattern
and cooling ability of the device. Allow approximately 30 seconds before installing the new or
replacement component to ensure that configuration data about the removed component is cleared
from the system registry, but, to avoid possible overheating, insert the new or replacement component
within one or two minutes. If the internal temperature exceeds acceptable limits, the device may
overheat and automatically shut down or restart.
• Parts can be damaged by electrostatic discharge. Use proper anti-static protection.
Ver
ifying component failure
Har
d drive failure is indicated by an amber Drive Failure LED.
96
Operation and management