
HP StoreEver MSL2024 Tape Library Getting Started (AK378-96060, December 2012)
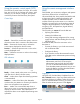

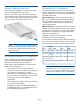


Optional: Installing the tabletop conversion
cover
Skip this step if you are mounting the library in a rack.
Place the cover on the work surface behind the library.
Slide the library into the cover until the front panel of
the library is aligned with the cover.
Tighten the two captive screws on the front bezel to
secure the library in the cover.
CAUTION: Operating the library on a flat
surface without the tabletop conversion cover
may cause errors or damage to the library.
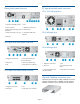
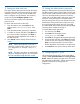
2 Determining your rack type
If you mounted the library in the tabletop conversion
cover, continue with “Optional: Adding a tape drive”
(page 6).
You will need a #2 and #3 Phillips screwdriver, the
two rack rails, and the packet of eight M6 screws
appropriate for your rack.
• The HP System/E rack has 7.1 mm round holes
in the rack column. Choose the bag labeled HP
Rack System/E.
• The HP Intelligent Series, HP 5000, and HP
10000 racks have 9.5 mm square holes in the
rack column. Choose the bag labeled HP Rack
5000, 10000.
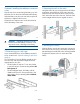
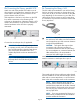
3 Securing the rails to the rack
Using the screws for your rack type and a #3 Phillips
screwdriver, secure the front of one rail to the rack.
Extend the rail and secure the back of the rail to the
rack. Secure the other rail to the rack. The front of the
rails is straight and the back is angled, as shown.
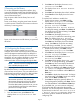
4 Installing the library
Slide the library onto the rails in the rack. Secure the
front bezel to the rack using a #2 Phillips screwdriver
placed through the small holes in the mounting bracket
to tighten the captive screws on each side of the
library.
Page 5