
Compaq StorageWorks Getting Started RAID Array 3000 for Microsoft Windows Installation Guide (AA-RACZD-TE, January 2001)

Unpacking and Setting Up RAID Array 3000 Pedestal 2-7
Compaq Confidential – Need to Know Required
Writer: Bob Young Project: Getting Starting RAID Array 3000 for Microsoft Windows Installation Guide Comments:
Part Number: AA-RACZD-TE File Name: c-ch2 Unpacking and Setting Up RAID Array 3000 Pedestal.doc Last Saved On: 12/4/00 2:26 PM
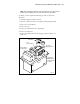
Connecting the PC Serial Interface Cable
You must make a serial connection to the RAID controller to create your first
virtual disk. This disk is required to communicate to your RAID Array 3000
over a network or SCSI bus. The serial cable is 16.4 feet (5m) long and is
labeled 17-04730-01. Do the following steps to connect the PC to the
controller:
1. Locate the serial cable that came with the RAID subsystem. It has
9-pin female, serial connectors on each end.
2. Plug one end of the serial cable into the 9-pin serial port on a PC.
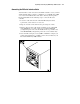
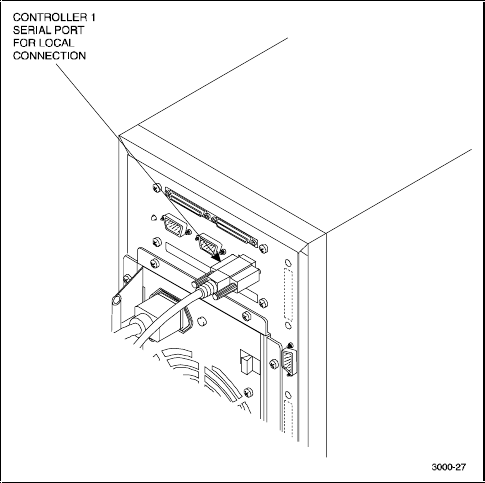
3. Plug the other end of the cable into the Controller 1 port on the RAID
Array 3000 (Figure 2–5). The control ports are labeled CTR TOP
(configuration port for the controller installed in the top controller slot)
and CTR BOTTOM (configuration port for the second controller slot).
4. Note which PC serial port you use (COM1 or COM2 for example); you
will need that information to establish a serial connection between your
PC and the RAID Array 3000 controller.
Figure 2-5. Connecting the serial interface