
HP StorageWorks 6000-series Virtual Library System User Guide (AH809-96049, September 2010)

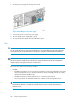
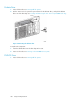
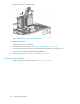

3. Slide the hard drive out of the cage.
Figure 97 Removing a hard drive
.
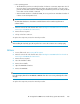
To replace the component:
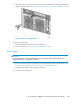
1. Press the ejector lever release button on the replacement hard drive to unlock the ejector lever.
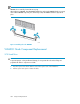
2. Insert the hot-plug SCSI hard drive into the drive cage. Be sure that the drive seats firmly into the
connector on the SCSI backplane.
3. Close the ejector lever to secure the drive.
Figure 98 Installing a hard drive
.
The replacement drive is automatically configured to RAID 1 — no administrator action is required.
NOTE:
The hard drive online LED on the replacement drive flashes green or amber, indicating that the replaced
drive is being rebuilt from the data stored on the other hard drive. See Front Panel LEDs and Buttons.
HP StorageWorks 6000–series Virtual Library System User Guide 285