
HP StorageWorks 6000-series Virtual Library System User Guide (AH809-96049, September 2010)

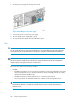
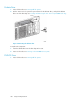
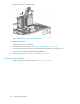

4. Remove the power supply from the bay.
Figure 101 Removing a power supply
.
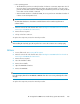
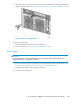
To replace the component:
1. Remove the protective cover from the connector pins on the new power supply, if present.
2. Open the lever by pushing the lever release button upward.
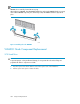
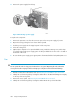
3. Slide the power supply into the empty bay until it locks into place.
4. Close the locking lever.
5. (Optional) For shipment or for optional added security, install the retaining screw, which ships
in a plastic bag with the power supply option kit. The pre-drilled hole for the screw is located on
the bottom of the node.
6. Be sure that the power supply power (green) LED is illuminated and the fault (amber) LED is not.
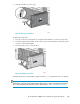
Fan
CAUTION:
Do not operate the node for long periods without the access panel. Operating the node without the
access panel results in improper airflow and improper cooling that can lead to thermal damage.
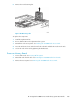
1. Extend or remove the node from the rack. See Extending the VLS6800 Node from the Rack.
2. Identify the non-functioning fan by locating the amber LED on the QuickFind Diagnostic Display
on the top of the access panel.
3. Remove the access panel. See Removing the VLS6800 Node Access Panel.
4. Identify the non-functioning fan by locating the amber LED at the top of the failed fan.
Component Replacement288