
6.0 HP X9000 File Serving Software File System User Guide (TA768-96043, October 2011)


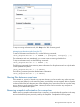
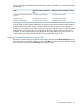
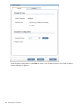

1. Disable any schedules on the snap tree. Select the snap tree on the Snap Trees panel, select
Modify, and remove the Frequency settings on the Modify Snap Tree dialog box.
2. Delete the existing snapshots of the snap tree. See “Deleting snapshots” (page 131)
3. Reclaim the space used by the snapshots. See “Reclaiming file system space previously used
for snapshots” (page 131).
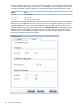
4. Delete the snap tree. On the Snap Trees panel, select the appropriate snap tree, click Delete,
and confirm the operation.
To disable snapshots on a directory tree using the CLI, run the following command:
ibrix_snap -m -U -f FSNAME -P SnapTreePath
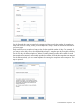
Backing up snapshots
Snapshots are stored in a .snapshot directory under the directory tree. For example:
# ls -alR /fs2/dir.tst
/fs2/dir.tst:
drwxr-xr-x 4 root root 4096 Feb 8 09:11 dir.dir
-rwxr-xr-x 1 root root 99999999 Jan 31 09:33 file.0
-rwxr-xr-x 1 root root 99999999 Jan 31 09:33 file.1
drwxr-xr-x 2 root root 4096 Apr 6 15:55 .snapshot
/fs2/dir.tst/.snapshot:
lrwxrwxrwx 1 root root 15 Apr 6 15:39 2011-04-06T15:39:57_ -> ../.@1302118797
lrwxrwxrwx 1 root root 15 Apr 6 15:55 2011-04-06T15:55:07_tst1 -> ../.@1302119707 /fs2/dir.tst/dir.dir: -rwxr-xr-x
1 root root 99999999 Jan 31 09:34 file.1
NOTE: The links beginning with .@ are used internally by the snapshot software and cannot be
accessed.
To back up the snapshots, use the procedure corresponding to your backup method.
Backups using NDMP
By default, NDMP does not back up the .snapshot directory. For example, if you specify a
backup of the /fs2/dir.test directory, NDMP backs up the directory but excludes /fs2/
dir.tst/.snapshot and its contents.
To back up the snapshot of the directory , specify the path /fs2/dir.tst/.snapshot/
2011-04-06T15:55:07_tst1. Now you can use the snapshot ( a point in time copy) to restore
its associated directory. For example use /fs2/dir.tst/.snapshot/
2011-04-06T15:55:07_tst1 to restore /fs2/dir.tst.
Backups without NDMP
DMA applications can not backup a snapshot directory tree using a path such as /fs2/dir.tst/
.snapshot/time-stamp-name. Instead, mount the snapshot using the mount -o bind option
and then back up the mount point. For example, using a mount point such as as
/mnt-time_stamp-name, use the following command to mount the snapshot:
mount –o bind /fs2/dir.tst.snapshot/time-stamp-name /mnt-time_stamp-name
Then configure the DMA to back up /mnt-time_stamp-name.
Backups with the tar utility
The tar symbolic link (h) option can copy snapshots. For example, the following command copies
the /snapfs1/test3directory associated with the point-in-time snapshot.
tar –cvfh /snapfs1/test3/.snapshot/2011-07-01T044500_hourly
134 Creating X9000 software snapshots