
6.0 HP X9000 File Serving Software File System User Guide (TA768-96043, October 2011)
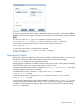

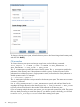

On the management console, select the file system and then select Quotas from the lower Navigator.
On the Quota Summary bottom panel, click Modify.
To enable quotas from the CLI, run the following command:
ibrix_fs -q -E -f FSNAME
Setting user and group quotas
Before configuring quotas, the quota feature must be enabled on the file system and the file system
must be mounted.
NOTE: For the purpose of setting quotas, no UID or GID can exceed 2,147,483,647.
Setting user quotas to zero removes the quotas.
NOTE: When a new NIS user is added, you need to restart the Fusionmanager services before
assigning quotas to the user:
/etc/init.d/ibrix_fusionmanager restart
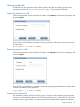
GUI procedure
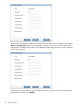
To configure a user quota, select the file system where the quotas will be configured. Next, select
Quotas > User Quotas from the lower Navigator, and then, on the User Quota Usage Limits bottom
panel, click Set. User quotas can be specified by either the user name or ID. Specifying quota
limits is optional.
Setting user and group quotas 23