
6.0 HP X9000 File Serving Software File System User Guide (TA768-96043, October 2011)

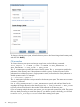

On the Task Summary panel, select Start to open the Start Online quota check dialog box and
select the appropriate mode.
The Task Summary panel displays the progress of the scan. If necessary, select Stop to stop the
scan.
To run an online quota check in FILESYSTEM_SCAN mode from the CLI, use the following command:
ibrix_onlinequotacheck –s –S -f FSNAME
To run an online quota check in DTREE_CREATE mode, use this command:
ibrix_onlinequotacheck -s -c -f FSNAME -p PATH
To run an online quota check in DTREE_DELETE mode, use this command:
ibrix_onlinequotacheck -s -d -f FSNAME -p PATH
The command must be run from a file serving node that has the file system mounted.
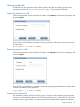
Configuring email notifications for quota events
If you would like to be notified when certain quota events occur, you can set up email notification
for those events. On the GUI, select Email Configuration. On the Events Notified by Email panel,
select the appropriate events and specify the email addresses to be notified.
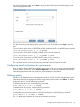
Deleting quotas
Quotas can be deleted from the management console or the CLI. From the management console,
select the quota from the appropriate Quota Usage Limits panel and then click Delete. To delete
quotas from the CLI, use the following commands.
To delete quotas for a user, use the following command:
ibrix_edquota -D -u UID [-f FSNAME]
To delete quotas for a group, use the following command:
ibrix_edquota -D -g GID [-f FSNAME]
To delete the entry and quota limits for a directory tree quota, use the following command:
ibrix_edquota -D -d NAME -f FSNAME
The -d NAME option specifies the name of the directory tree quota.
Configuring email notifications for quota events 29