
HP StoreEver MSL4048 Tape Library Getting Started (AK380-96016, December 2012)
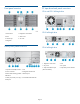
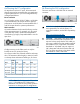
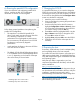

Status icons
The green Status OK icon indicates that the library is
fully operational and that no user interaction is required.
The blue exclamation point Status Warning icon indicates
that user attention is necessary, but that the device can
still perform most operations.
The red X Status Error icon indicates that user intervention
is required and that the device is not capable of
performing some operations.
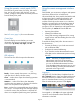
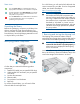
Unpacking the library
Remove the packaging, accessories, and library from
the box one layer at a time. Place the library on a
level work surface. Carefully remove the foam padding
from the library. Save the packaging materials to move
or ship the library in the future.
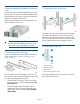
Identifying product components
Confirm that you received the following product
components:
1. Parallel SCSI cable (one per parallel SCSI drive)
2. U320 parallel SCSI terminator (one per parallel
SCSI drive)
3. Product documentation
4. Ethernet cable
5. Two packets of rack hardware
6. Rack rails
For a Fibre Channel library, you will need a Fibre
Channel cable for each tape drive.
For a SAS library you will need a SAS cable with the
correct connector for your HBA. For a list of supported
cables, see the MSL QuickSpecs:
http://www.hp.com/go/tape
CAUTION: High quality SAS cables rated at
the transfer rate of the SAS components are
required. Always verify that the SAS cable you
are using is rated for the data transfer speed of
the interface of your components. SAS cables
described as "equalized" or “active” are not
supported. For optimum performance, only use
HP cables of the length specified as qualified
for your products.
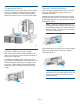
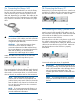
1 Removing and storing the shipping lock
The shipping lock protects the robotic transport
mechanism from moving during shipment and must be
removed and stored before powering on the library.
IMPORTANT: The shipping lock must be
removed for the robotics to operate properly. A
robot move error is displayed if the shipping
lock is not removed.
Locate the adhesive tape holding the storage lock at
the top of the library. Remove the adhesive tape, then
remove the storage lock and store it as shown.
Page 5