
HP Store Once 2700, 4500 and 4700 Maintenance and Service Guide


Boot the appliance and install the StoreOnce software
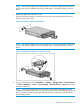
Make sure that power, network, keyboard and monitor, and all expansion enclosures are attached
to the StoreOnce appliance, then insert the QR USB stick into one of the front or rear USB ports
and power on the system.
After the system powers up and completes self-tests it will boot from the USB key and launch the
Linux installation process.
After a few seconds a boot splash screen will appear offering the choice of Restore (R) or Exit (E).
Press R to continue to the installation process.
A warning will now be displayed indicating that all data will be lost after entering “yes”. THIS IS
THE LAST CHANCE TO EXIT THE INSTALL PROCESS WITHOUT DATA LOSS.
Enter “yes” to continue.
The installation process will now continue and will:
1. Delete the existing logical storage configuration on the appliance head disks.
2. Create a new logical storage partition; depending on the appliance type this may be a pair
of mirrored disks or a LUN stripe across all disks in the appliance.
3. Install the Operating System and appliance software on the system.
4. After installation completes you will be prompted to remove the USB stick and reboot. Press
a key to reboot the system.
5. During the reboot process, the system will perform an install process and return to the login
prompt. During this sequence, you may need to answer questions presented on the console
screen.
Performing a configuration restore
This process is normally carried out after a quick restore (QR) or if a replacement appliance has
been received. It restores the appliance to the same state as it was when the configuration file was
created. It is important that there are no configured backup target devices on the appliance.
IMPORTANT: During this process you may be prompted to provide the Cluster ID. The Cluster
ID is the same as the System ID that can be found on the Device Management page of the StoreOnce
Management Console. Its value is assigned in the factory set up process and is a 12–character
string in the format HP<SerialNumber of Appliance>.
This process requires the latest configuration files that should have been saved and copied locally
to the local system. You will require the following files:
• <config_filename>.zip
• <config_filename>.txt
• <keystore_filename>.kms (if keystores have been saved for Security features)
1. Check the Cluster ID against the value shown in the configuration text file,
<config_filename>.txt, using the StoreOnce CLI command:
system show config
2. If necessary reset the Cluster ID of the cluster to the ID of the original appliance, the cluster ID
is shown in the configuration text file, run the command:
system set cluster <cluster_id>
This step may not be necessary if there has been no replacement hardware or if the serial
number of the original appliance has been copied to the BIOS settings of the replacement
appliance.
IMPORTANT: You can only restore the configuration file to an appliance that has the same
cluster ID as the one from which the configuration was taken.
38 The QR ISO image