
9.5 HP P4000 VSA Installation and Configuration Guide


A Using the VMware VSA laptop demo
The VMware VSA laptop demo is the smallest and most portable version of the SAN/iQ software
virtual appliance. Use this demo to create an HP P4000 SAN Solution, complete with storage
clusters.
NOTE: There is not a separate demo version of the VSA for Hyper-V Server.
The VSA can be used for free indefinitely as a single system iSCSI target with snapshots. If a
configuration is deleted and recreated, the trial period of licensed features starts again.
To use the VSA fully featured on an ESX Server, purchase a license and follow the instructions in
“Installing the VSA for ESX Server” (page 6) to set up a virtual HP P4000 SAN Solution.
The VSA runs a full-featured version of the SAN/iQ software, and provides the following capabilities:
• Use of the SAN/iQ software without requiring physical storage devices.
• Use of advanced SAN/iQ software features such as Clustering and Virtualization, Managed
Snapshots, Remote Copy and Multi-Site SAN during an evaluation period.
The demo is available at www.hp.com/go/tryvsa.
Requirements for the demo
• Minimum of 384 MB of RAM
• 5 GB to 950 GB SCSI of disk space
• VMware Player, Workstation, or Server
• IP address, subnet mask, and gateway for the virtual machine
Planning the demo installation
Before you install the VSA, plan the virtual network configuration. Then, when you install the CMC,
plan and configure the hardware features before configuring the virtual storage system for data
storage.
• Virtual appliance directories, host names and IP addresses. Create a directory for each virtual
machine on the hard drive you will use as the storage system.
• Network configuration. Plan the subnet and IP address for the virtual machines as well as for
the VIPs required for storage clusters.
• Storage configuration. Install the CMC on a Linux or Microsoft Windows OS. Then use the
CMC to find storage systems, create storage, and connect to application servers.
Installing the VSA
When you start the VSA for the first time with a VMware console, you will:
• Unzip to the prepared directory and start the virtual machine.
• Direct the Ethernet port to NAT (default), Host-only, or bridged.
• Set the IP address and host name of the VSA.
You only need to configure each virtual machine once.
1. Copy or download the VSA zip file.
2. Copy or unzip the VSA files to the virtual machine directory.
Configuring the VSA with VMware Player, VMware Server, or VMware Workstation
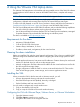
1. Open the VMware console.
2. Click File→Open to open the VSA.vmx file.
3. Navigate to the location of the unzipped VSA files.
Requirements for the demo 27