
Superdome Servers - I/O Expansion Cabinet Guide, Fifth Edition


Chapter 6
Remove and Replace Procedures
Removing and Replacing the XUC
155
Removing and Replacing the XUC
Required Tools
The following is a list of tools required for IOX assembly and service operations:
• Anti-static mat with provisions for connecting to chassis ground
• Wrist strap
•T-20 Torx bit
• Torx drive extension
• Torx torque driver
• Flat-blade screwdriver
Removing the XUC
To remove the XUC, perform the XUC procedure:
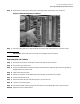
Step 1. Disable power to the ICE by removing the DC power cable on the rear of the XUC.
Step 2. Verify that the power is off by observing the HK Power LED on the front panel display.
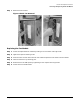
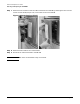
Step 3. Remove the front cosmetic bezel.
Figure 6-29XUC Cosmetic Bezel
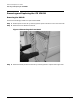
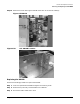
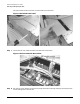
Step 4. Remove the two T-20 Torx screws retaining the chassis to the rack.
Step 5. Gently pull the XUC out from the cabinet until the slides lock.
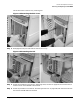
Step 6. Remove the XUC side panel by loosening the six captive T10 Torx screws.