
HP Surestore Bridge FC 2/1 LV and FC 4/1 HV Installation and Operations Guide


Chapter 4 Perform Configuration 93
Chapter 4
■ Select 7) to change the host name. This is an alphanumeric entry of
one word up to 8 characters long.
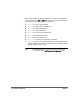
■ Select 8) to toggle the Ethernet mode among the following options:
10Mps Only
100Mps (half duplex) only
100Mps (full duplex) only
10/100Mps (auto-neg)
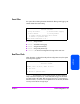
■ Select 9)
to toggle the DHCP setting. When DHCP is enabled, this
activates Dynamic Host Configuration Protocol and allows the bridge to be
assigned a dynamic IP address from a DHCP server located on the
Ethernet network used by the bridge.
Once the DHCP is enabled, it is necessary to save the current
configuration and reboot the bridge before DHCP will operate. This can
be accomplished by doing the following:
—
Select X) Return to previous menu
— Select A) Save Configuration
— Select X) Return to previous menu
— Select 4) Reboot
After the bridge finishes rebooting, the Main menu will appear. DHCP status
can be verified from the
Ethernet Configuration menu where DHCP
configuration is indicated as “Enabled” if DHCP has been successfully
activated. Note that the IP address will also appear different then the former
non-DHCP IP address.
Note To use the DHCP feature, a DHCP server must be operational on
the Ethernet network used by the bridge. If the DHCP feature is
used when there is no DHCP server, the standard for DHCP
requires that the bridge wait three minutes for a response from a
DHCP server before timing out. During this period, the bridge
menus and functions will not be accessible.
Your DHCP server may allow you to setup a lease reservation for an IP address
by providing the server with the Ethernet MAC address of the bridge. This sets
the DHCP server to always provide the same IP address to the bridge. This
setup can be useful for remote management of the bridge via Telnet or the
Web interface. Because the method of setting up a lease reservation varies,