
HP Systems Insight Manager 5.3 Technical Reference Guide


• Print specific selections; you can print the entire list only
• Print the table view page if you close the browser immediately after issuing a print request
Buttons are disabled if you do not have appropriate rights. However, the Print button appears for all
users.
Customizing
The Customize link is located in the upper right corner of the event table view page. Click this link to
configure what columns appear and in what order. When you modify the columns to display on the event
table view page and select Apply to all event table views, these columns become the default set of columns
displayed for any event collection selected if the collection does not already have customized columns
defined.
Related procedures
• Customizing the event table view page
• Clearing events from the collection
• Deleting events from the database
• Assigning events to users
• Entering comments on events
• Printing an event collection view
Related topics
• Monitoring systems, clusters, and events
• Event severity types
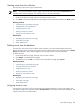
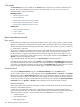
Customizing the event table view page
When you modify what columns display on the event table view page and select Apply to all event table
views, these columns become the default set of columns that appear for any cluster collection selected if the
collection does not already have customized columns defined.
1. On the event table view page, click Customize. The Customize Table Appearance page appears.
2. Select the columns you want displayed from the Available Columns box, and then click to add
the columns to the Displayed Columns box.
3. To remove one or more columns from the display, select the columns in the Displayed Columns box,
and then click to move them to the Available Columns box, so they no longer appear.
4. To rearrange how the columns display, select a column in the Displayed Columns box, and then click
or .
5. To sort the collection by column, select a column from the Sort by dropdown list.
6. Select Ascending or Descending.
7. To apply the customization to all event collections, select Apply to all event collections.
8. To save selections and return to the event table view page, click OK, to cancel all changes and return
to the event table view page or click Cancel.
Related procedures
• Clearing events from the collection
• Deleting events from the database
• Assigning events to users
• Entering comments on events
• Printing an event collection view
Related topics
• Event table view page
• Navigating the event table view page
242 Monitoring systems, clusters, and events