
Thunderbolt Add-in Card Installation


Step 2—Installing the Thunderbolt add-in card
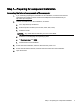
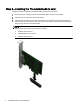
Follow these steps to install the Thunderbolt add-in card into the workstation.
1. Ground yourself, and then remove the Thunderbolt add-in card from the package.
2. Place the unit on a flat, clean, static-free surface.
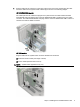
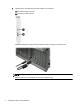
3. Install the add-in card into the correct PCIe socket in the workstation by sliding the bracket on
the end of the card down into the slot on the back of the chassis, and then press the card down
firmly into the socket on the system board.
NOTE: You must install the card into the correct PCIe socket for your workstation as indicated
below. The socket closest to the processor is socket 1.
●
HP Z820: PCIe socket 5
●
HP Z620/Z420: PCIe socket 3
●
HP Z230: PCIe socket 4
4 Thunderbolt Add-in Card Installation