
HP R3000v UPS User Manual

INSTALLATION
HP R3000v UPS User Guide S 164201731 Rev 1
14
UPS Initial Startup
To start up the UPS:
NOTE: Verify that the total equipment ratings do not exceed the UPS capacity to prevent an
overload alarm.
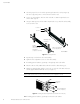
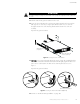
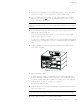
1. Verify that the internal batteries are connected. See “Installing the UPS” on page 10.
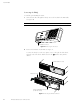
2. If optional ERMs are installed, verify that the ERMs are connected to the UPS. See
“Connecting the ERM(s)” on page 12.
3. Plug the equipment to be protected into the UPS, but do not turn on the protected
equipment.
4. Make any necessary provisions for cord retention and strain relief.
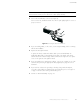
5. Plug the detachable UPS power cord into the input connector on the UPS rear panel.
6. Plug the UPS power cord into a power outlet.
7. Press the
(Output On) button on the UPS front panel for at least one second.
8. Check the UPS front panel for active alarms. Resolve any active alarms before
continuing. See “Troubleshooting” on page 39.
If the
(Alarm) indicator is on, do not proceed until all alarms are clear. Check the
UPS status from the front panel to view the active alarms. Correct the alarms and
restart, if necessary.
9. Verify that the
(Power On) indicator is illuminated, indicating that the UPS is
operating normally and any loads are powered.
The UPS should be in Normal mode.
10. If optional ERMs are installed, see “Configuring the UPS for ERMs” on page 20 to set
thenumberofinstalledERMs.
NOTE: The batteries charge to 90% capacity in less than 3 hours. However, to fully charge, HP
recommends that the batteries charge for 48 hours after installation or long-term storage.
NOTE: Verify that the UPS firmware is updated. See “Updating the UPS Firmware” on
page 33.