
Installing HP-UX 11.0 and Updating HP-UX 10.x to 11.0 HP 9000 Computers Edition 1

130 Chapter 5
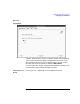
Installing from the Ignite-UX Server
Configuring the Installation
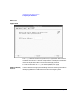
NOTE Renaming or changing the FS structure of a disk causes the old file
system on that disk to be lost (a warning message will remind you of
this).
• If you want to add a new/unused disk and give it a different volume
group name or create a new volume group, select the Add/Remove
field and follow the procedure.
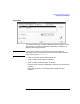
• If you want to reconfigure the volume group in general, including
renaming it, select Additional Tasks → Volume Group Parameters,
where you can fill in a custom VG Name, and change other disk
parameters.
• Select OK when you are finished with the sub-screens for any of these
tasks. You will be returned to the File System tab.
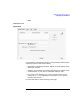
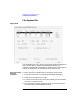
Mount Dir For the root disk, you should use the standard HP-UX (10.0x) mount
directory designations ("/", "/usr", "/stand", "/var", "/opt",
etc.) You can also specify your own mount points such as "/special" or
"/apps".
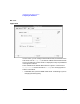
Size For setting up each selected file system (as shown in the Mount Dir
display), the following choices are available:
1. First select an item in the directory display for the file system you
want to change. The current selection will show in the Mount Dir
field.
2. The sizing method (such as "Fixed Size") currently used for that
particular file system will appear in the Size field. To change the
Sizing Method:
a. Make sure the file system you want to change is selected in the
directory display list.
b. Select the sizing method field to open the list of sizing methods.
c. Select one of the items (such as "Size Fixed MB"). It will then
remain displayed in that field.
d. Select the Modify button to execute the change on the selected file
system.
The types of sizing are as follows: