
Managing Superdome Complexes: A Guide for HP-UX System Administrators

Configuring and Managing Superdome Partitions
Procedures for Managing Partitions
Chapter 4 167
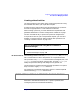
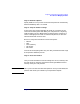
Step 4. Select Create Partition... from the Partition menu.
Step 5. The Create Partition task wizard will, in seven stages, guide you
through the process of creating the new partition:
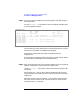
1. Naming (identifying) the partition.
2. Selecting the cells for the partition.
3. Setting the attributes for the cells you select in Stage 2.
4. Setting which cells can be core cells and in which order they should be
tried when the partition boots.
5. Specifying whether or not to immediately (automatically) boot the
partition after it is created.
6. Verifying all of the settings for the partition before actually creating
the partition.
7. Create the partition.
After completing each stage, use the Next > button to proceed to the next
stage. Until you press the Finish button in Stage 7 you can use the < Back
button to return to previous stages and change incorrect settings.
As you traverse the stages here are some important things to remember:
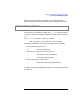
Stage 1: Name the Partition
Partition names have the following characteristics:
• Can contain from 1 to 64 characters.
• Valid characters are: A-Z, a-z, 0-9, hyphen (-), and space ( ).
• Names do not have to be unique. They are labels to help you identify
the partitions using terms meaningful to your operation. The
operating system and the PartitionManager usepartition numbers
to uniquely identify partitions.
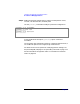
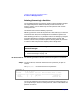
Stage 2: Select Cells
Using the <--Add--- and -Remove-> buttons, adjust the two lists so that the
Assign to the Partition list contains only the cells that you want to
be part of the new partition.