
Managing Superdome Complexes: A Guide for HP-UX System Administrators

Configuring and Managing Superdome Partitions
Procedures for Managing Partitions
Chapter 4 187
Step 2. Modify the partition’s core cell settings.
You can modify the local partition or any remote partition in the
Superdome complex.
Use the parmodify command: parmodify -p# -r# -r#...
Specify the partition number (-p#) and the cell ID (-r#) for all cells you
wish to designate as core cell preferences.
The order in which you list the cells is the order in which the partition’s
core cell preferences are established; the first cell listed is the first
preferred core cell (preference 1), and the subsequent cells are alternate
core cells (preferences 2 through 4, if specified).
Step 3. If you wish to immediately change the active core cell, boot or reboot the
partition whose core cell choices you have changed.
If you have modified the local partition, issue the reboot or shutdown
command with the -r option to boot the partition with the new core cell
preference serving as the active core cell. (You do not need to perform a
reboot-for-reconfig of the partition.)
If you have modified an inactive remote partition, use the GSP command
menu’s BO command to boot the remote partition; the designated core
cell preferences will be used to select the active core cell.
Partition Manager To modify the core cell settings for a partition using the Partition
Manager:
Step 1. Run the Partition Manager (parmgr).
The Partition Manager can be run from:
• an HP-UX command line
• a Web browser
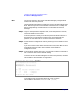
# parmodify -p0 -r2 -r0
Command succeeded.
#