
Installing and Administering HP EISA FDDI/9000 and HP HSC FDDI/9000
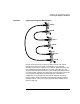


Chapter 4 59
Configuring and Verifying HP EISA and HSC FDDI/9000
Configuring the Local EISA or HSC FDDI Adapter
Configuring the Local EISA or HSC
FDDI Adapter
NOTE Make sure the HP EISA FDDI/9000 or HSC FDDI/9000 adapter and
software are installed in the system before you use SAM to configure the
software.
Log in as root and do the following:
1. At the HP-UX prompt, type: sam
2. Select Networking and Communications in the SAM main window.
3. Select Network Interface Cards in the Networking and
Communications window.
4. Highlight the EISA or HSC FDDI card that you want to configure
from the object list.
If you do not know the PPA of the card interface, use the lanscan
command to obtain this information.
5. Verify that the hardware path is correct for your EISA or HSC FDDI
adapter.
6. If you are configuring the first logical interface for a card type (also
called the “initial interface”), choose Configure from the “Actions”
menu to open the Configure LAN Card window.
If you are adding logical interfaces to a card type, choose Add IP
Logical Interfaces from the “Actions” menu to open the Configure LAN
Card window.
a. Enter the information about the EISA or HSC FDDI card. To do
so, press the Tab key to move through the data entry fields.
NOTE SAM displays the Card Name, Hardware (H/W) Path, and Station
Address fields with the appropriate values. These fields cannot be
modified.
b. Choose FDDI as the card type for your EISA or HSC FDDI card.