
AB291A Fabric Clustering System Support Guide (12-port Switch), April 2004
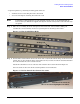
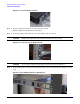
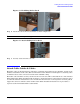
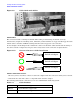

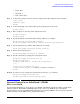
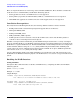

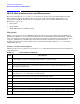
Table Of Contents
- About This Document
- 1 Introduction to Technology
- 2 Hardware Overview
- 3 Installation Planning
- 4 Installing HP Fabric Clustering System
- 5 Administration and Management
- HP-UX Host Administration and Management
- Switch Administration and Management
- CLI Overview
- Using the CLI
- Advanced Switch Setup
- Configuration, Image, and Log Files
- Configuration, Image, and Log File Overview
- File Management
- Listing Configuration, Image, and Log Files
- Viewing Configuration Files
- Viewing Log Files
- Saving Configuration Files
- Saving for System Reboot
- Saving the Backup Configuration
- Specifying the Configuration to Use at
- Saving and Copying Files
- Downloading Files to the System
- Deleting Configuration, Image, and Log Files
- Managing Log Files
- Understanding the Log Format
- Uploading Log Files
- Administering the System
- 6 Monitoring and Troubleshooting
- A Specifications
- B HP 12-Port 4X Fabric Copper Switch Commands
- Show Commands
- show arp ethernet
- show arp IB
- show authentication
- show backplane
- show boot-config
- show card
- show card-inventory
- show clock
- show config
- show fan
- show host
- show ib
- show ib sm configuration
- show ib sm multicast
- show ib sm neighbor
- show ib sm node subnet-prefix
- show ib sm partition
- show ib sm port
- show ib sm service
- show ib sm switch
- show ib-agent channel-adapter
- show ib-agent summary
- show ib-agent switch
- show ib-agent switch linear-frd-info
- show ib-agent switch all mcast-info lid
- show ib-agent switch all node-info
- show ib-agent switch all pkey-info
- show ib-agent switch port-info
- show ib-agent switch sl-vl-map
- show ib-agent switch switch-info
- show interface ib
- show interface ib sm
- show interface ib sm statistics
- show interface mgmt-ethernet
- show interface mgmt-ib
- show interface mgmt-serial
- show ip
- show location
- show logging
- show ntp
- show power-supply
- show running-status
- show sensor
- show snmp
- show system-services
- show terminal
- show trace
- show user
- show version
- IP Commands
- HP Fabric Clustering System Commands
- Administrative Commands
- action
- boot-config
- broadcast
- card
- clock
- configure
- copy
- delete
- dir
- disable
- enable
- exec
- exit
- ftp-server enable
- gateway
- help
- history
- hostname
- install
- interface
- interface mgmt-ethernet
- interface mgmt-ib
- ip
- location
- login
- logging
- logout
- more
- ntp
- ping
- radius-server
- reload
- shutdown
- snmp-server
- telnet
- terminal length
- terminal time-out
- trace
- type
- username
- who
- write
- Show Commands
- C How to Use Windows HyperTerminal
- Glossary
Installing HP Fabric Clustering System
Switch - Rack Installation
Chapter 4
31
4. Open the plastic bag containing mounting parts.and locate:
• (12) Torx screws for attaching the rails to the switch
• (8) screws and clips for attaching the rails to the rack.
NOTE It is highly recommend that two people install the switch, but it can be installed with one,
however it may be difficult to support and align the switch correctly in the rack rails with only
one person.
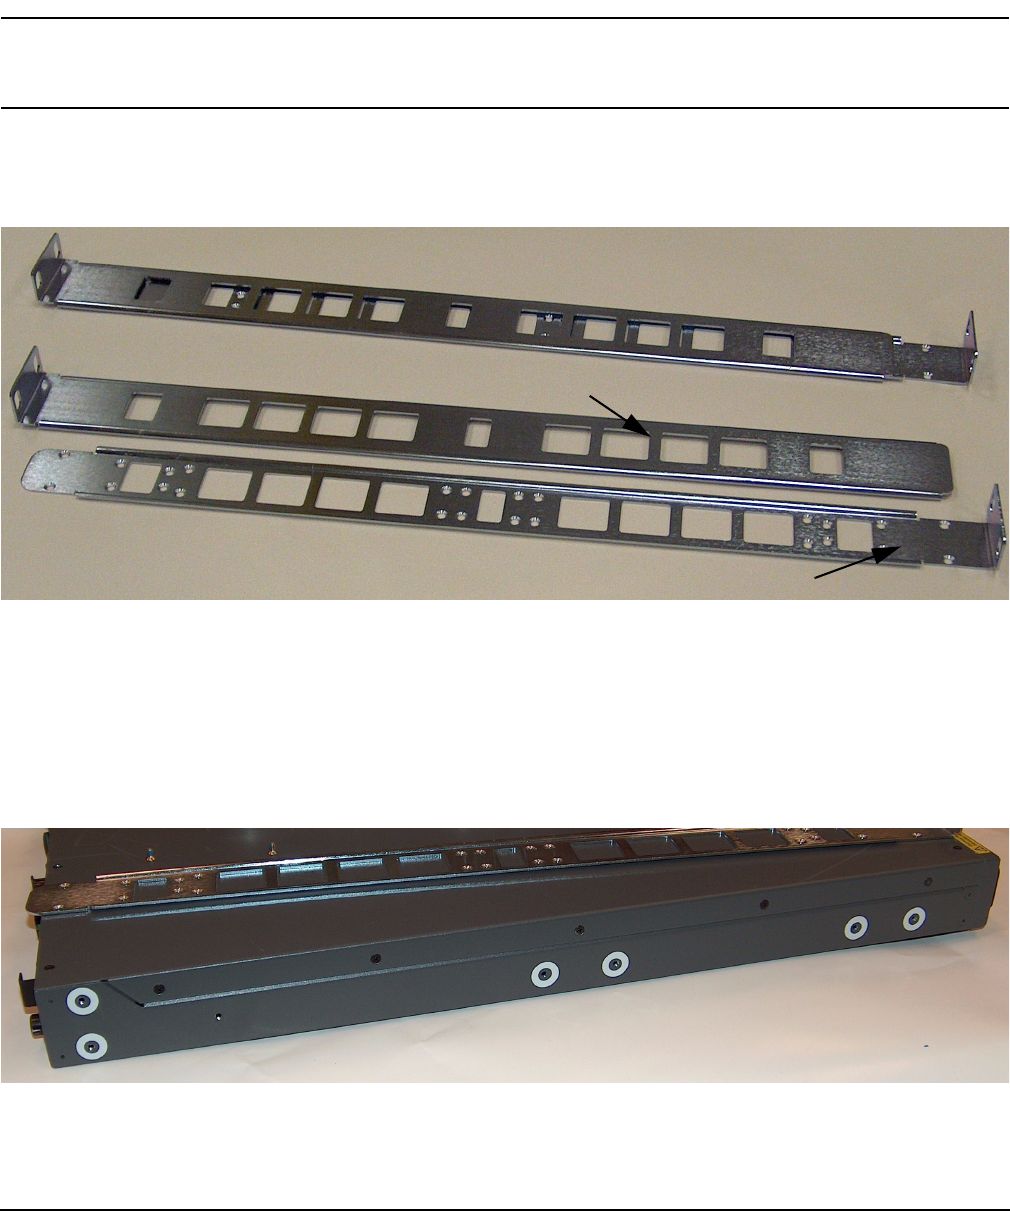
Step 1. Take one set of sliding brackets and separate them. Each side arrives with the sliding rail
assembled to a fixed rail. They need to be separated prior to attaching to the switch.
Figure 4-2 Fixed and Sliding Rails
Step 2. To install the switch with the bezel to the front of the rack, install with the flange at the front of the
switch. You can also mount the flange toward the back if you want to mount the switch backward in
the rack such that the service-side is forward.
Attach the rail with 6 screws to each side of the switch in the locations shown in Figure 4-3
Screw locations are the same in the switch regardless of rail orientation.
Figure 4-3 Rail-to-Switch Attachment Locations
Rails as packaged
Rails separated
Fixed rail to attach to switch
Sliding rail
Attach rail to switch in
Bezel end
the (6) locations highlighted in white.