
HP A7143A RAID160 SA Controller Support Guide
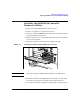

Installing the RAID160 SA Controller
Preparing for RAID160 SA Controller Installation
Chapter 4 55
Preparing for RAID160 SA Controller
Installation
Before installing a RAID160 SA controller in a server, backup all data.
This step is mandatory if the disks were not previously configured on a
RAID160 SA controller, because the data format will not be recognized
and the existing data will not be preserved.
Also, if you are connecting non-arrayed SCSI disk drives to a RAID160
SA controller, you must backup all data, because data is not preserved
when RAID controllers are connected to non-arrayed disk drives.
NOTE If your server supports Online Addition and Replacement (OLAR) of the
RAID160 SA controller and you plan to do an online installation, see
“Online Addition and Replacement” on page 59. See the Table 3-1, “HP
A7143A Support Matrix,” on page 50, to find out if your server supports
OLAR.
To prepare a server that does not support OLAR, or if you would prefer to
install the RAID160 SA controller offline:
1. Close all applications.
2. Power down the server.
3. Power down any peripheral devices that are attached to the server.
4. Unplug the AC power cord from the outlet, and then from the server.
CAUTION In systems using external data storage, be sure that the server is the
first unit powered down and the last unit to be powered back up. Doing
this ensures that the system will not erroneously mark the disk drives as
“failed”.