
HP A7143A RAID160 SA Controller Support Guide


Installing the RAID160 SA Controller
Setting up a RAID160 SA Controller As a Boot Device
Chapter 4 101
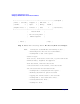
NOTE: Pushing a shell, you will have to use "reboot" to reboot
the system when done. Use the "loadfile" command to bring in more
commands as you need them.
#
Step 3. At the recovery shell prompt, enter:
loadfile -l INSTCMDS/opt/raidsa/bin/ciss_insf
# loadfile -l INSTCMDS /opt/raidsa/bin/ciss_insf
#
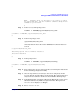
Step 4. At the next prompt, enter:
/opt/raidsa/bin/ciss_insf
and verify that the device file for the RAID160 SA controller has been
created.
# /opt/raidsa/bin/ciss_insf
Installing special file for RAID160 instance 5
/dev/ciss5 installed
#
Step 5. At the prompt enter:
loadfile -l INSTCMDS /opt/raidsa/bin/saconfig
# loadfile -l INSTCMDS /opt/raidsa/bin/saconfig
#
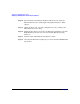
Step 6. Now configure the array(s) and logical drive(s) following the instructions
for the saconfig configuration utility.
Step 7. Once the logical drive(s) and array(s) have been configured, exit the
recovery shell by entering reboot at the prompt. The system will reboot
and you will be returned to the Boot Console Handler (BCH) prompt.
Step 8. At the BCH prompt, start Ignite-UX from the HP-UX 11i version 1 Core
OS Install and Recovery Media for September 2003. The Ignite-UX
“Welcome” screen displays (see Step 1).
Step 9. Select “Install HP-UX”.