
HP-UX Directory Server Administrator Guide HP-UX Directory Server Version 8.1 (5900-3098, May 2013)

12.2.3 Step 3: Install the certificate
1. In the Directory Server Console, select the Tasks tab, and click Manage Certificates.
2. Select the Server Certs tab, and click Install.
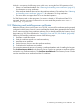
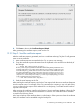
3. Give the certificate location or paste the certificate text in the text box, then click Next.
• In this file. Enter the absolute path to the certificate in this field.
• In the following encoded text block. Copy the text from the CA's email or from the created
text file, and paste it in this field.
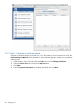
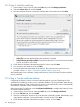
4. Check that the certificate information displayed is correct, and click Next.
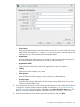
5. Give a name to the certificate, and click Next.
6. Provide the password that protects the private key. This password is the same as the one
provided in step 6 in “Step 1: Generate a certificate request” (page 472).
After installing the server certificate, configure the Directory Server to trust the CA that issued the
server's certificate.
12.2.4 Step 4: Trust the certificate authority
Configuring the Directory Server to trust the certificate authority consists of obtaining the CA's
certificate and installing it into the server's certificate database. This process differs depending on
the certificate authority. Some commercial CAs provide a web site that allow users to automatically
download the certificate. Others will email it back to users.
After receiving the CA certificate, use the Certificate Install Wizard to configure the Directory Server
to trust the certificate authority.
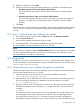
1. In the Directory Server Console, select the Tasks tab, and click Manage Certificates.
2. Go to the CA Certs tab, and click Install.
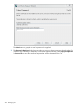
3. If the CA's certificate is saved to a file, enter the path in the field provided. Alternatively, copy
and paste the certificate, including the headers, into the text box. Click Next.
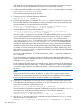
4. Check that the certificate information that opens is correct, and click Next.
476 Managing SSL