
User Guide
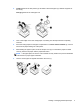
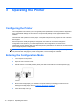
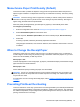

2. Loading: Remove the test printout (2) and starter roll thermal paper (3). Slide the supports off
the roll (4).
Changing: Remove the used paper roll.
3. Tear a clean edge on the new receipt paper roll, making sure the tape has been completely
removed.
4. Place the receipt paper into the paper compartment so it unrolls from the bottom (5). Leave a
few inches of paper sticking out of the printer.
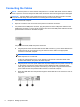
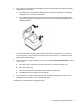
5. While holding the paper in place, close the receipt cover (6). To test that the paper is loaded
correctly, advance the paper with the paper feed button.
NOTE: If the paper jams, be sure the roll is inserted correctly. Refer to the previous illustration
in this section for proper paper orientation.
6. Tear the excess paper off against the blade in the cover (7).
Loading or Changing the Receipt Paper 5