
HP Virtual Connect for c-Class BladeSystem Setup and Install Guide Version 3.70 and 3.75
HP Virtual Connect Manager 72
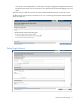
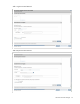
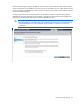
To define a network:
1. Enter a name for the network that will be easily understood and recognized by the server administrators
defining and deploying server profiles. The network name can be up to 64 characters in length (no
spaces).
2. To add a color to the network, select a color from the Color pull-down menu. The network color is used
as a visual identifier for the network within VCM.
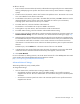
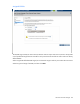
3. To add labels to the network, type a label in the Labels field, and then press Enter. Labels are used as
text-based identifiers for the network within VCM. Each label can contain up to 24 characters,
excluding spaces. Each network can have up to 16 labels.
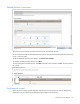
4. To enable Smart Link, select the checkbox under Smart Link.
The checkbox is not available until an uplink is added to the network.
5. To designate as a private network, select the checkbox under Private Network.
6. To enable VLAN tunneling, select the checkbox under Enable VLAN Tunneling.
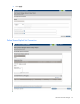
7. To set a custom value for the preferred link connection speed or maximum link connection speed, click
Advanced Network Settings. For more information, see "Advanced Network Settings (on page 72)."
8. Select the specific VC-Enet module external uplink ports that will connect the network to the data center.
The available external ports are listed in the multi-level Add Port selector. Each port is labeled as linked
or not linked. This status refers to whether or not a current connection to an external switch exists.
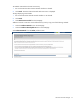
If the network is to be local to the servers within the VC domain (enclosure), then no uplinks need to be
selected.
To delete a port, click the Delete link in the Action column of the row to be deleted.
9. In the Network Access Groups field, begin typing the name of a Network Access Group that should
include this network. When the Network Access Group name appears, select the name.
10. Click Create Network.
For more information on defining networks, see the HP Virtual Connect for c-Class BladeSystem User Guide
on the Installing tab of the HP BladeSystem Technical Resources website
(http://www.hp.com/go/bladesystem/documentation).
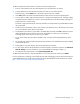
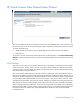
Advanced Network Settings
These settings affect only newly created profiles.
To change these settings:
1. Click the selection box, and then select a setting (100Mb to 10Gb):
o Set preferred connection speed. This value is the default speed for server profile connections
mapped to this network. The server administrator can override this setting on an individual profile
connection.
o Set maximum connection speed. This value is the maximum speed for server profile connections
mapped to this network.