
HP Virtual Connect Migration Guide
Technical white paper | Virtual Connect Migration Techniques
16
add enet-connection Profile_enc0_15 Network=heartbeat PXE=UseBIOS AddressType=Pool-Specified
EthernetMac=00-17-A4-77-20-26 iSCSIMac=00-17-A4-77-20-27
add enet-connection Profile_enc0_15 Network=heartbeat PXE=UseBIOS AddressType=Pool-Specified
EthernetMac=00-17-A4-77-20-28 iSCSIMac=00-17-A4-77-20-29
add fcoe-connection Profile_enc0_15 FcoeNetwork=FCoE_301 SpeedType=Preferred WWNAddressType=Pool-Specified
PortWWN=50:06:0B:00:00:C2:82:08 NodeWWN=50:06:0B:00:00:C2:82:09 MACAddressType=Pool-Specified
EthernetMac=00-17-A4-77-20-1C
add fcoe-connection Profile_enc0_15 FcoeNetwork=FCoE_302 SpeedType=Preferred WWNAddressType=Pool-Specified
PortWWN=50:06:0B:00:00:C2:82:0A NodeWWN=50:06:0B:00:00:C2:82:0B MACAddressType=Pool-Specified
EthernetMac=00-17-A4-77-20-1D
Applying the New FlexFabric-20/40 F8 Virtual Connect Domain Configuration
Break the configuration into three scripts
The completion of your new installation can be done most effectively in three steps; first, setting domain-wide parameters,
second, adding server profiles, and third, assigning profiles to server bays. By breaking the script created in previous steps
into three separate script files you can address any domain configuration issues before creating and applying the server
profiles. If there are errors during the domain creation, such as a typo in the uplinks, they are more difficult to correct if
server profiles have been created and applied.
Your modified SHOW CONFIG file should at this point contain all the commands necessary to recreate your Virtual Connect
configuration with the new VC FlexFabric 20/40 F8 modules.
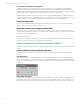
Break the configuration file into THREE separate scripts. The first script contains everything UP TO the first profile creation
line. The second script contains all of the profile creation commands. The third script applies each of the profiles to the
server bays (the most time consuming process). SCRIPT 3 was already created and saved in the previous section.
Domain-wide Settings
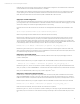
SCRIPT1 starts at the beginning of the file and should include all the commands to create all VC domain-wide settings, local
user accounts, networks, SAN fabrics, and uplinks. This is everything above the first “add profile” command. Save this
portion of the reference file as a separate file script, i.e. SCRIPT1.
#### IMPORT ENCLOSURE(S) FIRST
### Modify 'ExitOnFailure' property value to FALSE, when executing in script
### mode to avoid exiting (vcmcli returning FAILURE) on a command failure
### set cli ExitOnFailure=TRUE
set domain Name=enc1-FF-Herman-c7000_vc_domain
set snmp enet ReadCommunity=public
set snmp fc ReadCommunity=public
set ssl -quiet Strength=Strong
set user-security StrongPasswords=Disabled MinPasswordLength=8
set ldap Enabled=false
...
...
...
set domain WwnType=VC-Defined WwnPool=9
set link-dist-interval Interval=30
# FC ports for the HP VC FlexFabric 10Gb/24-Port modules are specified with a leading 'X'.
# But when adding the fabric the port numbers are specified without the leading 'X'.
# See the note on the VCMCLI help text for 'add fabric'.
add fabric SAN-A Type=FabricAttach Bay=1 Ports=5,6 Speed=Auto LinkDist=Auto
# FC ports for the HP VC FlexFabric 10Gb/24-Port modules are specified with a leading 'X'.
# But when adding the fabric the port numbers are specified without the leading 'X'.
# See the note on the VCMCLI help text for 'add fabric'.
add fabric SAN-B Type=FabricAttach Bay=2 Ports=5,6 Speed=Auto LinkDist=Manual
Server Profile Creation
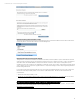
SCRIPT 2 begins with the first “add profile” command, and includes only the profile creation commands. Creation of the
profiles is crucial to the success of the migration, so we need to pay careful attention to the output of running this script.
Save this as a separate file, i.e. SCRIPT2. The first set of profile commands from our example is shown here for reference. It
includes one line to create the base profile, and one line for each connection defined in the profile. In this case we have 2
NICs and 2HBAs