
HP RIP Software - HP RIP Software User Guide


5-10 How to Add a Printer to Windows XP
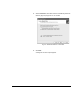
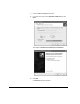
20. Click Browse, and navigate to the following folder on the RIP soft-
ware disc:
Printing Tools\PPDs\windows\
This displays a file named ntprint.inf in the file name field.
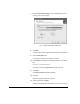
21. Click Open.
The Install from disk dialog box reappears.
22. Click OK.
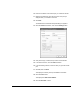
A dialog box appears with a list of printers.
23. Select your printer from the list, and click Next.
A dialog box appears with a blank field for you to name the printer.
24. Enter a name for the printer, then click Next.
A dialog box appears asking if you want to share the printer.
25. Select Do not share this printer, then click Next.
The Print Test Page dialog box appears, prompting you to indicate
whether you want to print a test page.
26. Select Yes and click Next.
Windows presents a summary of the installation options you
selected.
27. Click the Finish button.
The following message may appear:
The software you are installing for this hardware
(Printer) has not passed Windows Logo testing to verify
its compatibility with Windows XP.
28. Click the Continue Anyway button.
Next, Windows copies the necessary files, and sends a test page
to the printer. Then it displays a dialog box that asks whether the
test page printed correctly.
29. Click the OK or Troubleshoot button.
• If the test page prints, the Add Printer process is complete.