HP StorageWorks Automated Storage Manager User Guide HP Part Number: 5697-0816 Published: April 2011 Edition: Second
© Copyright 2010, 2011 Hewlett-Packard Development Company, L.P. Confidential computer software. Valid license from HP required for possession, use or copying. Consistent with FAR 12.211 and 12.212, Commercial Computer Software, Computer Software Documentation, and Technical Data for Commercial Items are licensed to the U.S. Government under vendor's standard commercial license. The information contained herein is subject to change without notice.
Contents 1 Automated Storage Manager Overview........................................................5 Software requirements...............................................................................................................5 Software support.................................................................................................................5 Using ASM with HP StorageWorks Storage Mirroring software..................................................6 Support for LUNs over 2TB in size..
Reverting data to snapshots.................................................................................................29 Scheduling backups................................................................................................................29 Managing backups.................................................................................................................29 Running a device backup.................................................................................................
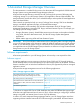
1 Automated Storage Manager Overview This documentation is intended for the person who administers HP StorageWorks X1000 Network Storage Systems running Automated Storage Manager software. ASM provides storage-allocation wizards that walk you through the process of allocating and configuring storage on your HP Storage System to host application data and shared folders. The storage-allocation wizards also allow you to schedule backups and snapshots of hosted application data and shared folders.
Express is not preinstalled. For more information about Data Protector Express, see the X1000 Network Storage System QuickSpecs at http://www.hp.com/go/X1000. To obtain an evaluation version of HP Data Protector Express, see the HP Data Protector Express Web site at http:// www.hp.com/go/dataprotectorexpress. The following table lists the supporting software and installation requirements.
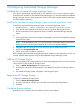
2 Configuring Automated Storage Manager Installing the Automated Storage Manager Agent If you plan to perform data migration tasks for any application servers on your network using the wizards that are available in the Automated Storage Manager, you must first install the Automated Storage Manager Agent on those application servers. Follow these instructions before performing any data migration operations.
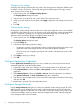
Changing color settings Changing color settings customizes the color used in the content pane to display the different types of storage, volumes, and servers. Colors help distinguish the different types of storage, storage areas, and servers from each other. 1. In the Actions pane, click Configure Display Options. The Display Options dialog box opens. 2. 3. 4. Select an item in the Items list and a color in the Color drop-down menu.
HP strongly recommends configuring all iSCSI-based storage for application servers on a dedicated Ethernet subnet. The purpose of a private LAN for iSCSI traffic is to is to guarantee dedicated network bandwidth for storage as well as increased security. To configure storage networks for iSCSI traffic: 1. 2. Under Preferred Storage Network, select a network that will be designated to manage all iSCSI traffic.
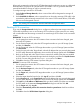
3 Hosting storage for applications and shared folders The Automated Storage Manager (ASM) radically simplifies hosting application storage and shared folders on your HP Storage System, using storage-allocation wizards. Use storage-allocation wizards to allocate and configure storage for these applications: Application Description Notes Exchange Allocate and configure storage for one or more Exchange storage See “Using the Host an Exchange group components.
Accessing the Host an Exchange Storage Group Wizard 1. In the Actions pane, select Host an Exchange Storage Group. The Host an Exchange Storage Group Wizard welcome page opens. 2. Click Next to open the Specify Exchange Server page (see “Entering a name of a server that hosts Exchange” (page 11)).
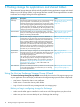
1. Do one of the following: • Select the entire storage group (including all of its components) by checking the box next to the storage group. • Select individual storage group components by expanding the list and checking the boxes next to the components. You must select all the storage group components in a storage group if you want to run backups or take snapshots of the Exchange storage group using ASM. The table below lists the action ASM will perform for each storage group component selected.
2. Click Next to open the Choose Shared Folder Types page (see “Choosing shared folder types” (page 13)). Choosing shared folder types Use the Choose Shared Folder types page to enable the types of client protocols that are allowed to connect to the shared folder. 1. 2. Select the Share this folder as a Windows share check box to allow Windows clients and clients running the Server Message Block (SMB) and Common Internet File System (CIFS) protocols to connect to the shared folder.
Using the Host a SQL Server Database Wizard The Host a SQL Server Database Wizard automatically discovers the servers that host SQL Server and SQL Server databases on your domain, and helps you allocate and configure storage space for each database component you select: • Data file—Contains pointers to database files, storage for system tables and objects, and storage for database data and objects. • Log file—Holds all the transaction log information for the database.
1. Do one of the following: • Select all components (including all of its components) by checking the box next to the component. • Select individual database components by expanding the list and checking the boxes next to the components. You must select all the database components, including the log file, in a database if you want to run backups and/or take snapshots of the database using ASM. NOTE: ASM cannot migrate system databases; for example, ASM cannot migrate master, model, msdb and tempdb.
server. Upon completion, you can monitor and manage storage for the application through the Automated Storage Manager. After storage is allocated and configured on your HP Storage System for a remote application using the Host a User-Defined Application Wizard, do the following: • Manually migrate the remote application's data to your HP Storage System. See “Migrating user-defined application data from a remote application” (page 25) for more information.
Entering an application name Use the Enter an Application Name page to enter a name for the application. This name will be used anywhere the application is referenced in ASM, so it must be a unique name. 1. 2. Enter a name for the application. When you are done, click Next to open the Storage Allocation page (see “Allocating space for components” (page 17)).
1. Do one of the following: • Click Next to accept the default values that ASM has provided for the components, user-defined application, or shared folder selected. • Change the default size values: ◦ Select a row to edit. ◦ Highlight the storage size unit value and then enter a new value as necessary: megabytes (MB), gigabytes (GB), or terabytes (TB). ◦ Highlight the storage size number value and enter a new value, or click the arrow buttons to change the value.
Table 5 Advanced Storage Properties items Physical storage Item Description Size The amount of storage that ASM allocates to the You are prevented from setting the size application component, user-defined application, or below 15 MB. shared folder you are configuring. After the allocated storage space is full (100 percent used), no further data can be stored to the space until you increase the size using the Allocate Space Wizard.
Table 5 Advanced Storage Properties items (continued) Physical storage Item Description Notes Percent full warning threshold The percent full value that when reached changes the storage status to Warning and issues a warning alert. The warning indicates that storage use has surpassed the percentage full value. For example, if you enter 75%, you see a warning (yellow asterisk) in the content pane when storage is at 75 percent full. The percent full warning threshold is set by default to 80%.
Table 6 Descriptions of RAID levels RAID level Description No RAID Offers no protection against disk failure. If a disk drive fails, data is lost. RAID 0 – Striping (No Fault Tolerance) Offers the greatest capacity and performance without data protection. If you select this option, you will experience data loss if a hard drive that holds the data fails. However, because no logical drive capacity is used for redundant data, this method offers the best capacity.
only; no hard limits are enforced on storage capacity as a result of setting this value. The warning is visible in these places: • A yellow warning icon appears on the application component, user-defined application, or shared folder icon in the content pane. • As an alert in the Properties window. NOTE: For shared folders and local storage applications, you can set an enforceable limit (or quota) for allocated storage, as well as a warning threshold.
NOTE: Backups and snapshots are disabled in ASM for an Exchange storage group or a SQL Server database if one or more of the components of the Exchange storage group or SQL Server database are not hosted. To host components for a storage group or database, start the Host an Exchange Storage Group Wizard or Host a SQL Server Database Wizard as appropriate, select the storage group or database, and then select the components on the Select Storage Group Components page that are not currently hosted.
See “Setting advanced storage properties” (page 18) for more information on advanced properties. 10. Click OK. 11. After you have selected and configured all data protection settings, click Next. Modifying backup job properties in Data Protector Express Although it is not required, after you finish creating a backup job using a wizard or a components property page, you can modify the backup job properties in Data Protector Express.
Monitoring task completion status The Task Viewer shows the status of ASM wizard tasks. ASM wizard tasks allocate and configure storage, host application storage and shared folders, and configure data protection. NOTE: Click the Expand tree icon next to a task to view its subtasks. Select a task to view its description in the Details box on the Task Viewer. The Task Viewer has a filter drop-down menu.
1. Using ASM, determine the path to the iSCSI LUN (logical disk) created on the application server by ASM, as follows: a. Select the user-defined application in the content pane. b. In the Actions pane, select Properties. The Properties window opens. c. d. 2. Click the Storage tab. Record the Application Path information displayed. Copy the application data to the path on the application server recorded in step 1 as follows: a. b.
4 Managing data protection The Automated Storage Manager provides data protection through the use of snapshots and backups. You can configure these data protection methods through the Data Protection page of ASM's application wizards, or you can configure and modify data protection settings after running the wizards by accessing the Snapshots and Backup actions in the ASM Actions pane.
2. 3. 4. 5. In the Actions pane, click Snapshots and then click Manage Snapshots. The Manage Snapshots dialog box displays. To take a snapshot immediately, click Take Snapshot and then click Yes to confirm. To delete a snapshot, select the snapshot from the snapshot list and click Delete. When you are done making changes, click Close.
Reverting data to snapshots ASM allows you to revert data stored on your HP Storage System to a snapshot. This overwrites the existing data and reverts it to a past state. NOTE: • Snapshots of shared folders cannot be reverted using ASM. To revert a shared folder to a past snapshot, use the Shadow Copy Client.
1. 2. 3. Select an Exchange storage group, SQL Server database, user-defined application, or shared folder that has backups scheduled in the content pane. In the Actions pane, click Backup and then click Run Device Backup. Click Yes to confirm the backup operation. Running a virtual library backup If virtual library backup has been configured for this component, you can run a virtual library backup from this location. 1. 2. 3.
NOTE: To modify properties of the job, right-click the Restore Job Properties. For example, you may want to choose a different device from which to restore or select different version of files to restore. To restore version for files other than the latest backup, refer to Selecting Files and File Versions in the HP StorageWorks Data Protector Express Users Guide and Technical Reference. 5. 6. Right-click the restore job and click Run to perform the restore. Click Yes to confirm the restore.
Installing Data Protector Express on other machines The Data Protector Express installation on the HP Storage System acts as the master server for a Data Protector Express Management Domain. If you wish to use the ASM system as a Disk-To-Disk (D2D) backup target for other clients or servers, you may install Data Protector Express on those machines and join the management domain.
5 Managing storage After an application is hosted or shared folder is created on your HP Storage System using a storage-allocation wizard, you can manage its storage and data by: • “Increasing or reducing the allocated storage” (page 33) • “Changing the percent full warning threshold” (page 33) • “Removing application areas from view” (page 34) • “Changing permissions, names, descriptions, or paths of shared folders” (page 34) • “Deleting shared folders” (page 35) Increasing or reducing the alloca
NOTE: For shared folders, you can set an enforced limit (quota) for allocated storage, as well as a warning threshold. For more information, see “Enforcing an allocated storage limit for shared folders and local storage applications” (page 22). To change the percent full warning threshold from the Properties window: 1. 2. 3. 4. 5. Select the application component, user-defined application, or shared folder in the content pane. In the Actions pane, click Properties. Click the Warning Threshold tab.
You will need to know the path of a shared folder to change its permissions, name, description, or path. To find the path, select the shared folder in the content pane and then click Properties in the Actions pane. The share path listed on the General tab is the path for the shared folder. Deleting shared folders ASM cannot be used to delete top-level or nested shared folders that reside on your HP Storage System.
6 Monitoring storage ASM provides storage-management functions so you can quickly view used and allocated storage, and percent full warning thresholds settings for application and shared folder storage on your HP Storage System.
Accessing application and shared folder properties When Application View is selected in the Actions pane, you can view the storage status, alerts, and properties for the following: • Applications • Application components • User-defined applications • Shared folders pool • Shared folders • Virtual libraries Do one of the following: • Select the item in the content pane and then click Properties in the Actions pane. • Right-click the item in the content pane and select Properties.
• Details tab — (Exchange storage groups) Displays the following Exchange server values: Table 8 Details tab: Exchange storage group properties Property Value Exchange Server Name of server where Exchange storage is being hosted. Exchange Version Version of Exchange. Days before log file removal The number of days before log files are deleted from the server. Directory Server The domain controller used by the server. Server Type The type of Exchange installation: Front-end or Back-end.
Table 9 Storage tab: Exchange storage group component properties (continued) Property Value Logical disk - RAID Level The RAID level to which the storage group component storage is configured. See “Customizing RAID levels” (page 20) for more information. Logical disk - RAID Stripe Size The RAID stripe size to which the storage group component's storage is configured. See “Advanced Storage Properties items” (page 19) for more information.
Table 11 Public Store tab: Exchange storage group component properties (continued) ◦ Value Description Replication Type Indicates if LCR is being used. LCR Status Indicate Exchange warnings for LCR. LCR Copy Copy of the active/original exchange component.
Table 14 Storage tab: Shared folder properties Property Value Application Path Path to the shared folder on the server. Storage System Host Name Name of your HP Storage System. Storage System Volume - Name Name of the volume on your HP Storage System where the shared folder is stored. Storage System Volume - Status Status of the volume that holds the shared folder on your HP Storage System.
properties window, and in parenthesis, which applications are applicable: SQL Server, SQL Server databases or SQL Server database components. • General tab—(SQL Server, SQL Server database, SQL Server database component) Displays the name of the application, the total capacity reserved for the application, and its operating status: Table 15 Operating status: SQL Server properties Status indicator Value OK SQL Server is running and storage is online. No alerts.
Table 17 Storage tab: SQL Server database component properties (continued) Property Value Application Server Volume - RAID Level The RAID level to which the database component storage is configured. See “Customizing RAID levels” (page 20) for more information. Application Server Volume - RAID Stripe Size The RAID stripe size to which the database component's storage is configured. See “Advanced Storage Properties items” (page 19) for more information.
3. To select properties for the user-defined application pool: • Select User-Defined in the content pane and then click Properties in the Actions pane. or • Right-click User-Defined in the content pane and select Properties. For a user-defined application: • Select any user-defined application in the content pane and then click Properties in the Actions pane. or • Right-click any user-defined application in the content pane and select Properties.
Table 21 Storage tab: User-defined application properties (continued) Property Value Application Server Volume - Write Cache Speeds up writes when enabled. This setting is determined by the storage array, not ASM. Application Server Volume Number of Hot Spares The number of hot spares with which the database component storage is configured. See “Advanced Storage Properties items” (page 19) for more information. Application Server Volume - Mount Path the application server volume is mounted on.
Table 23 Storage tab: Virtual library properties (continued) Property Value Storage System Volume - Name Name of the volume on your HP Storage System where the virtual library is stored. Storage System Volume - Status Status of the volume that holds the virtual library on your HP Storage System. Storage System Volume - Mount Paths Path to where the volume that holds the virtual library on your HP Storage System is mounted.
ASM assigns a drive letter to each volume on a logical disk. The drive letter can be viewed on the volume's Properties window. See “Accessing properties for HP Storage System volumes” (page 47) for more information. NOTE: A logical disk can only have one RAID configuration, so an application's components will reside on more than one logical disk if different RAID levels are selected for the application components using the storage-allocation wizard.
Storage tab—Displays the unallocated space, used space, free space on the volume, and also details on your volume or logical disk properties, depending on the application open: Table 26 Storage tab: HP Storage System logical disk properties Property Value System Name Name the system uses to identify the logical disk. Physical Disks Globally unique identifier(s) of the hard drive(s) used by the logical disk for storage.
folders on your HP Storage System. Expand the application servers listed to display the application server volumes and the applications hosted on the volumes. • In the Actions pane, select Application Server View. • To view the properties for all application servers with storage hosted on your HP Storage System, select Show all from the Filter drop-down menu, located at the top of the content pane. Application server properties are displayed in order of hierarchy in an expandable and collapsible view.
3. Click one of the following tabs: • General tab—Displays the name of the volume on the application server, the volume type, and status: Table 28 Operating status: Application server volume properties • Status indicator Value OK The storage is online. Warning See the Alerts list for more information. Critical See the Alerts list for more information.
The total capacity of your HP Storage System is divided into the following areas: • Exchange—Storage allocated to host Exchange storage group components. • Shared Folders—Storage allocated to host shared folders. • SQL Server—Storage allocated to host SQL Server database components. • User-defined—Storage allocated to host user-defined applications. • Data Protection — Storage allocated to host snapshots, backups, and replicated data. • Unallocated—Unused storage that is not allocated.
7 Troubleshooting Automated Storage Manager The following list documents recommended workarounds for conditions related to Automated Storage Manager. For information specific to a particular product release, see the HP Automated Storage Manager Release Notes for your product version. The ASM Grow/Extend Volume command fails intermittently. The Grow/Extend Volume command sometimes returns a failure even though the operation completes successfully and the volume capacity matches the requested size.
Backup job fails for Exchange storage groups that were manually migrated to the storage system It is possible to manually create a virtual hard disk on the storage system using the Microsoft Software iSCSI Target snap-in. This disk may then be assigned to a target, allowing an iSCSI initiator on the Exchange server to access the disk as a local volume.
8 Support and other resources Contacting HP For worldwide technical support information, see the HP support website: http://www.hp.
Index A accessing application and shared folder properties, 37 accessing application server properties, 49 accessing properties for application server volumes, 49 for Exchange, 37 for HP Storage System logical disks, 47 for HP Storage System volumes, 47 for shared folders pools, 40 for SQL Server, 41 for the user-defined application pool, 43 for virtual libraries, 45 accessing storage area properties, 47 Application Server View, 36, 48 application server volumes accessing properties, 49 operating status val