
5.6 HP StorageWorks X9000 File Serving Software User Guide (TA768-96035, June 2011)
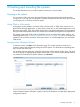


To remove a client access entry, select the affected file system on the GUI, and then select Client
Exports from the lower Navigator. Select the access entry from the Client Exports display, and click
Delete.
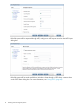
On the CLI, use the ibrix_exportfs command to create an access entry:
<installdirectory>/bin/ibrix_exportfs –c –f FSNAME –p CLIENT:/PATHNAME,CLIENT2:/PATHNAME,...
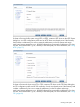
To see all access entries that have been created, use the following command:
<installdirectory>/bin/ibrix_exportfs –c –l
To remove an access entry, use the following command:
<installdirectory>/bin/ibrix_exportfs –c —U –f FSNAME –p CLIENT:/PATHNAME,
CLIENT2:/PATHNAME,...
Using Export Control
When Export Control is enabled on a file system, by default, X9000 clients have no access to the
file system. Instead, the system administrator grants the clients access by executing the
ibrix_mount command on the management console.
Enabling Export Control does not affect access from a file serving node to a file system (and thereby,
NFS/CIFS client access). File serving nodes always have RW access.
To determine whether Export Control is enabled, run ibrix_fs -i or ibrix_fs -l. The output
indicates whether Export Control is enabled.
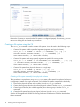
To enable Export Control, include the -C option in the ibrix_fs command:
<installdirectory>/bin/ibrix_fs -C -E -f FSNAME
To disable Export Control, execute the ibrix_fs command with the -C and -D options:
<installdirectory>/bin/ibrix_fs -C -D -f FSNAME
To mount a file system that has Export Control enabled, include the ibrix_mount -o {RW|RO}
option to specify that all clients have either RO or RW access to the file system. The default is RO.
In addition, when specifying a hostgroup, the root user can be limited to RO access by adding
the root_ro parameter.
18 Creating and mounting file systems