
5.6 HP StorageWorks X9000 File Serving Software User Guide (TA768-96035, June 2011)
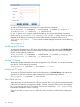
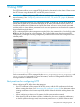


Modifying a virtual host
To change the properties for a virtual host, select the virtual host on the VHosts page, click Modify
Vhost, and make the necessary changes on the Modify VHost Properties dialog box. To modify a
virtual host from the CLI, use the following command:
ibrix_httpvhost -m VHOSTNAME -c PROFILENAME -I IP-Address:Port [-S
SETTINGLIST]
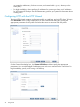
Viewing a virtual host
The VHosts pane shows the configuration of virtual hosts. To view the configuration from the CLI,
use the following command:
ibrix_httpvhost -i VHOSTNAME -c PROFILENAME [-v level]
Deleting a virtual host
To remove a virtual host, select the virtual host on the Vhosts pane, click Delete Vhost, and then
confirm the operation. To remove the virtual host from the command line, use the following command:
ibrix_httpvhost -d VHOSTNAME -c PROFILENAME
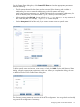
Managing HTTP shares
You can create an HTTP share when you create a file system on the GUI (see “Creating a file
system” for more information), or you can create a share with the HTTP Wizard. You can also add
a share to an existing virtual host. For example, you might need to create multiple shares having
the same physical path, but with different sets of properties, and then assign users to the appropriate
share.
IMPORTANT: Ensure that all users who are given read or write access to HTTP shares have
sufficient access permissions at the file system level for the directories exposed as shares.
NOTE: The file system must be mounted when you create the share.
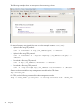
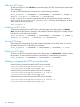
To view HTTP shares on the GUI, select the appropriate profile on the Config Profile pane, and
then select the appropriate virtual host from the lower navigator. The Share page shows the shares
configured on that virtual host.
Managing HTTP shares 79