
6.1 HP IBRIX X9000 Network Storage System File System User Guide (TA768-96061, June 2012)

Windows Vista, Windows 2008, Windows 7:
Complete the following steps:
1. Open the Start menu and enter mmc in the Start Search box. You can also enter mmc in a
DOS cmd window.
2. On the User Account Control window, click Continue.
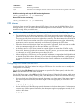
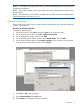
3. On the Console 1 window, select File > Add/Remove Snap-in.
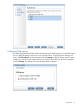
4. On the Add or Remove Snap-ins window, select Shared Folders and click Add.
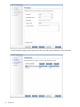
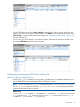
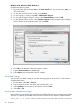
5. On the Shared Folders window, select Another computer as the computer to be managed,
enter or browse to the computer name, and click Finish.
6. Click OK to exit the Add or Remove Snap-ins window.
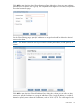
7. Expand Shared Folders (\\<address>).
8. Select Shares and manage the shares as needed.
Saving MMC settings
You can save your MMC settings to use when managing shares on this server in later sessions.
Complete these steps:
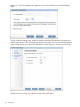
1. On the MMC, select File > Save As.
2. Enter a name for the file. The name must have the suffix .msc.
3. Select Desktop as the location to save the file, and click Save.
4. Select File > Exit.
Granting share management privileges
Use the following command to grant administrators X9000 Software share management privileges.
The users you specify must already exist. Be sure to enclose the user names in square brackets.
ibrix_auth -t -S 'share admins=[domainname\username,domainname\username]'
80 Using CIFS