
6.5 HP StoreAll OS User Guide


"http://10.10.104.116:8888/v1/AUTH_7b9a902423a582c9eda266dcf3ad6974a2b98e4b21ea7c9e1e8d38f76afdf1b4"}],
"endpoints_links": [], "type": "object-store", "name": "swift"}], "user": {"username": "IBRQA1\\ibrixuser21",
"roles_links": [], "id": "7b9a902423a582c9eda266dcf3ad697444be1dddc4fb6ba53ab2034013a51392", "roles": [{"name":
"admin"}], "name": "IBRQA1\\ibrixuser21"}, "metadata": {"is_admin": true, "roles":
["7b9a902423a582c9eda266dcf3ad6974a2b98e4b21ea7c9e1e8d38f76afdf1b4"]}}}
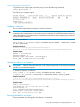
In this example,
• Token expiration date and time (the token is set to expire at 10:08 p.m., August 21, 2013
UTC/GMT time):2013-08-21T20:08:48Z
• Authentication token ID: 1bb88b944f6c4c8fb7411f85d3bd6bf4.
• Tenant ID:
7b9a902423a582c9eda266dcf3ad6974a2b98e4b21ea7c9e1e8d38f76afdf1b4
• Tenant name: IBRQA1\\domain^users
• The endpoint, which is listed as the publicURL in this example:
http://10.10.104.116:8888/v1/AUTH_7b9a902423a582c9eda266dcf3ad6974a2b98e4b21ea7c9e1e8d38f76afdf1b4
Keystone token flush
The keystone identity server generated tokens are stored in the keystone database for Object Store.
After these tokens are expired, they are not automatically removed by the keystone identity server.
As the number of token generations increase, the size of the database will continue to grow
unmanaged. To clear this database, you need to flush all the tokens. The StoreAll administrator
needs to run the following command explicitly to remove expired tokens from the database:
ibrix_objectstoreadmin -d –e
This command has to be run periodically to keep the database up to date, and to increase the
performance of token validation by the keystone identity server.
Managing non-administrative accounts
You can assign non-administrative users read or write permissions to a container by using your
authentication token and endpoint in the commands provided in “Assigning non-administrative
privileges with read-write access to a container” (page 144) and “Assigning non-administrative
privileges with read access to a container” (page 145). Your non-administrative users will need to
create their own authentication tokens. For a list of accessible tasks for each type of user, see
Table 15 (page 138).
Assigning non-administrative privileges with read-write access to a container
You can grant non-administrative users within your own group read-write access to a container by
adding them to an access control list for the container. Users with non-administrative privileges but
with write access to a container can only do the following in the container:
IMPORTANT: Keep in mind:
• You must be in the same group as the non-administrative user you are granting read-write
permissions to the container.
• The user must generate their own token.
• Give users the “<ENDPOINT>/<CONTAINER_NAME>” so the users can access the container.
• You must have read access in order to have write access.
To set read-write access to a container:
curl -X PUT -i -H "X-Auth-Token: <AUTHENTICATION TOKEN>" -H
"X-Container-Write:<group:user>" -H "X-Container-Read: <group:user>"
<ENDPOINT>/<CONTAINER_NAME>
Sample command:
144 Using Object Store