
HP P9000 Replication Manager Software 7.3.1-00 User Guide

Mount points
If different logical volumes are mounted in multiple mount points with a hierarchical relationship (such
as M:\ and M:\MNT) do not specify a mount point that includes a lower level directory mountpoint
(for example, M:\ in the above instance) as the target of replication. If this is done, the replica creation
fails and the error message (KAVX0006-E, DRM-10062) is output. To specify multiple mount points
(that include directory mount points) as replication targets, make sure they are not in a hierarchical
relationship.
Disabling of automatic mounting
Before using Application Agent, make sure that Automatic mounting of new volume is disabled on
the database server or backup server. Perform the following procedure to check the current status
and, if automatic mounting is enabled, disable it:
1. Execute the diskpart command in the command prompt.
2. Enter automount to display the current status.
3. If automatic mounting of new volumes is enabled, enter automount disable to disable the
setting.
4. Enter exit to end the diskpart command execution.
Backup servers and Windows Server 2008
If the backup server is Windows Server 2008, specify Offline for the secondary volume. After
replica creation, the secondary volume disk status becomes Offline, but if replica creation fails,
the status might remain Online. If this happens, perform the following procedure to change disk
statuses of the secondary volumes on the backup server to Offline:
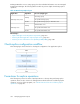
1. Use the P9000 RAID Manager command inqraid $Phys -CLI to check the disk numbers of
all secondary volumes that are the backup destinations. The disk numbers are shown in the
DEVICE_FILE column.
2. Start the diskpart command and then enter list disk to display the current disk statuses.
A list of disks that are currently connected to the server are displayed. The disk numbers are
shown in the Disk ### column. Check the Status column and confirm the disk numbers cor-
responding to the disk numbers on the secondary volumes are Online.
3. For each secondary volume whose disk status is Online, perform the following procedure:
a. Enter: select disk disk-number.
The following message is displayed: Disk disk-number is now the selected
disk.
b. Enter: offline disk.
The following message is displayed: DiskPart successfully offlined the selec-
ted disk.
4. Enter list disk to display the current disk statuses. Make sure that the disk statuses of the
secondary volumes are Offline in the Status column.
5. Enter exit to terminate the diskpart command.
Database and backup server time synchronization
The database server time and backup server time should be set to the present time, or the task status
related to replica management operation is not updated correctly. If the time zone of the database
User Guide 369