
HP P9000 Provisioning for Mainframe Systems User Guide (AV400-96369, October 2011)
2. From the Pool table, select the pool to be deleted.
Select multiple pools using the Shift key (if the pools are adjacent), or using the Ctrl key (if the
pools are not adjacent).
3. Click More Actions, and then select Delete Pools.
The Delete Pools window opens.
You cannot delete a pool whose usage is not 0%, or a pool for which THP V-VOLs are assigned.
4. Click Finish.
The Confirm window opens.
To continue with the shredding operation and delete volume data, click Next. For details about
the shredding operation, see HP P9000 Volume Shredder for Open and Mainframe Systems
User Guide.
If the pool is blocked, you might not be able to perform shredding operations.
5. In the Confirm window, confirm the settings, in Task Name type a unique name for this task
or accept the default, and then click Apply.
If Go to tasks window for status is checked, the Tasks window opens.
Increasing THP V-VOL capacity
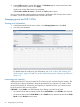
1. In the Remote Web Console main window, in the Storage Systems tree, select Pool.
The pool name appears below Pool.
2. Select the pool associated with the THP V-VOLs whose capacity is increased.
The pool information appears on the right.
3. Click the Virtual Volumes tab.
4. From the Virtual Volumes table, select the THP V-VOL for which you want to increase capacity.
Select multiple THP V-VOLs using the Shift key (if the THP V-VOLs are adjacent), or using the
Ctrl key (if the THP V-VOLs are not adjacent).
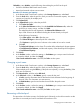
5. Click Expand V-VOLs.
The Expand V-VOLs window opens.
6. In Capacity, type the capacity amount.
You can enter the LDEV capacity to two decimal places within the range of values indicated
below the text box.
7. Click Finish.
The Confirm window opens.
8. In the Confirm window, confirm the settings, in Task Name type a unique name for this task
or accept the default, and then click Apply.
If Go to tasks window for status is checked, the Tasks window opens.
Changing the name of a THP V-VOL
1. In the Remote Web Console main window, in the Storage Systems tree, select Logical Devices.
The following shows another way to select LDEVs.
1. In the Remote Web Console main window, in the Storage Systems tree, select Pool.
The pool name appears below Pool.
2. Select the pool associated with the THP V-VOL for which you want to change the name.
3. Select the Virtual Volumes tab.
66 Configuring thin provisioning