Intel® Device View User Guide 713265-001
Year 2000 Capable An Intel product, when used in accordance with its associated documentation, is “Year 2000 Capable” when, upon installation, it accurately stores, displays, processes, provides, and/or receives date data from, into, and between the twentieth and twenty-first centuries, including leap year calculations, provided that all other technology used in combination with said product properly exchanges date data with it. Copyright © 1998, Intel Corporation. All rights reserved.
Contents Quick Start 1 Chapter 1 – Installation 3 Overview .................................................................................................................................................. 3 Choosing a version ................................................................................................................................... 4 System requirements ...............................................................................................................................
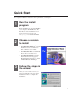
Quick Start For complete installation instructions and requirements, see Chapter 1. 1 Run the install program Put the Intel® Device View CD-ROM in your computer’s CD-ROM drive. The Intel Device View installation screen appears. If it doesn’t appear, run autoplay.exe from the CD-ROM. 2 3 Choose a version to install • Click Install for Windows* to install Intel Device View on a Windows NT* or Windows 95 or 98 PC. • Click Install for Web to install Intel Device View on a Web server.
4 Run Intel Device View Windows version Click the Intel Device View – Windows icon in the Intel Device View program group. Web version • To run Intel Device View from the Web server, click the Intel Device View – Web icon in the Intel Device View program group. • To view Intel Device View from another PC on your network, enter the following URL in Internet Explorer’s Address field: http://servername/devview/main.htm where servername is the IP address or name of the Intel Device View server.
1 Installation Overview This chapter explains how to install Intel Device View and lists system requirements for each version of the program.
C H A P T E R 1 INTEL DEVICE VIEW USER GUIDE Choosing a version When you install Intel Device View, you have three installation options: Install for Windows The Windows version of Intel Device View allows you to manage Intel networking devices from a single PC on the network. Install for Web The Web version of Intel Device View is hosted on a Web server and allows you to manage Intel devices from any PC on the network running Windows 95, Windows 98, or Windows NT 4.0 or later and Internet Explorer 4.
C H A P T E R 1 INSTALLATION System requirements Windows version Minimum hardware requirements Recommended processor 133 MHz or faster Intel Pentium®, Pentium Pro, or Pentium II Processor Memory At least 32 MB Disk space At least 25 MB Operating system • Windows 95 or 98 • Windows NT 4.
C H A P T E R 1 INTEL DEVICE VIEW USER GUIDE Web client Note Intel Device View does not support Netscape Navigator*. Recommended processor 133 MHz or faster Intel Pentium, Pentium Pro, or Pentium II Processor Memory At least 32 MB Disk space At least 25 MB Operating system • Windows 95 or 98 • Windows NT 4.0 or later (server or workstation) Web browser Internet Explorer 4.
C H A P T E R 1 INSTALLATION Installing Intel Device View Note If you’re installing Intel Device View on a Windows NT PC, you must log in with Administrator rights. Before you install Intel Device View, make sure your PC meets the system requirements on pages 5-6. 1 Put the Intel Device View CD-ROM in your computer’s CD-ROM drive. The Intel Device View installation screen appears. If it doesn’t appear, run autoplay.exe from the CD-ROM. 2 Choose the version of Intel Device View you want to install.
C H A P T E R 2 2 INTEL DEVICE VIEW USER GUIDE Using Intel Device View Overview This chapter explains how to start Intel Device View and use some of its basic features. All the procedures described in this chapter are the same for the Windows, Web, and plug-in versions of Intel Device View. For more information on managing devices, see Chapter 3.
C H A P T E R 2 USING INTEL DEVICE VIEW Starting Intel Device View Windows version Click the Intel Device View – Windows icon in the Intel Device View program group. The main page appears. Web version • To run Intel Device View on the Device View server, click the Intel Device View – Web icon in the Intel Device View program group. • To view Intel Device View from another PC on your network, enter the following URL in Internet Explorer’s Address field: http://servername/devview/main.
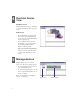
C H A P T E R 2 INTEL DEVICE VIEW USER GUIDE Installing a new device After you’ve installed a new hub, switch, or router on your network, you can use Intel Device View’s Device Install wizard to configure the device for management.
C H A P T E R 2 USING INTEL DEVICE VIEW Managing a device To manage a device 1 In the Device Tree, double-click the icon of the device you want to manage. The device image appears. 2 Select a management option: Double-click a device icon to view the device image. Device image • Right-click a port to view management options for the port. • Right-click anywhere else on the device image to view management options for the device. Different devices have different management options available.
C H A P T E R 2 INTEL DEVICE VIEW USER GUIDE Using the Device Tree When you start Intel Device View, the Device Discovery service begins searching for supported Intel network devices on your network. As it discovers devices, the Device Discovery service adds an icon for each device to the Device Tree on the left side of the screen. Each type of device is represented by a unique icon in the Device Tree.
C H A P T E R 2 USING INTEL DEVICE VIEW Adding a device to the Device Tree To add a device to the Device Tree 1 Right-click anywhere on the Device Tree. 2 Click Add Device on the menu that appears. 3 In the Add an SNMP device dialog box, enter the IP address of the device you want to add. 4 Fill in the other fields if necessary. 5 Click OK. The new device’s icon appears in the Device Tree.
C H A P T E R 2 INTEL DEVICE VIEW USER GUIDE Views and windows Intel Device View provides several different views and windows that display different types of information about the device you’re managing. To change to a different view or window, click its tab. Not all devices support all views and windows. Device view The Device view is Intel Device View’s primary display. You can fully manage a device using this view. Right-click a device or one of its ports to view management options.
C H A P T E R 2 USING INTEL DEVICE VIEW Diagnostics window The Diagnostics window lists all diagnostic messages sent by the device being managed. Trap window The Trap window lists all traps received by the Device View PC or server. Traps are color coded based on severity. System window The System window displays a log of all the major events that have occurred on the switch or router being managed. All events list date and time.
C H A P T E R 2 INTEL DEVICE VIEW USER GUIDE Errors window The Error view lists all error messages generated by the switch or router being managed.
3 Managing Devices Overview This chapter describes how to perform several management tasks on Intel hubs, switches, and routers. For more detailed information on product features, see the documentation that shipped with the device.
C H A P T E R 3 INTEL DEVICE VIEW USER GUIDE Managing Intel Express Stackable Hubs Note Intel Device View supports these Intel stackable hubs: Hubs must have Management Modules to support Intel Device View. • Express 220T Stackable Hub • Express 210T Stackable Hub • Express 10/100 Stackable Hub • Express 100BASE-T Stackable Hub To manage an Intel Express Stackable Hub 1 Double-click the Intel Express Stackable Hub icon in the Device Tree.
C H A P T E R 3 MANAGING DEVICES Basic management tasks This section describes some basic hub management tasks. For more information on these or other procedures, see the documentation that ships with the hub and management module. Managing a port 1 Right-click the port you want to manage. 2 Click Configure Port on the menu that appears. The Port dialog box appears. To change port speed (Express 220T only) The Intel Express 220T Stackable Hub allows you to force port speed to 10 or 100Mbps.
C H A P T E R 3 INTEL DEVICE VIEW USER GUIDE To set port security (Express 220T only) Setting port security “secures” a port for use by a specific MAC address. If another MAC address uses the port, the port is disabled. 1 2 Configure port security settings: • To use the first MAC address detected on the port, leave the Secured MAC Address box blank. • To use a specific MAC address, type the MAC address in the Secured MAC Address box. Click Enable Security.
C H A P T E R 3 MANAGING DEVICES To add a trap receiver 1 Right-click the hub image. 2 Click Management Module, then click Trap Receiver Configuration on the menu that appears. 3 Click Add in the Trap Receivers dialog box. 4 Type the IP address and community string of the PC you want to receive traps from the Management Module, then click Add. 5 Click Close. Setting alarms An alarm monitors a variable and generates an event (an SNMP trap, log event, or both) when a limit is exceeded.
C H A P T E R 22 3 INTEL DEVICE VIEW USER GUIDE 4 Select the segment you want to monitor in the Interface pull-down box. Segment 1 is the 10Mbps segment. Segment 2 is the 100Mbps segment. 5 Check the statistic you want to monitor and change the threshold value if necessary. 6 Click OK, then click Close.
C H A P T E R 3 MANAGING DEVICES Managing Intel Express Switches This section describes some basic switch management tasks. For more information on these or other procedures, see the documentation that ships with the switch.
C H A P T E R 3 INTEL DEVICE VIEW USER GUIDE Basic management tasks Managing a port 1 Right-click the port you want to manage. 2 Click Port Setup on the menu that appears. The Port Setup dialog box appears. To set port speed and duplex mode 1 Click the Port Mode tab in the Port Setup dialog box. 2 Configure port settings: 3 • To let the port automatically determine speed and duplex mode settings, check the Enable auto negotiation box (default setting).
C H A P T E R 3 MANAGING DEVICES Graphing device activity Intel Device View allows you to view graphs of total packets, transmitted packets, received packets, and errors. To graph device activity 1 Right-click anywhere on the switch image, except a port. 2 Click Device Activity, then click one of the graphing options on the menu that appears. To graph port activity 1 Right-click a port. 2 Click Port Activity, then click either Tx packets or Rx packets.
C H A P T E R 3 INTEL DEVICE VIEW USER GUIDE 4 Click Add. 5 Choose the IP address of the trap receiver. Note • To use the PC you’re managing from, click This PC. Press This PC in the Web version of Intel Device View to use the Web server as a trap receiver. • To send traps to another PC on the network, type the IP address and community string of the PC you want to use. 6 Click OK, then click OK on the Device Setup dialog box.
C H A P T E R 3 MANAGING DEVICES 4 Select the port you want to monitor in the Interface pull-down box. 5 Check the statistic you want to monitor and change the threshold value if necessary. 6 Click OK, then click Close.
C H A P T E R 3 INTEL DEVICE VIEW USER GUIDE Managing Intel Express Routers This section describes some basic router management tasks. For more information on these or other procedures, see the documentation that ships with the router. Intel Device View supports these Intel routers: • Intel Express 8100 Routers • Intel Express 9000 Series Routers To manage an Express Router 1 Double-click the Express router icon in the Device Tree. Express Router icon The device image appears on the screen.
C H A P T E R 3 MANAGING DEVICES Basic management tasks This section describes some basic router management tasks. For more information on these or other procedures, see the documentation that ships with the router. Monitoring WAN traffic To monitor WAN traffic 1 Right-click anywhere on the router image, except a port. 2 Click Link Activity, then click one of the options on the menu that appears. The activity graph appears.
C H A P T E R 3 INTEL DEVICE VIEW USER GUIDE 3 Double-click a name for more information. The Link Details dialog box appears. Adding a trap receiver Add a trap receiver when you want a management PC alerted of an event that occurs on the router. 30 1 Right-click anywhere on the router image, except a port. 2 Click Configuration, then click Management Setup on the menu that appears. 3 Click the Traps tab in the Management Setup dialog box. 4 Click Add.
C H A P T E R 3 MANAGING DEVICES 5 Choose the IP address of the trap receiver. Note • To use the PC you’re managing from, click This PC. Press This PC in the Web version of Intel Device View to use the Web server as a trap receiver. • To send traps to another PC on the network, type the IP address and community string of the PC you want to use. 6 Click OK, then click OK on the Management Setup dialog box.
INTEL DEVICE VIEW SOFTWARE LICENSE AGREEMENT IMPORTANT: Please review the License Agreement below. By doing so, or otherwise downloading or copying this Software, you agree to the terms of this Agreement. Do not load this software until you have carefully read and agreed to the following terms and conditions. If you do not agree to these terms, do not install or use this software. IF YOU DOWNLOAD, INSTALL OR USE THIS SOFTWARE, YOU WILL BE BOUND BY THE TERMS OF THIS AGREEMENT.
REGISTRATION: If a registration card is supplied with this license, this license shall only be valid if you register your acceptance of its terms and conditions with Intel. In addition, you grant your permission to Intel to provide your registration information to other Intel divisions and/or third parties and to use such information in connection with other similar product marketing efforts which Intel believes may be of interest to you.