
Product Guide
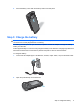
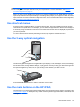

3. Connect the other end of the cable to the Micro-USB connector port on your HP iPAQ. The cable
connector only fits one way. If the connector does not insert easily, turn it over.
TIP: Charge the battery by connecting your HP iPAQ to a USB port on your computer through
the Micro-USB synchronization cable. The Microsoft
®
ActiveSync
®
or WMDC program appears on
the screen if you connect your HP iPAQ to a computer that has the software already installed on
the computer.
To enable USB charging on your HP iPAQ, tap Start > Settings > System > Power > USB
Charging. On the Power screen, select the Use USB Charging check box, select the Fast
Charging option, and then tap ok.
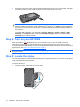
Step 4: Turn on your HP iPAQ
Press and hold the (End/Power) key for five seconds to turn on your HP iPAQ. Follow the
instructions on the screen to complete the setup. Tap the keyboard icon on the screen to use the
on-screen keyboard. Alternatively, you can use the keyboard to specify information. To learn more about
keyboard use, see
Step 6: Use the keyboard on page 11.
NOTE: The HP iPAQ will take a few minutes to become fully functional. The keyboard will not be active
during this period.
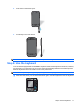
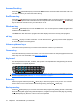
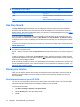
Step 5: Locate the stylus
You can use the stylus to tap and enter text using the on-screen keyboard. You can also use the stylus
to tap and select items on the screen.
To remove the stylus:
1. Locate the stylus on the back of your HP iPAQ.
10 Chapter 4 Set up your HP iPAQ