
HP Point of Sale (POS) Peripherals Configuration Guide

Page 197 of 522
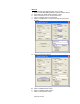
6.5.11 OPOS Test Applet for the MICR
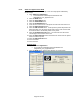
The following is overview of the steps to test the receipt printer followed by
detailed steps:
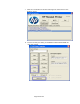
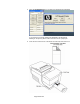
1. Open OPOS Test Application.
• C:\xxxxx\Point of Sale\Receipt Printer\OPOS Test
Utility\OPOS_Test_Application.exe.
2. Click the MICR button.
3. Click the Open MICR button.
4. Click the Claim MICR button.
5. Click the Enable MICR button.
6. Insert the check in the front of the printer until the front LED comes on.
7. Click the Begin Insertion button.
8. Click the End Insertion button. At this point the printer will perform the
MICR operation; the document should come out the front and then will
be returned back to the bottom portion of the printer.
9. Click the Enable Data Event button. The data from the check scan
should appear in the bottom of the GUI.
10. Click the Begin Removal button and remove the check from the printer
when it has been ejected.
11. Click the End Removal button.
12. Close the MICR.
13. Close the form.
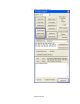
Detailed Steps
1. Open OPOS Test Application.
• C:\xxxxx\Point of Sale\Receipt Printer\OPOS Test
Utility\OPOS_Test_Application.exe.
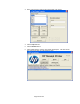
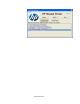
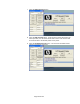
2. Click the MICR button. Another GUI will open as shown below: