
HP Point of Sale (POS) Peripherals Configuration Guide

Page 291 of 522
6.7.7 JPOS Drivers for the MSR
The JPOS drivers are included in the HP factory image and are also available from HP.COM.
The “MSR Keyboard Base Driver” must also be installed on the unit either via the standalone
package or via the OPOS drivers installed on the unit.
The following is overview of the steps to test the MSR followed by detailed steps:
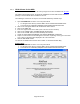
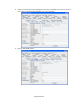
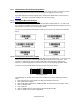
1. Open JavaPOStester located in one of the paths below:
• C:\<Program Files directory>\HP\HP MSR I-Series JPOS\POStest\POStest.bat.
• C:\xxxxx\Point of Sale\MSR (USB)\MSR JPOS\JPOS\POStest\POStest.bat.
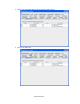
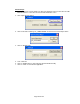
2. Click on the “Configured Device” tab to obtain the device names.
3. Click on the “MSR” tab.
4. Enter the Logical Name for the MSR. (Note: This item is case sensitive).
5. Click on the “OPEN” button; the MSR will beep several times.
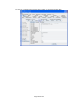
6. Click on the “CLAIM” button; the MSR will beep several times.
7. Check the “DATA EVENT ENABLED” and “DEVICE ENABLED” checkboxes.
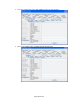
8. Swipe a credit card and text should appear in the field. Depending on the type of card there
may or may not be information displayed in all of the track fields.
9. Click the “RELEASE” button.
10. Click the “CLOSE” button and the click on “EXIT” to exit the JPOS test utility.
Detailed Steps
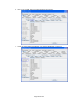
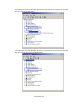
1. Open JavaPOStester located in one of the paths below:
• C:\<Program Files directory>\HP\HP MSR I-Series JPOS\POStest\POStest.bat.
• C:\xxxxx\Point of Sale\MSR (USB)\MSR JPOS\JPOS\POStest\POStest.bat.