
HP Point of Sale (POS) Peripherals Configuration Guide


Page 333 of 522
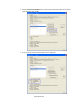
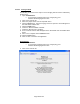
3. Click the Open Scanner button.
4. Click the Claim button.
5. Click the Enable button.
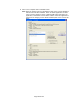
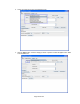
6. Click the Data Event Enable button or select Auto Data Event Enable so the status
states Ready to scan a label.
7. Scan a barcode.
8. After scan is complete click the Disable button.
Note: When the imaging scanner is disabled the LED on the scanner will blink to
indicate that it has been disabled. When an OPOS application has been
setup to use the imaging scanner in OPOS (USB COM) mode when the
application is started the scanner will be enabled. When the application is
exited then the imaging scanner will be disabled (LED on the scanner will
blink).
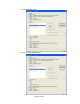
9. Click the Release button.
10. Click the Close Scanner button.
11. Exit ScannerTest.
Detailed Steps
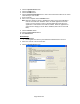
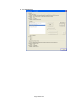
1. Open ScannerTest.
• C:\<Program Files directory>\HP\HPScannerOPOS\ScannerTest.exe.
2. Select the Scanner in the Scanners box.
3. Click the Open Scanner button.