
HP Point of Sale (POS) Peripherals Configuration Guide


Page 386 of 522
6.14.4.2 Testing HP ap5000 VFD in OPOS mode
The following is overview of the steps to test the ap5000 VFD followed by detailed steps:
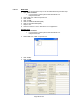
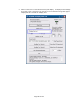
1. Start the OPOS test utility.
2. Click on “Clear Text” to clear the text on the pole display. To display a test message
on the pole, enter a message in the text box or use the default message that appear
“Display this text” and click on “Display Text”
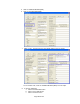
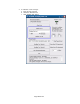
3. To blink a test message:
a. Enter the test message.
b. Check the “Blink” box
c. Click “Display Text” button.
4. To “Reverse” a test message:
a. Enter the test message.
b. Check the “Reverse” box
c. Click “Display Text” button.
5. To display a test message on different ROW or Column:
a. Enter the test message.
b. From the drop down menu select the column and row where you would like the
message to be displayed.
c. Click “Display Text At” button.
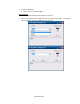
6. To cause message to scroll (test #1):
a. Click on “Scrolling Text Test #1” button. The pole will scroll a message and the
following message “Scrolling” appears on the VFD bottom line.
7. To cause message to scroll (test #2):
a. Click on “Scrolling Text Test #2” button. The pole will scroll a message and the
following message “Longer scroll message (37 characters)” appears on the VFD
bottom line.
8. To display a test message with delayed character appearing:
a. Enter different value (if so desired) for the delay time.
b. Click “Set CharacterDelayTime” button.
c. Enter a text message and click “Display Text” button.
9. To exit the OPOS test applet, click on the “EXIT” button or click on the “x” in the upper
right corner of the test applet.
Detailed Steps
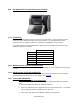
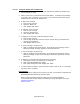
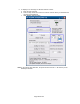
1. Start the OPOS test utility from the start menu or from “C:\xxxxx\Point of Sale\VFD HP
ap5000\ap5000 VFD OPOS Test Program” folder.
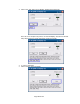
When the HP Pole Display OPOS test applet has successfully established
communication with the pole display, the following message will appear on the pole:
HPap5000LineDisplay
OPOS Test OK!