HP PageWide Enterprise Color MFP 785 FDSV ORFN $ VKLIW = # 6 ; DOW ' & ) 9 * % + 1 - . / 0 DOW " µ ³ HQWHU VKLIW 785z+ EN ZHCN Installation Guide KO 安装指南 TH ID Panduan Penginstalan JA 設置ガイド www.hp.com/videos/pagewide www.hp.
& ) & ) EN ZHCN Select a sturdy, well-ventilated, dust-free area, away from direct sunlight to position the printer. KO 选择一个稳固、通风良好、无尘且远离日光直射 的区域放置打印机。 TH ID Untuk meletakkan printer, pilih tempat yang kokoh, berventilasi baik, bebas debu, dan jauh dari sinar matahari langsung. JA プリンタの設置場所には、直射日光を避け、通気がよく埃の 少ない、しっかりした場所を選んでください。 직사광선을 피해 바닥이 단단하고 환기가 잘 되며 먼지가 없는 장 소를 선택하여 프린터를 내려 놓습니다.
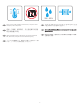
NJ OE P P LQ 3 P P LQ PP LQ & 0 < .
1 8: $ EN 8: $ 8: $ Install the input accessory that you ordered with this model. Follow the instructions on the install guide that came with the input accessory. CAUTION: Do not power on the printer until the input and finishing accessories are attached. ZHCN 安装随此型号订购的进纸附件。请按照进纸附件 随附的安装指南上的说明进行操作。 注意:在所有进纸附件和装订附件安装完成前, 请勿开启打印机。 ID Pasang aksesori input yang telah dipesan bersama model ini. Ikuti petunjuk pada panduan penginstalan yang disertakan bersama aksesori input.
1.1 1. 2. 3. EN 1.1 For dn+ and Z+ models, the paper input orientation is different from what is shown on the input accessory tray. Affix the new set of labels that are provided in the bag with the cartridges as shown in the next steps. ZHCN 对于 dn+ 和 Z+ 型号,进纸方向与进纸盘附件 上所示方向不同。按照后续步骤的说明,粘贴碳 粉盒随附袋子中提供的一组新标签。 ID KO TH 1.1 1.1 ZHTW 1.1 使用 dn+ 與 Z+ 機型時,實際進紙方向與進紙附件紙匣所 示方向並不相同。依照下列步驟所示,黏貼碳粉盒包裝袋中 的全新成套標籤。 1.
1.1A 9UW01A 1.1B 9UW02A x3 1.
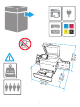
2 2.1 2.2 2.3 EN ZHCN Remove all tape, packing material and orange restraints. KO 取下所有胶带、包装材料和橙色束带。 TH ID Lepaskan semua perekat, bahan kemasan, dan pembatas oranye. JA すべてのテープ、梱包材、オレンジ色の固定具を取り外し ます。 테이프, 포장재 및 주황색 고정 장치를 모두 제거합니다.
3 3.1 3.2 3.3 3.4 3.6 3.
4 5 5.1 5.2 5.3 5.4 CAUTION: Use Letter/A4 paper in Tray 2 to initialize the printer. The printer will not initialize correctly with Tabloid/A3 paper loaded in Tray 2. KO ZHCN 注意:使用纸盘 2 中的 Letter/A4 纸张初始化打印 机。如果纸盘 2 中装入 Tabloid/A3 纸张,则打印 机无法初始化。 TH ID PERHATIAN: Gunakan kertas Letter/A4 dalam Baki 2 untuk menginisialisasi printer. Printer tidak akan diinisialisasi dengan benar jika menggunakan kertas Tabloid/A3 yang dimuat dalam Baki 2.
CAUTION: Do not extend more than one paper tray at a time. Do not use paper tray as a step. Keep hands out of paper trays when closing. All trays must be closed when moving the printer. Remove paper from the finisher accessory before moving it. KO ZHCN 注意:请勿一次伸出多个纸盘。 请勿使用纸盘作为阶梯。 闭合时,手远离纸盘。 移动打印机时,必须合上所有纸盘。 在移动装订器附件前,请先移除附件中的纸张。 TH ID PERHATIAN: Jangan rentangkan lebih dari satu baki kertas sekaligus. Jangan gunakan baki kertas sebagai pijakan. Jauhkan tangan dari baki kertas saat menutup.
6 9UW04A 2 EN ZHCN Unbox the finisher accessory that you ordered with this model. KO 拆开随此型号订购的装订器附件的包装箱。 ID Keluarkan aksesori akhir yang telah dipesan bersama model ini. JA このモデルと共に注文したフィニッシャアクセサリを箱か ら取り出します。 4 이 모델과 함께 주문한 피니셔 액세서리를 상자에서 꺼내십시오.
7 EN ZHCN Remove all tape and packing material. KO 去除胶带和包装材料。 TH ID Lepaskan semua perekat dan bahan kemasan. JA テープと梱包材をすべて取り除きます。 테이프와 포장재를 모두 제거합니다. ZHTW 移除所有膠帶和包裝材料。 8 8.1 EN ZHCN ID 8.1 Install the two metal brackets in the slots on the finisher chassis plate, and then install the two smaller screws to fasten the brackets to the finisher. 8.1 将两根金属支架安装到装订器机箱底盘上的插 槽中,然后安装两颗较小的螺丝将支架固定到装 订器上。 8.1 피니셔 섀시 플레이트의 구멍에 두 개의 금속 브래킷을 설치한 다음 작은 나사 두 개로 브래킷을 조여 피니셔에 고정시킵니다. TH 8.1 ZHTW 8.
8.2 EN 8.2 Place the lower output bin on the brackets, press down to align the four screw holes in the bin with the holes in the brackets, and then install the four larger screws. KO ZHCN 将下出纸槽放到支架上,按下以将该出纸糟上 的四个螺丝孔与支架上的孔对齐,然后安装四颗 较大的螺丝。 TH ID 8.2 8.2 하부 출력함을 브래킷에 맞추고 아래쪽으로 눌러 출력함에 있는 네 개의 나사 구멍을 브래킷의 구멍과 정렬한 다음 큰 나사 네 개를 설치합니다. 8.2 ZHTW 8.2 將下層的出紙槽放在固定架上,接著向下壓,將紙槽的四 個螺絲孔洞對齊固定架的孔洞,接著裝上四根大螺絲釘。 8.
ID ZHTW 8.3 Untuk memasang nampan keluaran atas, luruskan keempat tab di tepi nampan, dengan keempat slot pada finisher. Masukkan tab dengan bagian ujung nampan terangkat, setelah tab masuk, turunkan bagian ujung nampan ke posisinya dengan hati-hati. JA 8.3 在安裝上層出紙槽時,紙槽邊緣的四張彈片必須對齊完 稿機的四條安裝槽。紙槽向上抬高,接著插入其最遠端的彈 片,當彈片都插好之後,小心地將紙槽最遠端向下放到固定 位置。 8.3 上部排紙ビンを取り付けるには、排紙ビンの端にあ る 4 つのタブをフィニッシャの 4 つのスロットに合わせま す。ビンの先端を持ち上げた状態でタブを挿入し、タブが 挿入されたら、慎重に排紙ビンの端を所定の位置に下ろし ます。 9 9.1 9.2 EN KO 9.
11 10 10.1 10.2 10.3 EN 10.1 Turn the green wheel left to roll the stapler carriage away from you until the carriage spins. 10.2 Turn the green wheel right to roll the stapler carriage TOWARD you until it reaches its closest position. 10.3 Insert the new staple cartridge by holding the green wheel with one hand while pushing the staple cartridge into the slot. 10.4 Close the finisher rear door. ZHCN 10.1 向左旋转绿色滚轮让订书钉盒转动并远离 您,直到订书钉盒开始旋转。 10.2 向右旋转绿色 滚轮让订书钉盒转动并靠近您,直到到达极限。 10.
EN ZHCN ID JA If you are connecting to a network, connect the network cable now. CAUTION: Do not connect the USB cable now. NOTE: The cables are not included with the printer. KO 如果要连接到网络,则现在连接网络电缆。 注意:现在请勿连接 USB 电缆。 注:打印机未随附电缆。 TH ZHTW Jika Anda menyambung ke jaringan, sambungkan kabel jaringan sekarang. PERHATIAN: Jangan sambungkan kabel USB sekarang. CATATAN: Kabel tidak diberikan bersama printer. 네트워크에 연결하려면 지금 네트워크 케이블을 연결합니다. 주의: 아직 USB 케이블을 연결하지 마십시오. 참고: 케이블은 프린터에 포함되어 있지 않습니다.
11 11.1 11.2 X 11.3 EN 11.4 11.1 Connect the finisher cable to the printer. 11.2 Attach the finisher accessory to the printer. 11.3 Connect the power cable between the printer and a grounded AC outlet. 11.4 Turn on the printer, and then wait for it to initialize. On the control panel, set the language, the date/time format, and the time zone. NOTE: For advanced setup for network-connected printers, enter the printer IP address in the address bar of a web browser after the printer is in a ready state.
JA 11.1 フィニッシャ ケーブルをプリンタに接続します。 11.2 フィニッシャ アクセサリをプリンタに取り付けます。 11.3 電源ケーブル で、プリンタをアース付き AC コンセントに接続します。 11.4 電源をオンにし、プリンタが初期化されるまで待ちます。コントロー ル パネルで、言語、日付/時刻の形式、タイム ゾーンを設定します。注記:ネットワーク接続プリンタの高度なセットアップを行 う場合は、プリンタの準備完了後、Web ブラウザのアドレス バーにプリンタの IP アドレスを入力します。IP アドレスを検索するに は、[情報] ボタンを選択し、次に [イーサネット] アイコンを選択します。 注意:使用する電源が、プリンタの定格電圧に適しているか確認してください。定格電圧は、プリンタのラベルに記載されていま す。プリンタで使用する電圧は 100~127VAC または 220~240VAC、周波数は 50/60Hz です。プリンタの損傷を防ぐため、プリンタ に付属の電源ケーブル以外は使用しないでください。 KO 11.1 피니셔 케이블을 프린터에 연결합니다. 11.
EN Windows: Do not connect the USB cable until prompted during the software installation in the next step. If the network cable was connected previously, proceed to the next section. Mac: Connect the USB cable now. NOTE: The cables are not included with the printer. ZHCN Windows:直到软件安装过程的下一步中出现提 示后,再连接 USB 电缆。如果以前连接了网络电 缆,则继续执行下一部分。 Mac:现在连接 USB 电缆。 注:打印机未随附电缆。 ID Windows: Jangan sambungkan kabel USB sebelum diminta saat penginstalan perangkat lunak berlangsung pada langkah berikutnya.
EN Download the software installation files. Method 1: Download HP Easy Start (Windows and macOS clients) 1. Go to 123.hp.com and click Download. 2. Follow the onscreen instructions. Method 2: Download from product support website (Windows clients and servers) 1. 2. 3. 4. ID o to the product support website: G www.hp.com/support/pwcolor785MFP Select software and drivers. Download the software for your printer model and operating system.
KO ZHTW 下載軟體安裝檔。 方法 1:下載 HP Easy Start(Windows 和 macOS 用戶端) 1. 前往 123.hp.com,然後按一下 Download(下載)。 2. 依照螢幕上的指示進行。 方法 2:從產品支援網站下載(Windows 用戶端和伺服器) 소프트웨어 설치 파일을 다운로드합니다. 방법 1: HP Easy Start 다운로드 (Windows 및 macOS 클라이언트) 1. 123.hp.com 로 이동한 다음 다운로드를 클릭합니다. 2. 화면에 표시되는 안내를 따릅니다. 방법 2: 제품 지원 웹사이트에서 다운로드 (Windows 클라이언트 및 서버) 1. 2. 3. 4. 제품 지원 웹 사이트: www.hp.com/support/pwcolor785MFP 로 이동하십시오. 소프트웨어 및 드라이버를 선택합니다. 해당 프린터 모델 및 운영 체제용 소프트웨어를 다운로드합니다. 파일이 저장된 폴더에서 소프트웨어 파일을 실행한 다음 화면에 표시되는 안내를 따릅니다. 1. 2. 3.
EN For information on firmware updates, advanced configuration using the Embedded Web Server, and remote and mobile printing using HP ePrint go to www.hp.com/support/pwcolor785MFP Select the Help button on the printer control panel to access Help topics. KO ZHCN 有关固件更新、使用内嵌式 Web 服务器进行高级 配置和使用 HP ePrint 进行远程和移动打印的信 息, 请访问 www.hp.com/support/pwcolor785MFP 选择打印机控制面板上的帮助按钮 以访问帮助 主题。 TH 펌웨어 업데이트, 내장형 웹 서버를 통한 고급 구성, HP ePrint를 통한 원격 및 모바일 인쇄에 대한 자세한 내용은 www.hp.com/support/pwcolor785MFP 로 이동하십시오.
www.hp.com © Copyright 2020 HP Development Company, L.P. Reproduction, adaptation or translation without prior written permission is prohibited, except as allowed under the copyright laws. The information contained herein is subject to change without notice. The only warranties for HP products and services are set forth in the express warranty statements accompanying such products and services. Nothing herein should be construed as constituting an additional warranty.