Hardware Reference Guide - HP Compaq dc7800 Small Form Factor
Table Of Contents
- Product Features
- Hardware Upgrades
- Serviceability Features
- Warnings and Cautions
- Using the Small Form Factor Computer in a Tower Orientation
- Unlocking the Smart Cover Lock
- Removing the Computer Access Panel
- Replacing the Computer Access Panel
- Removing the Front Bezel
- Removing Bezel Blanks
- Replacing the Front Bezel
- Installing Additional Memory
- Removing or Installing an Expansion Card
- Drive Positions
- Installing and Removing Drives
- System Board Drive Connections
- Removing an Optical Drive
- Installing an Optical Drive into the 5.25-inch Drive Bay
- Removing an External 3.5-inch Drive
- Installing a Drive into the 3.5-inch External Drive Bay
- Removing and Replacing the Primary 3.5-inch Internal SATA Hard Drive
- Removing and Replacing a Removable 3.5-inch SATA Hard Drive
- Specifications
- Battery Replacement
- External Security Devices
- Electrostatic Discharge
- Computer Operating Guidelines, Routine Care and Shipping Preparation
- Index

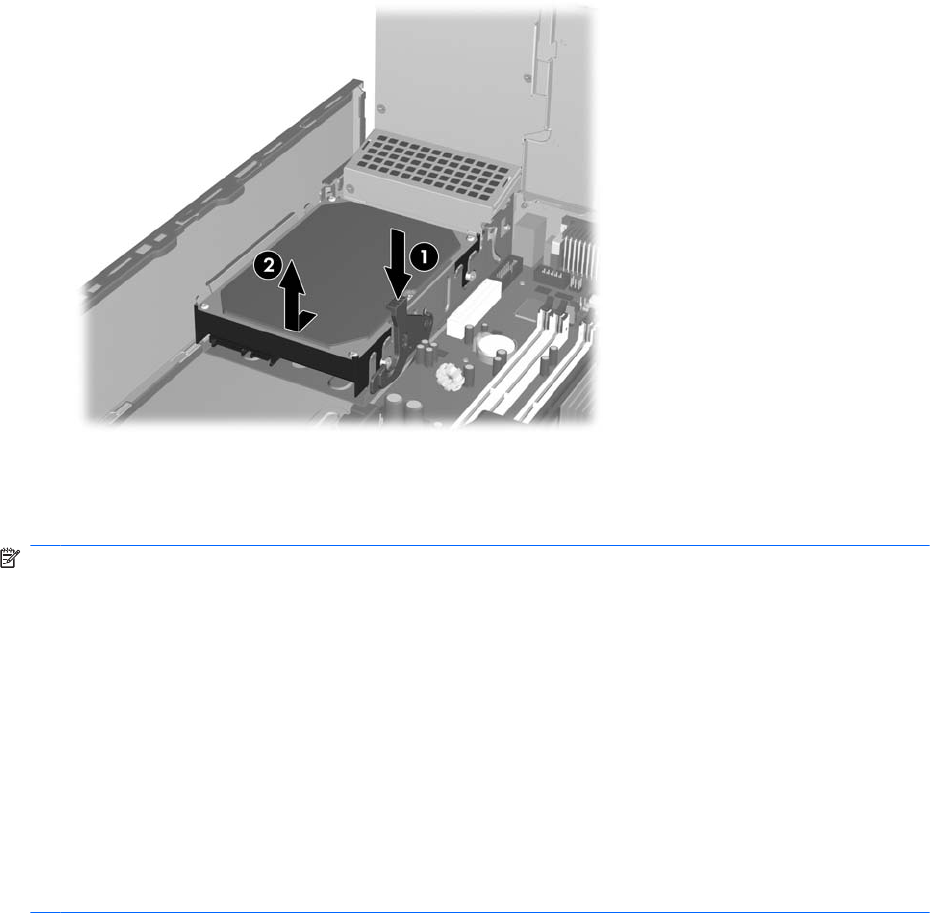
10. Press down on the green release latch next to the hard drive (1). While holding the latch down,
slide the drive forward until it stops, then lift the drive up and out of the bay (2).
Figure 2-38 Removing the Hard Drive
11. To install a hard drive, you must transfer the silver and blue isolation mounting guide screws from
the old hard drive to the new hard drive. Align the guide screws with the slots on the chassis drive
cage, press the hard drive down into the bay, then slide it back until it stops and locks in place.
NOTE: When replacing the primary hard drive, be sure to route the SATA and power cables through
the cable guide on the bottom of the chassis frame behind the hard drive.
If the system has only one SATA hard drive, the data cable must be connected to the dark blue connector
labeled SATA0 on the system board to avoid any hard drive performance problems. If you are adding
a second hard drive, connect the other end of the data cable to the next available (unpopulated) SATA
connector on the system board by following the numbered sequence of the connectors.
When replacing the primary hard drive, transfer the four silver and blue isolation mounting guide screws
from the old drive to the new one. You will need a Torx T-15 or flat blade screwdriver to remove and re-
install the guide screws.
If you are replacing the primary hard drive, make sure you have created a Recovery Disc Set to restore
the operating system, software drivers, and any software applications that were preinstalled on the
computer. If you do not have this CD set, select Start > HP Backup and Recovery and create it
now.
ENWW Installing and Removing Drives 41


