
Hardware Reference Guide - HP Compaq dc7800 Small Form Factor
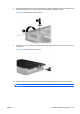

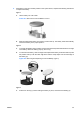
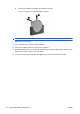
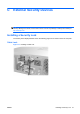
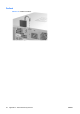
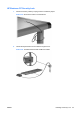
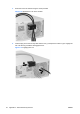
Table Of Contents
- Product Features
- Hardware Upgrades
- Serviceability Features
- Warnings and Cautions
- Using the Small Form Factor Computer in a Tower Orientation
- Unlocking the Smart Cover Lock
- Removing the Computer Access Panel
- Replacing the Computer Access Panel
- Removing the Front Bezel
- Removing Bezel Blanks
- Replacing the Front Bezel
- Installing Additional Memory
- Removing or Installing an Expansion Card
- Drive Positions
- Installing and Removing Drives
- System Board Drive Connections
- Removing an Optical Drive
- Installing an Optical Drive into the 5.25-inch Drive Bay
- Removing an External 3.5-inch Drive
- Installing a Drive into the 3.5-inch External Drive Bay
- Removing and Replacing the Primary 3.5-inch Internal SATA Hard Drive
- Removing and Replacing a Removable 3.5-inch SATA Hard Drive
- Specifications
- Battery Replacement
- External Security Devices
- Electrostatic Discharge
- Computer Operating Guidelines, Routine Care and Shipping Preparation
- Index
8. Place the thermal sensor on top of the hard drive in a position that does not cover the label (1) and
attach the thermal sensor to the top of the hard drive with the adhesive strip (2).
Figure 2-45 Replacing the Thermal Sensor
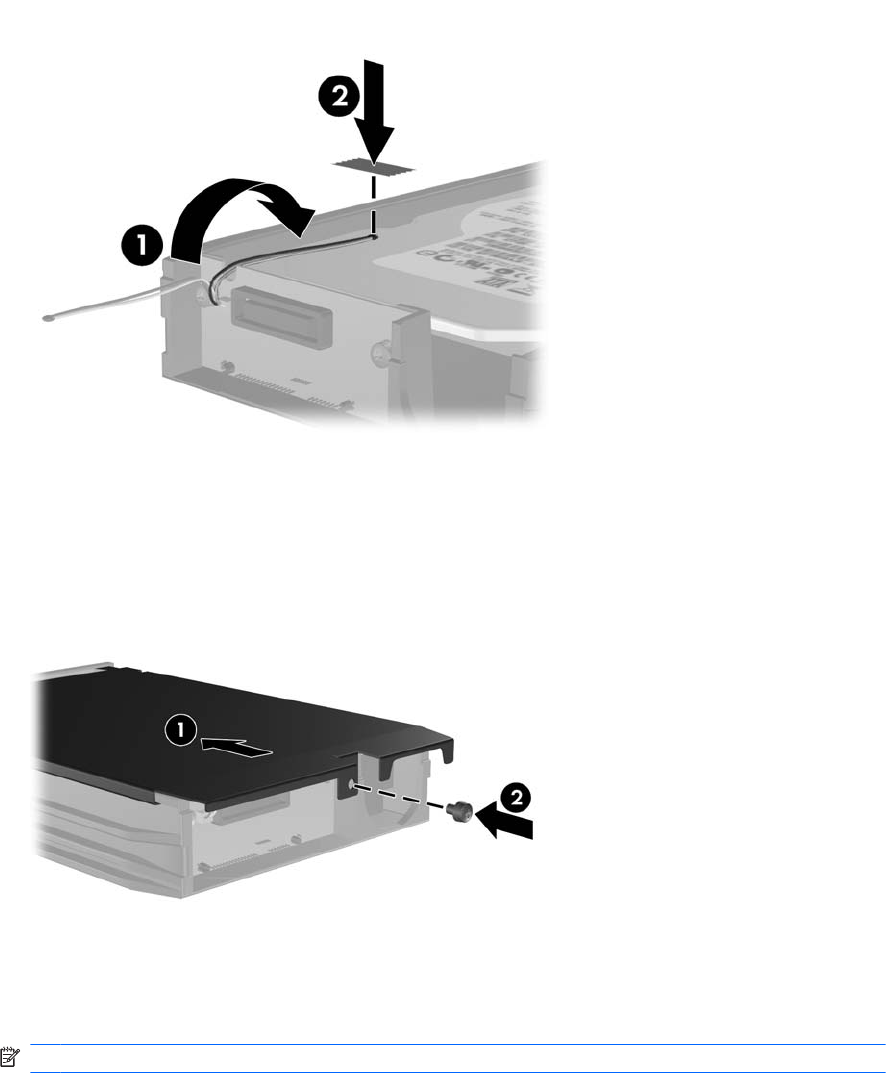
9. Slide the cover on the carrier (1) and replace the screw on the rear of the carrier to secure the cover
in place (2).
Figure 2-46 Replacing the Carrier Cover
10. Slide the hard drive carrier into the enclosure on the computer and lock it with the key provided.
NOTE: The carrier must be locked for power to be supplied to the hard drive.
ENWW Installing and Removing Drives 45