
HP Enterprise, HP Managed - HP Universal Scan Solution User Guide
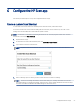

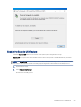
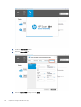


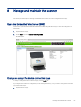
Table Of Contents
- Introduction
- Install the HP Scan app
- App overview
- Use the HP Scan app
- Use the scan preview window to edit scanned pages
- View scanned pages in a thumbnail grid in the scan preview window
- View scanned pages in a document list in the scan preview window
- View a scanned page using zoom mode in the scan preview window
- Use the scan preview window to crop pages
- Use the scan preview window to delete or remove pages
- Use the scan preview window to add or remove pages
- Use the scan preview window to change page order
- Use the scan preview window to change page orientation
- Use the scan preview window to insert a divider, page break, or job separator
- Scan more pages in the scan preview window
- Configure the HP Scan app
- Manage Shortcuts
- Manage and maintain the scanner
- Uninstall the HP Scan app or remove a device from the app
- Index

4. Select Yes to conrm. This cannot be undone.
The Scan Shortcut settings are resets to the factory default values.
Delete a Scan Shortcut
To delete a custom Scan Shortcut you created in the HP Scan app, follow these steps.
NOTE: Factory default Scan Shortcuts cannot be deleted.
1. Open the HP Scan app.
2. On the Scan tab, select Scan a Document or Photo.
The scan interface opens.
3. In the left pane of the home screen, right-click the shortcut and select Delete <Shortcut name>.
4. Select Yes to conrm delete. This cannot be undone.
64 Chapter 7 Manage Shortcuts