
User Guide - Windows 10


Table Of Contents
- Welcome
- Components
- Network connections
- Screen navigation
- Entertainment features
- Power management
- Shutting down (turning off) the computer
- Setting power options
- Using power-saving states
- Using battery power
- Using external AC power
- Security
- Protecting the computer
- Using passwords
- Using antivirus software
- Using firewall software
- Installing critical security updates
- Using HP Client Security (select products only)
- Using HP Touchpoint Manager (select products only)
- Installing an optional security cable (select products only)
- Using a fingerprint reader (select products only)
- Maintenance
- Backup and recovery
- Computer Setup (BIOS), TPM, and HP Sure Start
- HP PC Hardware Diagnostics (UEFI)
- Specifications
- Electrostatic Discharge
- Accessibility
- Index
Inserting a SIM card (select products only)
CAUTION: To prevent damage to the connectors, use minimal force when inserting a SIM card.
To insert a SIM card, follow these steps:
1. Turn o the computer by using the Shut down command.
2. Close the display.
3. Disconnect all external devices connected to the computer.
4. Unplug the power cord from the AC outlet.
5. Turn the computer upside down on a at surface, with the battery bay toward you.
6. Remove the battery.
7. Remove the smaller service door.
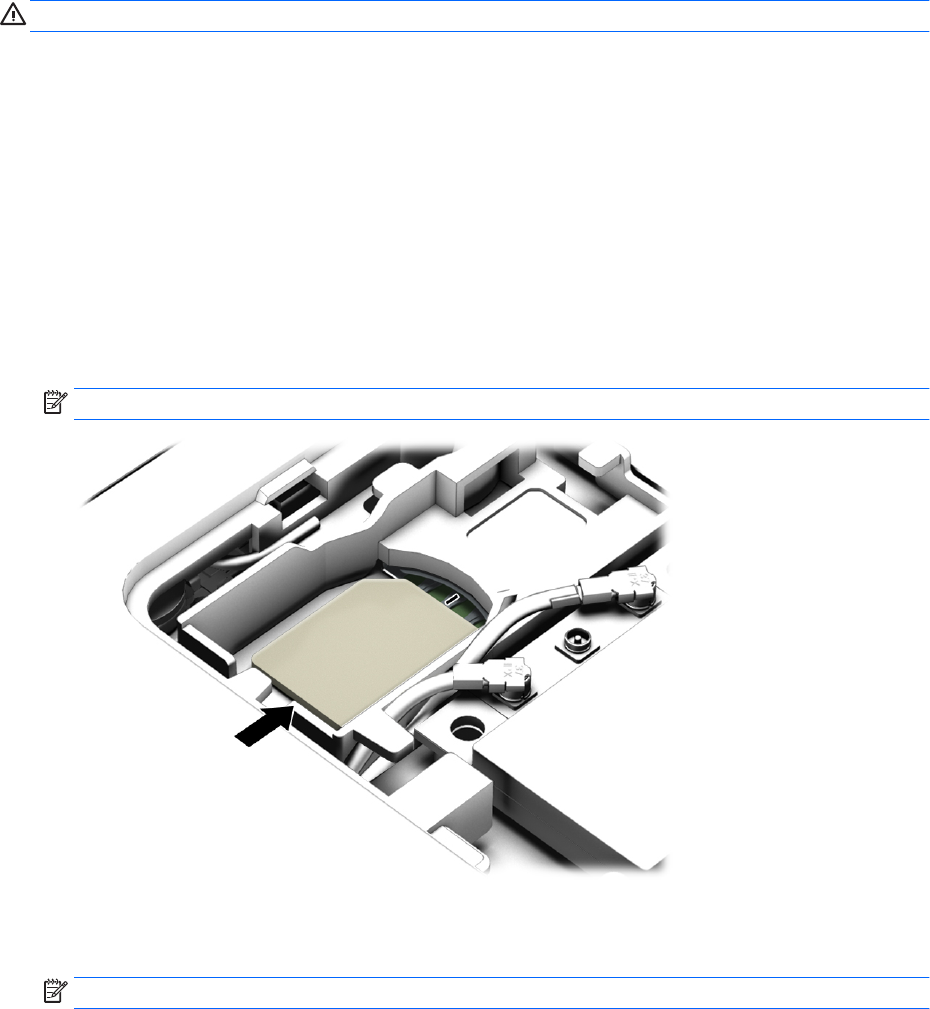
8. Insert the SIM card into the SIM card slot, and then press in on the SIM card until it is rmly seated.
NOTE: See the image below to determine which way the SIM should be inserted into your computer.
9. Replace the service door.
10. Insert the battery.
NOTE: HP Mobile Broadband will be disabled if the battery is not replaced.
11. Reconnect external power.
12. Reconnect external devices.
13. Turn on the computer.
To remove a SIM card, press in on the SIM card, and then remove it from the slot.
Inserting a SIM card (select products only) 29