
User Manual


Table Of Contents
- Product basics
- Software for Windows
- Use the product with Mac
- Connect the product
- Paper and print media
- Print tasks
- Cancel a print job
- Print with Windows
- Open the Windows printer driver
- Get help for any print option with Windows
- Change the number of print copies with Windows
- Print colored text as black with Windows
- Save custom print settings for reuse with Windows
- Improve print quality with Windows
- Print the first or last page on different paper with Windows
- Scale a document to fit page size with Windows
- Add a watermark to a document with Windows
- Print on both sides (duplex) with Windows
- Create a booklet with Windows
- Print multiple pages per sheet with Windows
- Select page orientation with Windows
- Use HP ePrint
- Manage and maintain
- Solve problems
- Supplies and accessories
- Service and support
- Specifications
- Regulatory information
- FCC regulations
- Environmental product stewardship program
- Protecting the environment
- Ozone production
- Power consumption
- Toner consumption
- Paper use
- Plastics
- HP LaserJet print supplies
- Return and recycling instructions
- Paper
- Material restrictions
- Disposal of waste equipment by users in private households in the European Union
- Chemical substances
- Material Safety Data Sheet (MSDS)
- For more information
- Declaration of conformity
- Safety statements
- Index
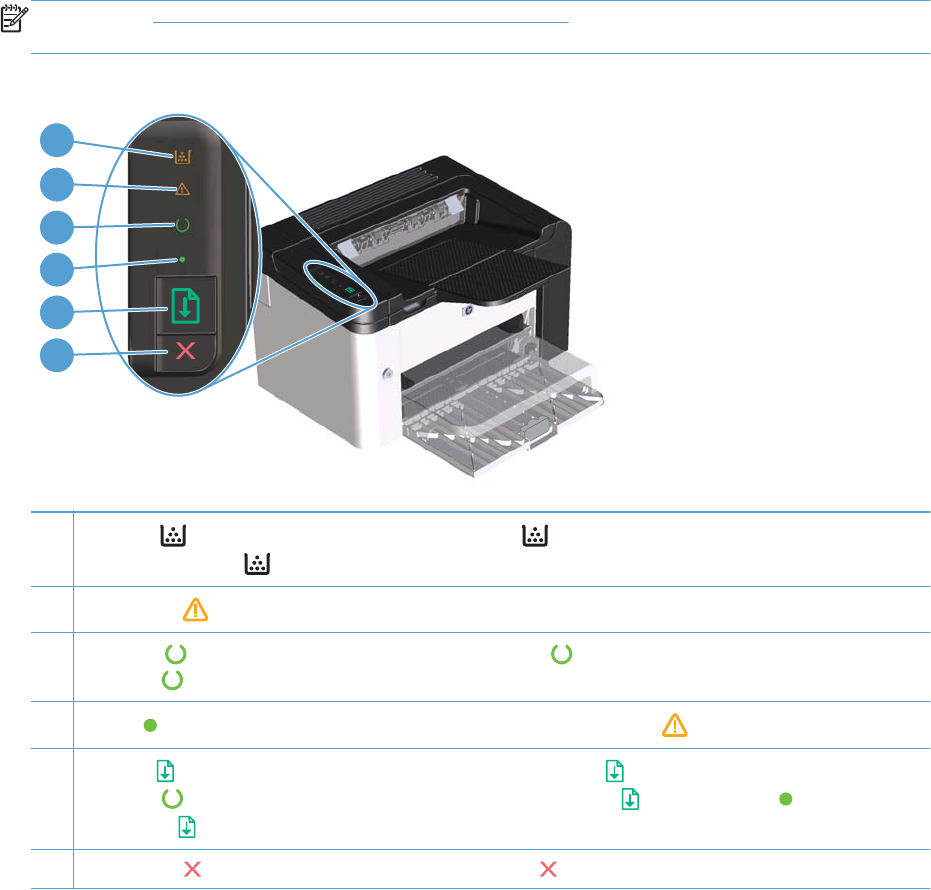
Control-panel layout
The control panel contains four lights and two buttons.
NOTE: See Interpret control-panel light patterns on page 80 for a description of what the light
patterns mean.
Figure 1-3 HP LaserJet Professional P1560 and P1600 printer series control panel
2
3
4
5
6
1
1
Toner light
: When the print cartridge is low, the toner light illuminates. When the print cartridge is out of the
product, the toner light
blinks.
2
Attention light
: Indicates that the print-cartridge door is open or other errors exist.
3
Ready light
: When the product is ready to print, the ready light is on. When the product is processing data, the
ready light
blinks.
4
Go light
: Indicates that there is a continuable error (along with the attention light ).
5
Go button
: To print a configuration page, press and hold the go button , and then release the button when the
ready light
blinks. To print a demo page, press and release the go button . When the go light is flashing, press
the go button
to continue the print job.
6 Cancel button
: To cancel the print job, press the cancel button .
8 Chapter 1 Product basics ENWW