Getting Started
For more information about HP products and services, see the HP Web site at http://www.hp.com. © Copyright 2010 Hewlett-Packard Development Company, L.P. Windows is a U.S. registered trademark of Microsoft Corporation. The information contained herein is subject to change without notice. The only warranties for HP products and services are set forth in the express warranty statements accompanying such products and services. Nothing herein should be construed as constituting an additional warranty.
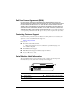
End User License Agreement (EULA) BY INSTALLING, COPYING, DOWNLOADING, OR OTHERWISE USING ANY SOFTWARE PRODUCT PRE-INSTALLED ON THIS PC, YOU AGREE TO BE BOUND BY THE TERMS OF THE HP EULA. IF YOU DO NOT ACCEPT THESE LICENSE TERMS, YOUR SOLE REMEDY IS TO RETURN THE ENTIRE UNUSED PRODUCT (HARDWARE AND SOFTWARE) WITHIN 14 DAYS FOR A REFUND SUBJECT TO THE REFUND POLICY OF YOUR PLACE OF PURCHASE.
Warranty Information You may find the expressly provided HP Limited Warranty applicable to your product in the start menu on your PC and/or in the CD/DVD provided in the box. Some countries/regions may provide a printed HP Limited Warranty in the box. In countries/regions where the warranty is not provided in printed format, you may request a printed copy from www.hp.
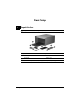
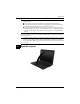
Basic Setup 1 Unpack the box ✎ Computer color, features, and options may vary. Component Component 1 AC adapter 3 Battery 2 Computer 4 Power cord ✎ Getting Started Batteries and power cords vary in appearance by country or region.
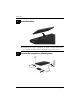
Basic Setup 2 Insert the battery To reduce potential safety issues, use only the AC adapter or battery Å WARNING: provided with the computer, a replacement AC adapter or battery provided by HP, or a compatible AC adapter or battery purchased as an accessory from HP.
Basic Setup WARNING: To reduce the risk of electric shock or damage to your equipment, observe Å these practices: ■ Plug the power cord into an AC outlet that is easily accessible at all times. ■ Disconnect power from the computer by unplugging the power cord from the AC outlet (not by unplugging the power cord from the computer). ■ If provided with a 3-pin attachment plug on your power cord, plug the cord into a grounded (earthed) 3-pin outlet.
Basic Setup 5 Turn on the computer the computer will not start up, be sure that the power cord and AC adapter ✎ Ifconnections are secure. 6 Set up the software After the computer is turned on, the software setup process begins. The on-screen instructions guide you through setting up and registering your computer. After you respond to the setup prompt, you must complete the entire setup process without interruption. Select your language carefully.
What’s Next? Locating the electronic manuals For detailed information about your computer, such as power management, drives, memory, security, and other features, click Start, click Help and Support, and then click User Guides. You do not need to connect to the Internet to access the user guides in Help and Support. desktop of your computer may look slightly different from the illustration in this ✎ The section.
What’s Next? WARNING: To reduce the risk of serious injury, read the Safety & Comfort Guide. It Å describes proper workstation setup and proper posture, health, and work habits for computer users. The Safety & Comfort Guide also provides important electrical and mechanical safety information. To access this document, click Start, click Help and Support, and then click User Guides, or refer to the User Guides disc included with some models.
What’s Next? Recovering In case of system failure or instability, use the Operating System disc and the Driver Recovery disc that are included with the computer to recover your operating system and programs. The recovery process reformats and completely erases the hard drive. All files you Ä CAUTION: have created and any software installed on the computer are permanently removed. The recovery process reinstalls the original operating system as well as software and drivers.
What’s Next? 3. Click the option for software and driver downloads, and then type your computer model number in the product box. 4. Press enter. 5. Follow the on-screen instructions. To update the software using a Support Software disc, follow these steps: 1. Insert the Support Software disc into an optional external optical drive. 2. Follow the on-screen instructions. To update the software using the HP Web site, follow these steps: 1. Identify your computer model, product category, and series or family.
What’s Next? Downloading a BIOS update CAUTION: To prevent damage to the computer or an unsuccessful installation, Ä download and install a BIOS update only when the computer is connected to reliable external power using the AC adapter. Do not download or install a BIOS update while the computer is running on battery power, docked in an optional docking device, or connected to an optional power source.
What’s Next? 3. Using the hard drive path you recorded earlier, open the folder on your hard drive that contains the update. 4. Double-click the file that has an .exe extension (for example, filename.exe). The BIOS installation begins. 5. Complete the installation by following the instructions on the screen. a message on the screen reports a successful installation, you may delete the ✎ After downloaded file from your hard drive. Updating programs and drivers 1. Open your Web browser, go to http://www.hp.
Product Information and Troubleshooting Input power The power information in this section may be helpful if you plan to travel internationally with the computer. The computer operates on DC power, which can be supplied by an AC or a DC power source. The AC power source must be rated at 100–240 V, 50–60 Hz. Although the computer can be powered from a standalone DC power source, it should be powered only with an AC adapter or a DC power source supplied and approved by HP for use with this computer.
Product Information and Troubleshooting Traveling with the computer The computer is built to go with you for work and play. For best results, follow these traveling and shipping tips. ■ Prepare the computer for traveling or shipping: 1. Back up your information. 2. Remove all optical discs and all external media cards, such as digital cards and ExpressCards.
Product Information and Troubleshooting Routine care Cleaning the display : To prevent permanent damage to the computer, never spray water, cleaning Ä CAUTION fluids, or chemicals on the display. To remove smudges and lint, frequently clean the display with a soft, damp, lint-free cloth. If the screen requires additional cleaning, use premoistened antistatic wipes or an antistatic screen cleaner.
Product Information and Troubleshooting Quick troubleshooting The computer is unable to start up If the computer does not turn on when you press the power button, adequate power may not be available to the computer. The following suggestions may help you determine why the computer will not start up: ■ If the computer is plugged into an AC outlet, plug another electrical device into the outlet to be sure that the outlet is providing adequate power.
Product Information and Troubleshooting The computer is unusually warm It is normal for the computer to feel warm to the touch while it is in use. But if the computer feels unusually warm, it may be overheating because a vent is blocked. If you suspect that the computer is overheating, turn off the computer to allow the computer to cool to room temperature. Then be sure to keep all vents free from obstructions while you are using the computer.