HP Media Center PC Software Guide
The information in this document is subject to change without notice. Hewlett-Packard Company makes no warranty of any kind with regard to this material, including, but not limited to, the implied warranties of merchantability and fitness for a particular purpose. ® HP shall not be liable for errors contained herein or for incidental or consequential damages in connection with the furnishing, performance, or use of this material.
Table of Contents Using Media Center ...................................... 1 Getting Started with Media Center ......................................... 1 Media Center Features.......................................................... 1 Media Center Start Menu ...................................................... 4 Setting the PC Location for the Program Guide ......................... 5 Media Center Setup.............................................................. 5 Setting Up Media Center.............
Recording TV Shows to DVDs ................... 109 About Copying Recorded TV Programs to DVD.....................109 Copying Recorded TV Programs to DVD or CD.....................110 Watching Recorded TV Programs on DVD ...........................111 Capturing Analog Home Video ..........................................112 Using Double-Layer Technology and Media .........................113 Copy Protection................................................................114 Playing CDs and DVDs .............
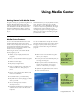
Using Media Center Getting Started with Media Center This guide can help you get started using Microsoft Windows XP Media Center Edition and other software programs. HP has combined the features of the HP Pavilion home PC with the Microsoft® Windows® XP Media Center Edition operating system to create a powerful entertainment center for you. With Media Center you can play all kinds of audio, video, and picture media by using a specially designed remote control.
Getting the most out of Media Center It is best to have the following items completed before trying to use Media Center; otherwise, many of the program features won’t be available to you. Before opening Media Center, make sure: ■ The HP Media Center PC is set up correctly. For setup information, refer to the setup poster. ■ The remote control has two AA alkaline batteries installed.
Navigating Media Center In the Media Center windows, a selected item such as a folder, file, or menu item is outlined with a green border. To select items in Media Center, use the arrow buttons on the remote control, and then use the OK button to enter your selection. If you have media playing, such as music or television, it appears in an inset window in the lower-left corner.
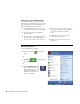
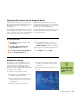
Media Center Start Menu C D E F G H A J K L M N O P B n You can use the Minimize and Resize buttons to run Media Center side by side with another program from your desktop.
Setting the PC Location for the Program Guide During the initial setup of the PC, you specify your PC country/region location. Media Center uses this information to select the country/region for the Program Guide. Media Center Program Guide setting, an error message may appear. You may also see No data available in the Program Guide, or you may not be able to get the correct Program Guide. The Media Center PC uses United States as the PC location by default.
Setting Up Media Center n Use Media Center settings to: ■ Change settings for your television service provider. ■ Change settings for your Internet Service Provider. ■ Manually update the My TV Program Guide. ■ Check your remote control. ■ Change your postal code to receive the correct Program Guide for your area. 6 It is best to complete each step in the Media Center setup wizard to be able to use all the features in Media Center.
2 Select the download method for your Internet connection In this step, you select options for your Internet connection so that Media Center can download and update your Program Guide and display information about your music CDs and other media. a You can have Media Center automatically download the Guide when connected, or you can manually download the Guide when you connect to the Internet.
3 Set up television signal This step makes sure your computer receives the correct TV signal and the correct Program Guide information. If you have a set-top box, the setup wizard programs your remote control to work with your set-top box so that you can view premium channels. Make sure the TV signal source is properly connected to your PC and the correct TV provider is selected. a Select your TV service. b Select if you have a set-top box. Sometimes a set-top box receives a TV signal.
Media Center Menu Bars When you move the mouse, the Media Center menu bars appear. When you use the remote control, or when you stop using the mouse (after 5 seconds), the menu bars disappear. You can switch to the desktop at any time without closing or minimizing Media Center. You don’t need to minimize the Media Center window to open another program or go to a Web site. You can just resize the Media Center window and then open another program by using the Start menu.
Setting Media Center as the Automatic CD Player When you insert a CD while Media Center is active, your CD plays automatically after a few seconds. If you are not in Media Center, Windows asks you what you want to do with the CD. To avoid this message, you can select Media Center as the primary program to play CDs. To select Media Center as the primary CD playing program: 1 2 3 4 Close Media Center. Insert a CD into the drive. A message appears asking you what you want Windows to do.
Keyboard The keyboard shortcut buttons do not open the Media Center program. Refer to “Using the Keyboard” in the HP Media Center PC Getting Started Guide for more information about your keyboard shortcut keys. + Using Media Center Help 1 2 3 Press the Start button control. on the remote Move the mouse to show the Media Center navigation bar, and then select the Help (?) icon from any window in Media Center.
Changing Media Center Settings In the Media Center Settings window, you can change settings for watching television, for viewing your pictures and slide shows, and for controlling sound and the display of all the Media Center windows. To change your Media Center settings: n Some settings such as parental control and caption display settings for TV and DVDs are included with select models only. 1 2 3 Press the Start button control. Select Settings. ■ Radio to organize or delete pre-set radio stations.
Using the Remote Control The remote control is designed to work with Media Center. You can use your remote control with Media Center to play CDs, DVDs, and videos, to view pictures, and to watch and record television programs. This remote control helps you navigate the Media Center windows on your computer just as a cable TV remote control navigates cable TV options or controls the playback of a movie in a VCR or DVD player.
Remote Control Buttons Overview A Standby puts the PC into and out of a power-reduced state. B DVD Menu opens main menu on a DVD movie, if available. C Radio opens the FM Radio window. E Record records a selected television program and stores it on the hard disk. F REW (Rewind) moves the media backward at two speeds. G Replay moves media backward 7 seconds. H Pause pauses audio and video tracks, and pauses live or recorded TV programs.
Q TV opens the My TV window. R Pictures opens the My Pictures window. S Videos opens the My Videos window. T Play plays selected media. U Stop stops media currently playing. V FWD (Fast-forward) moves media forward at three speeds. W Skip moves media forward, for example, 30 seconds in videos and live TV, or one music track. X Guide opens Television Program Guide to display available TV channels and programs to watch and record. Y OK selects the desired action or window option.
To begin using your remote control 1 2 3 Point the remote control at the remote sensor. The remote sensor should be located near your monitor or in a convenient place. Make sure there is nothing blocking the pathway between your remote control and the remote sensor. To start Media Center and to open the Media Center Start menu, press the Start button . If this is your first time using the remote control, the Media Center setup wizard opens.
Remote Control Buttons Direct access buttons The direct access buttons open the main Media Center windows. DVD MENU RADIO TV MUSIC PICTURES VIDEOS Button Function DVD Menu Opens the Play DVD main menu where you can play your DVD movies. TV n Opens the My TV window where you can watch and record TV, open your Television Program Guide, schedule future TV recordings, and find your recorded TV programs. Radio Opens the FM radio station window where you can select FM radio stations to listen to.
Standby button n Make sure you turn off the monitor and turn down or mute the volume, for example, if you have a scheduled recording in the middle of the night and don’t want to be disturbed. The PC will not automatically go into standby mode if Media Center is open. It is best to close Media Center before you manually place the PC in standby mode.
Media playback buttons These buttons allow you to play back picture slide shows, music files, playlists, music CDs, DVD movies, home videos, and live TV, from within the Media Center program. RECORD PLAY REW STOP FWD PAUSE REPLAY SKIP Button Function Record Records TV programs. The Record button works only when My TV is used to play a TV show. It is inactive when other media is playing. ■ Press Record once to record a TV show while watching live TV or while in the Guide.
Navigation and other direct access buttons These buttons allow you to move the cursor and to select actions within the Media Center windows. BACK GUIDE OK LIVE TV Button Back Guide RECORDED TV Function Returns to the previous window. Opens the electronic Television Program Guide. Arrows Move between menus, windows, or activities. Move the cursor to select actions within the Media Center windows. OK Selects a desired action and works as an Enter button.
Audio and video buttons The audio and video buttons change channels, adjust volume, and show details of selected media. VOLUME MORE INFO CHANNEL/ PAGE MUTE ABC DEF 1 2 3 GHI JKL MNO 4 5 6 PQRS TUV WXYZ 7 8 9 ENTER CLEAR 0 PRINT hp media center Button Function Volume (+ and –) Increases or decreases PC volume. More Info Displays media information. Some media may not include this information. This button displays details such as TV program summary or music artist.
22 HP Media Center PC Software Guide
Using an HP Personal Media Drive The HP Personal Media Drive is an internal and external USB hard disk drive designed to quickly and easily increase your storage capacity and to transfer media files such as digital photos, music, videos, and other important files. You can also use the HP Personal Media Drive to back up other drives on your PC. n The HP Personal Media Drive is sold separately. The HP Personal Media drive is designed to: ■ Work with the Media Center PC and other PCs that have a USB port.
Assigning a Drive Letter to the HP Personal Media Drive n The installation CD that came with your HP Personal Media Drive allows you to assign a drive letter to the HP Personal Media Drive. You can permanently assign a drive letter to avoid the letter changing when you connect and disconnect this drive and other devices. Also, it is easier for a software program to locate files on the HP Personal Media Drive if a drive letter is assigned.
Playing Music Files You can play all kinds of music that are stored on HP Personal Media Drive. If you want the music files that are stored on your HP Personal Media Drive to appear in the Windows Media Player Library and the Media Center My Music window, you must create a link to this drive. 5 6 7 To do this: 1 2 3 4 Click Start on the taskbar, click My Computer, and then double-click the HP Personal Media Drive icon.
5 6 7 Right-click anywhere in the My Pictures window, select New, and then select the Shortcut. When the Create Shortcut wizard window opens, click Browse and locate your personal pictures folder, select the folder, and then click OK. Click Next and then click Finish. The shortcut to your personal picture folder appears in the My Pictures window. 8 Click Add to add a pathway to your HP Personal Media Drive.
Watching TV Programs Stored on the HP Personal Media Drive To play back recorded TV files stored on your HP Personal Media Drive, you must: 1 2 3 4 Connect your HP Personal Media Drive to the PC with the PC turned off. Turn on the PC and open Media Center. 5 6 Click Settings, TV, Recorder, Recorder storage. Under Record on drive select the HP Personal Media Drive, select Save, and then select Yes. A Recorded TV folder is created and placed in your HP Personal Media Drive.
Recording TV Programs to the HP Personal Media Drive When you set the TV recording pathway to your HP Personal Media Drive, Media Center stores the recording buffer data for pausing live TV on your drive. This means that if live TV is playing, you won’t be able to remove the drive safely. To avoid this scenario, change the recording pathway back to your local hard disk drive, and then restart the PC before disconnecting the HP Personal Media Drive.
4 Under Record on Drive, select “+” to select the HP Personal Media Drive. You can also set the disk allocation and recording quality settings in this window. 5 6 7 Click Save and then click Yes. Close Media Center. Restart the PC. HP recommends that you know the drive letter assigned and the storage amount of your HP Personal Media Drive. Changing the TV recording path to the local hard disk drive To change the Media Center TV recording path to your local hard disk drive: 1 2 Open Media Center.
Changing disk allocation If you experience a Low Disk Space error message, and you want to change the disk allocation to a higher percentage for your HP Personal Media Drive: 1 2 Open Media Center. 3 Select Settings, TV, Recorder, and then select Recorder storage. Change the disk allocation percentage setting by selecting the “+” or “–“ option.
Convenient media file locations Most media files that you copy from CD or download from the Internet can be placed in specific folders on your local hard disk drive for easy access. For example, you download a music file from the iTunes Music Store, and place it into your My Music folder in My Documents. You may want to go to these locations to move or copy your files into your HP Personal Media Drive. Below is a quick reference of your digital media file locations on your local hard disk drive.
32 HP Media Center PC Software Guide
Watching and Recording TV Programs The Media Center PC acts as a digital video recorder (DVR) which works with the Media Center remote control so you can watch and record TV programs at your own convenience and pace. n In My TV you can: ■ Watch your favorite television programs in full-screen mode or in an inset window. ■ Check which TV programs you have scheduled to record. ■ Pause, stop, rewind, and fast-forward live TV. ■ ■ Record a single TV program or an entire series.
Watching TV Before you can watch TV by using Media Center, make sure: n You can change the channel by using the remote control while in full-screen mode or when the inset window is selected. You can go to live TV from anywhere in Windows Media Center by pressing Live TV on the remote control. You can select a channel to see upcoming programs for that channel. ■ The computer is set up correctly for your TV signal source. Refer to the setup poster for more information.
Using Remote Control in My TV Remote Control button Action To freeze the live TV image, press Pause. While paused, My TV continues to record a pause buffer for up to 30 minutes. To resume watching TV where you left off, press Play. To stop live TV or a recorded program, press Stop once. To resume watching the program, press Play. n If you close Media Center or leave the Guide page, Media Center defaults back to displaying all available channels.
Watching Live TV Using the Digital Video Recorder n The 30-minute pause buffer applies only when pausing, rewinding, and fastforwarding live TV. Media Center allows you to record a program for longer than 30 minutes. When you open the My TV window and begin watching live TV, Media Center begins recording the selected program in the background for up to 30 minutes. This allows you to use your remote control to stop, pause, rewind, and fast-forward live TV programs within a 30-minute time range.
Using the Television Program Guide In the Guide, you can scroll through a list of the current television programs and channels available from your television service provider. The Guide displays the channel and network, as well as the program title, scheduled time block, and a brief description of the program. The number of days displayed depends on your television service provider. By selecting a program title, a detailed description of the program appears at the bottom of the window.
Viewing the Television Program Guide w Make sure the PC has a connection to the Internet and that you have completed the Media Center setup wizard before you try to download your Television Program Guide or change the settings for your Guide. 1 2 3 4 38 Press the Start button on the remote control. Select My TV, and then select Guide. Select a channel, and then use the arrow buttons to view up to two weeks of programming for that channel.
Downloading the Television Program Guide You have three options to download the Television Program Guide: ■ Automatically connect and download the Guide at a specified time each day. Some Internet Service Providers may not support this option. ■ Manually connect to the Internet, and Media Center automatically downloads the Guide. ■ Manually connect to the Internet and then manually download the Guide in Media Center TV Settings menu.
Changing a Postal Code to Receive the Correct Television Program Guide 1 2 3 Press the Start button control. on the remote Select Settings, TV, Guide, and then select Reset Guide lineup. 4 5 Enter your postal code, and then select Next. To download your provider information and then start downloading your Guide information, follow the onscreen instructions. Select Next, and follow the onscreen instructions.
Adding Missing Channels to the Guide Some program channels are seasonal and don’t appear in the Guide all the time. To add the names and numbers of the television channels you are missing or to change the associations between channel numbers and lineups: 1 2 3 Press the Start button control. on the remote Select My TV, Settings, Guide, and then select Add missing channels to add the names and numbers of the channels you are missing. Select Add channel.
Searching for TV Programs ■ ■ n Using Categories to search can help you find, for example, all football games. A title or keyword search displays every program that has “football” in the title or description. The TV search results do not include previously recorded TV programs. To find a TV program, you can enter a title, keyword, or select a category in your Guide by using your remote control.
Searching for TV programs using categories You can search the Guide to find a TV program by selecting a category using your remote control. To search for a TV program 1 2 3 4 Press the Start button on the remote control, select My TV, and then select Search. Select Categories. Select a category of program types such as Movies or Sports, and then press OK on the remote control. All items that match the category are displayed in the search results. You can sort them by date or by name.
Recording TV Programs w If you turn off (shut down) your PC, Media Center will not record a scheduled program. The PC must be turned on or in standby mode to record a TV program. The PC will not automatically go into standby mode if Media Center is open. Make sure you turn off the monitor and turn down or mute the volume if, for example, you have a scheduled recording in the middle of the night and don’t want to be disturbed.
Recording TV tips ■ ■ If you are watching live TV during a scheduled recording time, you can watch only the program being recorded. If you change channels, recording stops. If you go to another area in Media Center, the TV channel you last selected will be displayed in the inset window at the bottom of the window. ■ Some channels can be shared by two or more networks, depending on the time of day. The Guide may display only one network’s programming. This may cause recording options to be unavailable.
3 Press the Record button on the remote control. The Record icon appears next to the program in the Guide. Press Record twice to record a series. 4 5 To return to the previous window, press Back on the remote control. If there is a recording conflict, Media Center displays a message and allows you to select which program you want to record. The Record Series icon is displayed to indicate a series. Press Record again to cancel the recording.
4 5 Select Record or Record Series in the window, and then press OK. The Record icon for a single program or the Record Series icon for a series appears next to the program in the Guide. If there is a recording conflict, Media Center displays a message and allows you to select which program you want to record. To return to the previous window, press Back on the remote control.
5 6 To set the recording and return to the Settings window, select Record in the window, and then press OK on the remote control. To return to the previous window, press Back on the remote control. To manually record a program or series from the Guide: 1 2 Press the Start button on the remote control, select My TV, and then select Guide. Select the program you want to record, and then press the Record button.
Playing Recorded TV Programs Recorded TV is the storage place for all your recorded programs. In the Recorded TV window, you can sort your programs by name, date, or category. You can also delete a recorded program or series of programs and check for any recording errors. To play a recorded program 1 2 3 Press the Start button on the remote control, select My TV, and then select Recorded TV. To organize all of your previously recorded programs, select Sort by date, Sort by name, or Sort by category.
Locating Recorded TV Programs for Viewing on the Desktop 1 n To play recorded TV programs in Windows Media Player, a PC requires: ■ Windows XP operating system. ■ Windows Media Player 9. ■ A special Media Center codec file that may be available through Windows Update (for select models only). 50 2 3 4 5 Click Start on the taskbar, and then click My Computer. Double-click the Shared Documents folder. Double-click the Recorded TV folder. Double-click your Microsoft Recorded TV program file.
About Recording Errors A recording error means that a program scheduled to record was not recorded. This can occur for several reasons. If your PC was turned off and not in standby mode during the time the program was scheduled to record, or if there was a recording conflict with another scheduled program, a recording error occurs. If you were watching live TV when the program was scheduled to record and declined the prompt to change channels, a recording error occurs.
Resolving Recording Conflicts Media Center can record only one TV program at a time. If you schedule two recordings for the same time, a message appears telling you to resolve the conflict. If you don’t resolve the conflict, Media Center automatically makes the selection just before the program begins recording. Before the program records, a conflict icon (a red circle with an exclamation point) is listed next to the program in the Guide.
Deleting a Scheduled Program or Series To prevent recording conflicts, you may need to delete a program or series that is scheduled to be recorded. 1 2 Press the Start button on the remote control, select My TV, Recorded TV, and then select Scheduled. Use the arrow buttons to select the program title you don’t want to record, and press OK. 3 To remove a single program, select Don’t record in the window and press OK on the remote control.
Blocking Unwanted TV Programs and Movies (Select models only) If you set Media Center to block unrated channels, an error could occur. It is recommended that you make sure this option is not selected. To do this: n Parental control and caption display settings for TV and DVDs are included with select models only. 1 2 3 4 Press the Start button control. on the remote Select Settings, General, and then select Parental control. 5 6 Enter your four-digit code number. Select TV Ratings.
Setting Caption Display (Select models only) If you set Media Center to display captions while in window mode (not full-screen mode), the window or the caption text may flash as the text scrolls in the window. To fix this problem, change the display to full-screen mode or turn off the caption display option. To turn off the caption display option: 1 2 Press the Start button control. on the remote Select Settings, TV, and then select Audio.
About Teletext Teletext is additional information that is broadcast within a TV signal. You can navigate the Teletext main page and subpages to find information such as the weather, sports scores, or community events. You can turn on subtitles in a specific language for a program you are watching. When a TV show is recorded, the Teletext subtitles are stored with the recording so you can view the subtitles when you play the recording later. Teletext may not be available for all the channels you receive.
Preparing the code key files 1 2 3 4 5 6 7 After you set up your PC and turn it on, complete the initial Microsoft Windows setup. Open Media Center and complete its setup. Record at least one TV program. Close Media Center. Open the Microsoft Backup utility: Click Start on the taskbar, choose All Programs, Accessories, System Tools, and then click Backup. The Backup or Restore Wizard opens. n The code key files and backup CD you make can be used in your PC only.
8 9 In the Files excluded for all users box, put your cursor over the vertical line between Filename and Application in the title bar, and then click and drag the line to the right to see the full entries. Scroll down the list to see and then click the entry: C:\Documents and Settings\All Users\DRM\* 10 Click Remove, click Apply, and then click OK. The Options window closes. 11 In the Backup Utility window, click the Backup tab. 12 In the left box, click the plus sign (+) for Local Disk (C:).
Making the backup CD 1 2 3 4 5 6 7 Click Start on the taskbar, choose All Programs, CD (DVD) Recorder, if present, RecordNow!, and then click RecordNow! again. The RecordNow! window opens. Insert a blank CD. Select the Data Projects tab, and then click Data Disc. Click Continue. Click Add Files and Folders. The Select files and folders to add window opens. 8 9 In the RecordNow! window, click the red Burn icon. If a warning window opens, click OK.
12 The Backup or Restore Wizard window shows the message You have created the following restore settings. In the window, click the Advanced button. Click Next. 15 Wait until the process completes, and then click Close in the Restore Progress window. 16 A Backup Utility message window opens. Click Yes to restart the PC. Wait until the restart completes. 13 A warning message window opens. Click OK in the Warning window. 14 Select Replace existing files and then click Next. Click Next again. Click Finish.
Recording quality and hard disk drive storage space The space available for recording TV programs depends on your hard disk drive size, the percentage of hard disk drive space allocated to recorded TV, and the recording quality setting. To get the maximum recording time, change the recording quality to Fair instead of the default setting of Best. Quality of recording Hard disk drive space used Best *3 GB/hour Better *2.
Using the Disk Cleanup utility 1 2 Click Start on the taskbar. Choose All Programs, Accessories, System Tools, and then Disk Cleanup. 3 4 5 Select HP Pavilion (C:), and then click OK. Select the type of files you want to delete. Click OK. Adjusting System Restore settings 1 2 3 4 Click Start on the taskbar. Right-click My Computer. Click Properties. Select the System Restore tab. 5 6 7 Select HP Pavilion (C:), and then click the Settings button.
Playing Music Files The My Music window in Media Center works with Windows Media Player to find and play your music files and CDs. You can use Windows Media Player to create your music library and then use Media Center to find and play your music using your remote control. n In My Music you can: ■ Play music CDs. Skip, shuffle, or repeat songs or albums. ■ Play digital music files from a music library you create and organize using Windows Media Player.
Using Windows Media Player Windows Media Player allows you to copy digital music files and organize a music library that you can access by using the My Music window in Media Center. You can: n Media Center can find and play only those files that have been added to the Windows Media Player Library. 64 ■ Create playlists of your favorite songs. ■ Share music files with others. ■ Create a music library by copying tracks from CDs or adding music files from the Internet.
Creating a Music Library When you add music files to your music library, they are placed into your My Music folder in Windows Explorer and in the Media Library in Windows Media Player. You can also find them in Media Center. Adding music files 1 2 3 4 c Select the tracks you want to copy by Click Start on the taskbar, choose All Programs, and then click Windows Media Player. Click the Media Library tab on the side of the window.
Searching the Computer for Music Files You may have already copied and organized your music files on your hard disk drive. If so, you need to add them to the Windows Media Player Library to access them with the Media Center. To add music files that are stored in your My Music or Shared Music folder on your hard disk drive: 1 2 3 4 Click Start on the taskbar, and then click Windows Media Player. Click the Media Library tab.
Adding CD Tracks to the Music Library To add the CD tracks to your Media Center music library: 1 2 3 Press the Start button on the remote control, and then select My Music. 4 Insert a CD into the CD drive. Select the CD you want to copy from the My Music main window. 5 6 Select Copy CD. The first time you copy a music CD you must select your copy protection option, and then follow any onscreen instructions. Select Yes to begin copying tracks to your music library.
Playing Digital Music Files n You can place all your music files into the My Music folder or into other folders on your hard disk drive, but you need to add those files to the Windows Media Player Library for Media Center to be able to find and play them. When you first open the Media Center and open the My Music window, you may not find any music files listed unless there is a music CD in your CD drive or unless you have already added audio files to your Windows Media Player Library.
Finding Music Files in My Music After you have added and organized files in Windows Media Player Library, you can browse through your music files in the My Music window. You can search for music files by album title, artist, song title, or music genre. You can also use the search feature to quickly find a specific song, album, or artist.
2 n Use the arrow keys to select a music file, and then press the Play button on the remote control to begin playing that music file. When copying music tracks, a check mark appears next to the track after it has been copied to the music library. Playing a Song n You can select Visualize in the Now Playing window to see a visualization while you play a music track. 70 You can play a song from anywhere in My Music. You can select it from the View Song list, or from the Album, Artist, and Genre lists.
Setting Up an Automatic Disc Jockey You can select to have Media Center randomly play all the available songs in one genre: 1 2 3 In the My Music window, select Genres. The list displays all the genres available in your Media Library. Use the arrow buttons to select a genre, and then press OK on the remote control. Use the arrow buttons to select Shuffle, and then press OK on the remote control. All songs in that genre are randomly played.
4 5 n When recording a CD track, Windows Media Player Library automatically skips over songs that are already included in the Library. In the Play window, select a song and press OK on the remote control. After play begins, you can also select: ■ View Song to view cover art and play one track. ■ View Tracks to view a list of all tracks on the album. ■ Shuffle to rearrange the play order. ■ Repeat to play the album again.
4 5 Type a name for your playlist, and then click OK. The new playlist should appear under the My Playlists area of the Media Player window. In the Media Library, right-click the music file that you want to add to your playlist, and then click Add to Playlist. Selecting a Visualization 6 Select your playlist from the Add to Playlist window, and then click OK. Repeat this step until all of your files are added. You can now play your playlist in Media Center.
74 HP Media Center PC Software Guide
Working with Pictures The My Pictures and HP Image Zone Plus areas in Media Center are great ways to view, organize, and print your pictures. With My Pictures, you can organize your pictures into folders you create in the My Pictures directory in Windows Explorer. For more information about using My Pictures, see “Using My Pictures in Media Center” on page 76. With HP Image Zone Plus, you can organize your pictures by assigning a date, keyword or place.
Using My Pictures in Media Center My Pictures is a folder on your hard disk drive in the My Documents folder, and it is a Media Center menu item which allows you to view and search for your digital images by using the remote control or the keyboard and mouse. It provides all the tools you need for viewing, organizing, editing, printing, sharing, and protecting your digital images.
Organizing Pictures in My Pictures For Media Center to find and display your pictures, they can be stored in several places: ■ The My Pictures folder on your computer. ■ The Shared Pictures folder on your computer, which allows you to share your pictures with others. ■ On other removable media such as a memory card, a DVD-ROM, or a CD-ROM. Creating picture folders in My Pictures 1 2 3 Click Start on the taskbar, and then click My Pictures to open the My Pictures folder in Windows Explorer.
Viewing Pictures in My Pictures n From the My Pictures menu, you can select Settings to: ■ Select a slide transition, slide time delay, and a background color. ■ Include picture folders you have created. ■ Show captions. ■ Display your pictures randomly. ■ Show song information during slide show. n If the message Image cannot be displayed appears, the file may be corrupted or it may be an unsupported file type.
Zooming in and panning across your pictures 1 2 3 4 Press the Start button control. on the remote Select My Pictures. Select a picture you want to view. Press OK on the remote control once to magnify 150%. 5 6 7 Press OK again to magnify 225%. Once you have zoomed in, you can use the arrow buttons on the remote control to pan around the image. Press OK again to return the picture to the original size.
Viewing a slide show with music 1 2 3 Select My Music on the Media Center Start menu. Select the music you want, and then press OK on the remote control. If the music doesn’t start automatically, press the Play button on the remote control. 4 5 6 To go back to the Media Center Start menu, press Start on the remote control. Select My Pictures. Select the folder of pictures, and then press OK. Select Play slide show, and then press OK.
Editing Pictures in My Pictures To fix red eye or contrast in your picture: 1 2 3 4 5 6 7 Press the Start button control. on the remote Select My Pictures. Select the picture you want to edit. Press the More Info button on the remote control. Select Touch up. Select Red eye or Contrast and then press OK. After you select the options you want to fix, select Save. The picture is displayed with the new settings.
Printing Pictures in My Pictures 1 2 3 4 Press the Start button control. on the remote Select My Pictures. Select the picture you want to print. Press the More Info button on the remote control. Select Print, and then Print again. Or Press the Print button on the remote control. You may need to set up your printer before you can print from Media Center. Follow any onscreen instructions. Setting up your printer 1 n Set up your printer before you try to print your pictures with the remote control.
Copying Pictures to CDs 1 Click Start on the taskbar, and then click My Pictures. Or Locate the files you want to copy. Click Start, My Computer, and then select the drive or removable device where your pictures are located. 2 3 4 Select the files you want to copy by pressing the Ctrl key and then selecting each picture. Select Copy to CD from Windows Explorer in the area Picture tasks. The CD recording program opens. Follow the onscreen instructions to complete recording your pictures to CD.
Using HP Image Zone Plus in Media Center n For more information on using the HP Image Zone Plus program, click the Help link in the control area of the program window. HP Image Zone Plus is both a software program and a Media Center menu item which allows you to view and search for your digital images by using the remote control or the keyboard and mouse. HP Image Zone Plus is a software program to organize your photos, scanned images, and video clips by date, keyword or place.
Organizing pictures in HP Image Zone Plus The HP Image Zone Plus program and Media Center work together. Before you can view and search for your pictures in Media Center, you have to set some things up in HP Image Zone Plus program. To start organizing your pictures in HP Image Zone Plus: 1 2 3 4 Create your image catalog. This indexes all of your pictures so you can assign dates, keywords and places to your files. See “Creating your picture catalog in HP Image Zone Plus” on page 86.
Creating your picture catalog in HP Image Zone Plus n You can click Go to My Pictures folder at the top of the HP Image Zone Plus window to open the My Pictures folder in Windows Explorer. The first time you open the HP Image Zone Plus program, a message appears asking you if you want to create a catalog by indexing images in the My Pictures folder and its subfolders. This catalog allows you to search for your pictures by date, keyword or place by using HP Image Zone Plus.
Updating your catalog when you add new pictures If you add new pictures to your My Pictures folder, you need to open the HP Image Zone Plus program and locate the new image to be able to view it in Media Center. This action updates your HP Image Zone Plus program to include the new image in the catalog. 1 Double-click HP Image Zone Plus icon on the desktop. 2 3 Click the My Images tab. Select View All. Creating albums You can organize your pictures into albums by using the HP Image Zone Plus program.
Assigning a keyword to your pictures n You can assign more than one keyword. You can also edit or delete assigned keywords. 1 2 3 4 5 Double-click the HP Image Zone Plus icon on the desktop. 6 Click the My Images tab and then click the View All tab under the My Images tab. Select a keyword from the available keywords list, and then use the arrow button to add the keyword to the Assign to all box. Click Assign and then click OK. Or Select your picture by clicking it.
Searching for pictures in HP Image Zone Plus You can search for pictures by date, keyword and place by using your remote control or mouse in Media Center. HP Image Zone Plus automatically organizes your pictures by date, based on the date assigned by the camera when the picture was taken, or the date the picture was scanned. 1 2 3 4 Press the Start button control. n Select By keyword. Select a keyword and then press OK on the remote control. on the remote Select HP Image Zone. Or Select Search.
Viewing a slide show with music 1 2 Select My Music on the Media Center Start menu. Select the music you want, and then press OK on the remote control. If the music doesn’t start automatically, press the Play button on the remote control. 3 4 5 To go back to the Media Center Start menu, press Start on the remote control. Select HP Image Zone. Select the pictures, and then press OK.
Editing Pictures in HP Image Zone Plus You can make changes to your pictures and video clips in HP Image Zone Plus. Some of the editing features include: removing red eye, cropping or resizing images, rotating images, and adjusting the color, brightness, and sharpness of your images. For more information about the editing tools, refer to Help in the HP Image Zone Plus program. To edit your pictures: 1 2 3 4 5 Double-click HP Image Zone Plus icon on the desktop. 6 Click the My Images tab.
Printing Pictures in HP Image Zone Plus n You cannot use the Print button on the remote control in HP Image Zone Plus. 1 2 3 4 5 6 Press the Start button control. on the remote Select HP Image Zone. Select the picture group you want to print from. Select Print images. Select the pictures you want to print. Select Print. Follow any onscreen instructions. You may need to set up your printer before you can print from Media Center. Refer to “Setting up your printer” on page 82.
Using Backup and Restore You can create backup discs of all the images on your PC. You can also restore images either from a backup disc or from a automatically created digital negative. HP Instant Share You can share your images with friends and family. After you select images on the My Images tab, you can post the images to the HP Instant Share Web site and send a link to the images on the Web site by e-mail. You can also create online albums if you want to organize your images on the Web site.
94 HP Media Center PC Software Guide
Playing Videos The My Videos window in Media Center makes it easy to play home video files you created or video files you downloaded from the Internet. In My Videos you can: Play and scroll through videos that are in the My Videos or Shared Video folders in Windows Explorer by using your remote control or your keyboard and mouse. ■ Display your video details such as the name and date your video file was modified. ■ Sort videos by date or name.
Organizing Videos When you attach a digital video camera to your PC, Windows asks you how you want to capture your video. You can choose from various software programs to capture and then edit your video file. Most programs automatically save your file to the My Videos folder in Windows Explorer. If not, move your videos into the My Videos or Shared Video folder in Windows Explorer for Media Center to be able to find and play them.
Playing Digital Videos in Media Center After you organize your videos in the My Videos or Shared Video folder in Windows Explorer, open Media Center to watch your videos. 1 2 3 Press the Start button control. on the remote Select My Videos. Select My Videos or Shared Video. The right side of the window shows small images of your video files and folder icons, if you’ve organized your videos into folders. n If you do not have any videos displayed, this message appears.
Playing a video stored on removable media Removable media can be from various sources: n If your video is playing in full-screen mode and you want to see it play in the inset window, press the Back button on the remote control. Digital video camera (FireWire IEEE 1394 port) ■ CD-ROM or DVD-ROM drive 3 ■ Memory card readers such as Smart Media or CompactFlash 4 1 Make sure your removable media is connected or inserted properly.
Sorting Videos To organize your videos by date or by name: 1 On the Media Center Start menu, select My Videos, Shared Video, or Other media. 2 3 If your videos are organized within other folders, use the arrow buttons to select the folder you want to sort, and then press OK. If you don’t select a folder, Media Center sorts all the files and folders. Select Sort by date or Sort by name.
Using Supported Video File Types n For more information about supported video file types, refer to Media Center Help menu. 100 You can view the following types of video files in Media Center. Other file types are supported if your PC has the correct software installed. File extension File type .avi Video file .mpeg, mpg, .mpe, .mlv, .mp2, .mpv2 Movie file .wm, .asf Windows Media file .
Playing DVDs Watching DVDs in Media Center allows you to control the playback with your remote control. If you select to play your DVD in another program, the use of some of the remote control buttons is not supported. To play a DVD movie in Media Center 1 2 3 4 5 Press the Start button control. on the remote Insert the DVD into the drive. If you have other media playing, Media Center asks if you want to play the DVD. Select Yes or No.
Stopping a DVD movie 1 2 Press the Stop button on the remote control to stop the movie. Use the arrow buttons on the remote control to select an item on the Stopped menu, and then press OK. ■ To begin playing the DVD where you left off, select Resume. ■ To begin playing the DVD at the beginning, select Restart. ■ To go to the DVD main menu, if available, select Title Menu. ■ To change the language for the DVD sound track, subtitles, and menu, if available, select DVD Languages.
Changing the DVD Movie Language To select DVD language settings for subtitles, closed captioning, and viewing the DVD: 1 2 3 4 5 6 In the Media Center Start menu, select Settings. In the Settings window, select DVD. In the DVD Settings window, select Language. Select the (+) or (–) buttons. To scroll through the languages available, press the OK button on the remote control. When you find the one you want, use the arrow buttons to select Save in the window, and then press OK on the remote control.
104 HP Media Center PC Software Guide
Listening to FM Radio If your PC is equipped with a radio tuner card, then Media Center can play FM radio. The Radio window in Media Center makes it easy to play FM radio stations by using your remote control. In Radio you can: ■ Listen to FM radio stations. ■ Set up pre-sets of your favorite radio stations. ■ Delete or organize your radio station pre-sets. ■ Use the time-shifting feature; pause, rewind, and fast-forward up to 30 minutes of radio programs.
Using the FM Radio and the TV Signal at the Same Time In Media Center PCs, the FM radio signal and My TV input signal share the same tuner card. This means that you are unable to watch or record TV and listen to FM radio at the same time. When Media Center is scheduled to start a recording, a Playing FM Radio Stations 1 2 3 4 Connect the FM radio antenna to the back of the PC to the connector labeled FM-IN. Press the Start button control. on the remote Select Radio.
Organizing Pre-set Radio Stations 1 2 3 4 Press the Start button control. on the remote Select Radio. Select Settings. Select the up arrows and down arrows next to each pre-set station to move it to a different position. Or Select the delete icon (X) to delete a pre-set station. Or Select Auto Sort to sort your pre-set stations in numerical ascending or descending order. 5 6 Select Save to save your changes. Select Back to return to the previous window.
108 HP Media Center PC Software Guide
Recording TV Shows to DVDs The Media Center PC includes several recording software programs for you to create CDs and DVDs. For more detailed information about recording CDs and DVDs, refer to “Creating (Burning) CDs” on page 119 and “Creating DVD Movies” on page 137. You can: ■ Use RecordNow! to create music CDs and data CDs and DVDs. ■ Use InterVideo WinDVD Creator to record your video and recorded TV programs to DVD or CDs.
Copying Recorded TV Programs to DVD or CD n If your PC has a DVD Writer drive, you can archive your recorded TV programs to DVD+RW or DVD+R media and play them back on your PC in Media Center or from a set-top box DVD player. TV programs recorded in Media Center can be converted to an MPEG format, by using InterVideo WinDVD Creator. This means that recorded TV programs recorded with WinDVD Creator can be played from a PC and from a set-top box DVD player.
Copy a TV program to a DVD with RecordNow! When you copy your recorded TV programs to CD or DVD using RecordNow!, it is recorded as a data file, which can be played back from a PC, not a set-top DVD player. 1 2 3 4 Insert a blank formatted DVD+RW or DVD+R disc. Click Start, choose All Programs, CD (DVD) Recorder, if present, RecordNow!, and then click RecordNow! again. Click the Data Projects tab, and then Click Data Disc. Click the Add Files and Folders button.
Capturing Analog Home Video (Select models only) The TV tuner card of your PC allows you to play television programs in Media Center. The TV tuner card also allows you to connect a VCR, a camcorder, or another analog video device to the PC, and then capture your home video as a file. You cannot play a television program and capture analog video at the same time.
To disconnect the analog home video source 1 2 3 4 5 6 Turn off your analog home video device. 7 Close any open programs. From the Media Center start menu, click My TV, and then click Guide. Find the program you canceled and then select it. Click Start, click Turn Off Computer, and then click Turn Off. Or Disconnect your analog home video source (VCR or camcorder) cable from the connectors on the front of the PC.
Copy Protection n Digital music and video providers may have playback restrictions for downloaded media files. Digital media content that is purchased on the Internet may have restricted access depending on the terms agreed to when you purchased the files. This protects copyrighted media files from being illegally copied and used. For more detailed information about digital rights management, you can go to: http://www.microsoft.
Playing CDs and DVDs The PC includes software that lets you play music CDs and DVD movies. This section describes how to: ■ Play music CDs using Windows Media Player, or play music CDs or DVDs with iTunes. ■ Play DVD movies using Windows Media Player or InterVideo WinDVDTM. ■ Play video CDs (VCD) with InterVideo WinDVD or Windows Media Player. n The software listed in this chapter is for select models only. Playing Music CDs with iTunes You must have either a CD or DVD drive.
Playing DVD Movies with InterVideo WinDVD The InterVideo WinDVD program uses a DVD drive to play DVD movies. n Most DVD movies are localized to geographical countries/regions. See “Using country/ region codes” on page 117. 1 2 Insert a DVD disc into the DVD drive. Close the disc tray by gently pushing the button to the right of the tray on the chassis. The movie plays in its own resizable video window, and the WinDVD control panel appears.
To use the WinDVD control panel: ■ To move the WinDVD control panel, place the mouse pointer on the panel (but not on a button), and drag it to the desired location on the screen. ■ To resize the video window when it is not fullscreen, place the mouse pointer on a window corner and drag the border. ■ For information on the InterVideo WinDVD software, refer to the online Help within the program by clicking the ? (question mark) icon in the WinDVD control panel.
Playing Video CDs (VCD) with InterVideo WinDVD 1 2 Insert your video CD (VCD) into a DVD or CD drive. 3 Select Play DVD movie using InterVideo WinDVD, and click OK. Or If the program doesn’t open, click Start, choose All Programs, Video, InterVideo WinDVD, and InterVideo WinDVD 4. 4 5 If you have a dual-language video CD, the sound of one language comes out of the left speaker, and the other language comes out of the right speaker. Double-click the Volume icon on the taskbar.
Creating (Burning) CDs If your PC has a CD-RW or DVD Writer (select models only), your PC has recording software and you can make your own music or data CDs. Your PC has four recording software programs, iTunes, Windows Media Player, RecordNow!, and Windows XP. You copy or download music to their library and can then organize or copy the music files. You can copy Windows Media files that have a .wma extension, .mp3 files, or .wav files to a CD by using a CD-RW drive or a DVD Writer drive.
Creating (Burning) Data CDs Using Windows XP Your PC has recording software to record data files, such as text files or digital pictures, onto CDs. 1 2 3 4 Click Start on the taskbar and choose My Documents or the folder that has the files you want to copy. 5 6 Select the file or files you want to copy. Click Copy to CD in the Tasks list. Click My Computer in the Other Places list, and then double-click the disc drive you want to use. 7 8 Insert a blank disc into the drive.
Creating CDs to play in your car or home CD players with RecordNow! 1 2 3 4 Click Start, choose All Programs, CD (DVD) Recorder, RecordNow!, and then click RecordNow! again. Select the Audio Projects tab. Select Audio CD for Car or Home CD Player. Insert a music CD to view the tracks on your CD. Select View if you would like to look at another optical drive. Or Click Find and then click either Scan for Music or Browse to find music files on your hard disk drive that you want to record.
About creating a music CD n IMPORTANT: HP supports the lawful use of technology and does not endorse or encourage the use of our products for purposes other than those permitted by copyright law. When recording music files, it is important to note that: ■ To play your music CD in a home or car stereo, it needs to be recorded as a music CD in CD Audio (CDA) format, not as a data CD. ■ You must record all music files in one recording session because RecordNow! closes the CD after recording is complete.
5 Add your data files to the file selection window: ■ n Click the Add Files and Folders button, click the browse folder icon to find and select your file, and then click Add. Repeat this step until all files are added. You can rename your files in the file selection window by selecting and typing over the current name. This does not affect the original files on your hard disk drive. Or ■ 6 7 Drag your file from your desktop or from anywhere in Windows Explorer into the file selection window.
Copying a DVD or CD n IMPORTANT: HP supports the lawful use of technology and does not endorse or encourage the use of our products for purposes other than those permitted by copyright law. RecordNow! allows you to make a copy of a music or data disc from your collection. You can’t copy commercial DVDs because they are protected by copyright laws and are encoded to prevent illegal duplication.
About Removing Files in RecordNow! When removing files in RecordNow!, it is important to note: ■ When you remove a recorded file from a data DVD+R or CD-R, the disc space is lost and can’t be used for new recordings. ■ You can’t remove music files from previously recorded music CDs, but you can remove music files from the file selection window in RecordNow! before you record the files to your disc. ■ You must use a blank CD to create a music CD.
Archiving Files on a DVD or CD 1 2 3 4 5 Click Start, choose All Programs, CD (DVD) Recorder, RecordNow!, and then click RecordNow! again. 6 Add your files to the Archive window: ■ Select one or more categories from the list on the left and click Scan. RecordNow! scans your hard disk drive for files related to the category. ■ Drag files from the Windows Explorer to the Archive window. Select the Backup Projects tab. Select File Archive. Insert a blank CD or DVD into the drive.
Burning an Image 1 2 3 Click Start, choose All Programs, CD (DVD) Recorder, RecordNow!, and then click RecordNow! again. Select the Backup Projects tab. Select Burn Image. 4 5 6 7 Click the Browse button to locate your saved image file. Click the Burn icon. Insert a blank CD or DVD into the drive. Click Done when recording is complete. About Recording Video Files Video quality depends on the quality of the source files, the PC speed, and its graphics processing ability.
Setting automatic recording options When you first insert a blank CD into your DVD Writer or CD Writer drive, Microsoft Windows XP may give you options for the type of disc you insert. When you insert a blank DVD into your DVD Writer/CD Writer drive, an options window does not appear. You must open the program you want to use with your DVD, and then perform an action. For example, if you insert a blank CD-RW disc, you see options such as: 128 ■ Open writable CD folder using Windows Explorer.
If you later decide that you want to change the option you have set: 1 2 3 4 5 Click Start. Click My Computer. Right-click the DVD Writer/CD Writer drive icon and select Properties. Click the AutoPlay tab. Click Select an action to perform, select an action, and then click OK. Or You can also open a program before you insert a disc. After the program is opened, select an action and follow the onscreen instructions within the program.
Compatible File Formats Your DVD Writer/CD Writer drive can read and record the following audio formats: n The InterVideo WinDVD Creator and RecordNow! recording programs support the double-layer technology.
CD-R discs ■ ■ Can’t be erased or written to again. Some programs, like RecordNow!, allow you to record data in multiple sessions until the disc is full. ■ Can hold 700 MB of data, depending on the CD. ■ Can be used to create storage discs for your hard disk drive files. Can hold about 80 minutes of music files or up to 99 tracks. CD-RW discs ■ Can be erased and rewritten. ■ ■ Can hold about 80 minutes of music files or up to 99 tracks. Can hold 700 MB of data, depending on the CD.
Disc Feature and Compatibility n For the latest disc compatibility information for your PC, check the following Web site: http://www.hp.com File type CD-ROM Data No Yes No No Music No Yes Yes Varies by model Data Yes Yes No No MP3 music Yes Yes Varies by model Varies by CD-RW n n The InterVideo WinDVD Creator and RecordNow! recording programs support the doublelayer technology.
Optical Drive Quick Reference Optical drive can Read CDs, CD-Rs, and CD-RWs CD-ROM CD-RW DVD-ROM DVD+RW/+R DoubleLayer Combo CD-RW/DVD X X X X X X X X X X Read DVDs Read data on a CD X X X X X X Play music X X X X X X X X X X X X X X X X Record data or music to disc for storage or backup X View DVD movies X Record DVD movies Play PC games X X X X Software quick reference To open the DVD Writer/CD Writer software programs, click Start on the taskbar, choose
Software iTunes Windows Media Player RealOne Player Windows Movie Maker 2.0 134 HP Media Center PC Software Guide With this program you can ■ Play music CDs, MP3s, and other audio files. ■ Record music files. ■ Record a copy of an existing music or data CD to use on the PC. ■ Organize digital files into a library for recording or listening. ■ Play music CDs, MP3, and other audio files. ■ Play DVD movies.
Software With this program you can InterVideo WinDVD ■ Play DVD movies and video CDs (VCD). RecordNow! ■ Record data and music files. ■ Record a copy of an existing music or data CD to use on the PC. ■ Create customized music CDs from CDs in your collection, or from WAV, MP3, or WMA files. These CDs can be played in your home or car stereo. InterVideo WinDVD Creator ■ Copy and share data files. ■ Copy short video files.
136 HP Media Center PC Software Guide
Creating DVD Movies Your PC allows you to capture (copy), edit, and record your home movies in four easy steps by using the InterVideo WinDVD Creator® software program. Capture: Take videos and pictures from digital camcorders, capture cards, and Web cameras, and then save them to your hard disk drive. Author or Add Menu: Add a menu with chapters to your DVD. Make Movie: Finalize your project by burning your movie to a DVD.
Media Library The Media Library contains your video clips, images, and audio tracks. To import existing media files from your hard disk or CDs into your Media Library, click the Import (or Drag and Drop) button. Capture: Located in bottom right corner. Contains your video clips, images, and audio tracks. Edit: Located in upper-right corner. Contains your video clips, images, and audio tracks. Author (or Add Menu): Located in upper-right corner.
Capturing Digital Camcorder Video 1 2 3 4 5 Click Start, choose All Programs, Video, InterVideo WinDVD Creator, and then click InterVideo WinDVD Creator again. Click the Capture video into hard disk button. Connect your digital camcorder to your PC. Make sure the output from your Digital Camcorder appears in the Preview window. If it does not, double-check your connections and make sure your camera is in playback mode. Click the Play button to preview your video file before you record it.
Capturing Video with a Capture Card 1 2 3 4 5 Click Start, choose All Programs, Video, InterVideo WinDVD Creator, and then click InterVideo WinDVD Creator again. Click the Capture video into hard disk button. 6 7 Connect your VCR, television, or other input device to your capture card. Use the Up and Down arrows to select the channel you would like to record. 8 Click the Record button. Enter a file name, click Save, and recording begins. Click the Stop button to stop capturing your video file.
To edit your video files: 1 2 3 If your project is already open, click the Edit button and skip to step 4. 4 Click Start, choose All Programs, Video, InterVideo WinDVD Creator, and then click InterVideo WinDVD Creator again. Open a project by selecting either the Create new project or the Open existing project button. 5 If you have already captured video for this project, drag and drop the video files from the Media Library to the Storyboard.
Storyboard icons Trims a video clip: Edit Clip 1 2 Double-click a video clip on the Storyboard. Adjust the sliders to cut off video at the beginning or the end. Merges clip with the next clip. Edit Clip Splits a video clip: Edit Clip 1 2 3 Click the video clip you want to split. Click the Play button in the Preview window. Click the Split Clip icon at the point of the clip you want split. Adding audio effects 1 2 3 Click the Audio Library icon.
Adding title effects 1 2 3 Click the Title Effects icon. Drag and drop a title effect either between video files or to a video file on the Storyboard. Type the text you would like to appear on your title screen. 4 5 If you inserted the title effect between video clips, click the Image Setting icon to adjust the length of time you want the title clip to appear. A capital T appears in the bottom-right corner of the title clip on the Storyboard.
Click the following icons to add a menu theme, chapters, buttons, audio tracks, and images to your DVD: Menu and chapter icons (icons may vary) Select a custom-made menu theme by WinDVD Creator. Select a video background for your menu that runs continuously. Select an audio track to run in the background when your menu is displayed. Select one of your own images as the background for your menu. Double-click a button to add it to your menu.
Make Movie This is the final step of your DVD project. You select a format, the type of TV system, and volume name. 1 2 3 4 5 If your project is already open, click the Make Movie button and skip to step 5. Click Start, choose All Programs, Video, InterVideo WinDVD Creator, and then click InterVideo WinDVD Creator again. 6 Choose one from each of the following sections (order of selections may differ). Select Function Format Select one of the formats to record your project.
Recording VHS Video Files Direct to DVD To record VHS video files direct to DVDs: 1 2 3 Connect your VCR or other analog video source to your capture card. Click Start, choose All Programs, Video, InterVideo WinDVD Creator, and then click InterVideo WinDVD Creator again. Select the Record video tape into DVD disc in one step button. 4 5 6 7 Insert a blank DVD into your drive. Click the Capture button and select your VCR. Press the Playback button on your VCR.
Troubleshooting Problems and Solutions For help on general and miscellaneous problems you may be experiencing with the PC, refer to the following pages for possible solutions. Look up the description of the problem and try the solution listed. Problem My remote control doesn’t work. I cannot remove a CD or DVD. For more detailed information, press the Help button on your keyboard, or click Start on the taskbar and select Help and Support.
Problem My PC is experiencing video errors. Solution ■ The file may be corrupt or in an unsupported format. Open the video file in a video editor such as InterVideo WinDVD Creator, and then resave the file in a supported format. ■ There may be a problem with the codec. For more information, look in Windows Media Player help, and then search for codec.
Problem Solution My DVD won’t play. You can put data files on a DVD to store them or transfer them to another PC. However, data files on a DVD do not play in a DVD player. Rerecord your files to a file format that can be read by some DVD players. Codec errors are occurring when I play certain files. Codec is an abbreviation for compressor-decompressor. A codec is software or hardware used to compress and decompress digital media. My music files don’t appear in the Media Library.
Problem Solution My TV program didn’t record and/or my screen was blank when I tried to get it out of standby. Make sure you do not put the PC into manual standby mode while Media Center is open. (You manually put the PC into standby by pressing the power icon or moon icon on the remote control or by pressing the moon icon on the keyboard, or by clicking Start on the desktop taskbar, then clicking Turn Off Computer, then Stand By.) Close Media Center before putting the PC into manual standby.
Problem Solution I forgot my parental control password. Open Media Center and select Settings, and then select General. Highlight (do not open) Parental Control. Hold down Ctrl and Alt and press Enter on your keyboard. This will reset the password and allow you to enter a new four-digit code. Postal code results do not match my channels in Television Program Guide (Europe only).
152 HP Media Center PC Software Guide
Index A adding CD tracks to Music Library 67 channels to TV Program Guide 48 missing channels to TV Program Guide 41 music files to library from CD 65 from hard disk drive 65, 66 adding images 141 analog VCR or camcorder, connecting 112 appendable disc 122 archiving files 126 CD 126 DVD 126 author 143 authoring your DVD 143 automatic recording options setting 128 B blocking TV shows 54 burning CDs 119 buttons remote control 14 shortcut buttons 10 C caption display setting 55 capturing capture card 140 dig
DVD can’t remove from drive 147 won’t play 149 DVD movies changing language 103 size of window 102 sound settings 103 speaker settings 103 creating 137 playing in Media Center 101 in small window 102 stopping 102 E edit video files 140 editing pictures 81 encrypted TV shows 56 erasing a DVD or CD 124 error messages 5 common recording errors 51 Image cannot be displayed 78, 90 Low Disk Space 27, 30 No data available 5, 7 errors, recording 51 external hard disk drive 23 F file formats 130 finding music file
memory card reader 75 movie ratings, setting 54 music about burning a music CD 122 burning CD 119 playing with iTunes 115 playing with Windows Media Player 115 music files, deleting files 65 music library 149 adding CD tracks 67 adding files from hard disk drive 66 creating 65 My Music 63 finding and playing an album 71 finding music files 69 playing a song 70 playing songs chosen randomly by Media Center 70 My Pictures 75 changing picture settings 80 copying pictures to CD 83 editing pictures 81 organizing
playing CDs 115 digital music files 68 digital videos 97 DVDs 115 DVDs in Media Center 101 music CDs in Media Center 68 songs in My Music 70 videos in full-screen mode 98 in inset window 98 stored on removable media 98 playing song Buy Music option 72 visualize option 72 playlist, creating 72 Program Guide, see Television Program Guide R radio connecting antenna to PC 105 getting reception 105 Radio window 105 organizing pre-set radio stations 107 playing FM stations 105 playing radio in Media Center 105 r
shortcut buttons 10 slide show displaying information about picture 79 viewing pictures 79 viewing with music 79 software uninstalling 62 software quick reference 133 sorting TV shows by category 49 by date 49 by name 49 Standby button 18 standby mode recording 18 Start menu Media Center 4 storing files about storing data files 123 using RecordNow! 122 System Restore settings 62 T Teletext, displaying 55 Television Program Guide adding missing channels 41 downloading 39 getting correct Guide 39 removing ch
W Web camera video 139 Windows Media Player 115 creating music CDs 119 features 134 playing DVD movies 115 playing music CDs 115 playing video CDs 118 setting as default player 66 types of files 66 Windows Movie Maker 2.