
Owner's manual
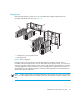
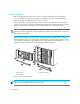
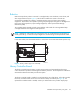
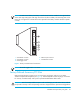

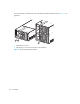
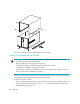
Table Of Contents
- Contents
- Introduction
- Installation
- Library Configuration
- Changing Default Configuration Settings
- Setting a SCSI ID
- Setting Up a Reserved Slot
- Reserved Slot Numbering
- Figure 24 Reserved slot locations, SDLT
- Figure 25 Reserved slot locations, Ultrium (MSL6030)
- Figure 26 Reserved slot locations, lower module, SDLT
- Figure 27 Reserved slot locations, lower module, Ultrium (MSL6060)
- Figure 28 Total reserved slots screen
- Figure 29 Reserved slots numeric keypad screen
- Figure 30 Total reserved slots confirmation screen
- Reserved Slot Numbering
- Configuring the Network Settings
- Operation
- Front Panel
- Library Display Screens and Options
- Menu Selections
- Inserting and Removing Tape Cartridges
- Remote Management Interface
- Maintenance
- Troubleshooting
- Regulatory compliance notices
- Regulatory compliance identification numbers
- Federal Communications Commission notice
- Canadian notice (Avis Canadien)
- European Union notice
- Japanese notices
- Korean notices
- Taiwanese notices
- Laser compliance notices
- Recycling notices
- Disposal of waste equipment by users in private household in the European Union
- Danish notice
- Dutch notice
- Czecholslovakian notice
- Estonian notice
- Finnish notice
- French notice
- German notice
- Greek notice
- Hungarian notice
- Italian notice
- Latvian notice
- Lithuanian notice
- Polish notice
- Portuguese notice
- Slovakian notice
- Slovenian notice
- Spanish notice
- Swedish notice
- Specifications
- Electrostatic Discharge
- Configuration Examples
- Optional Fibre Channel Card
- Index
Installation30
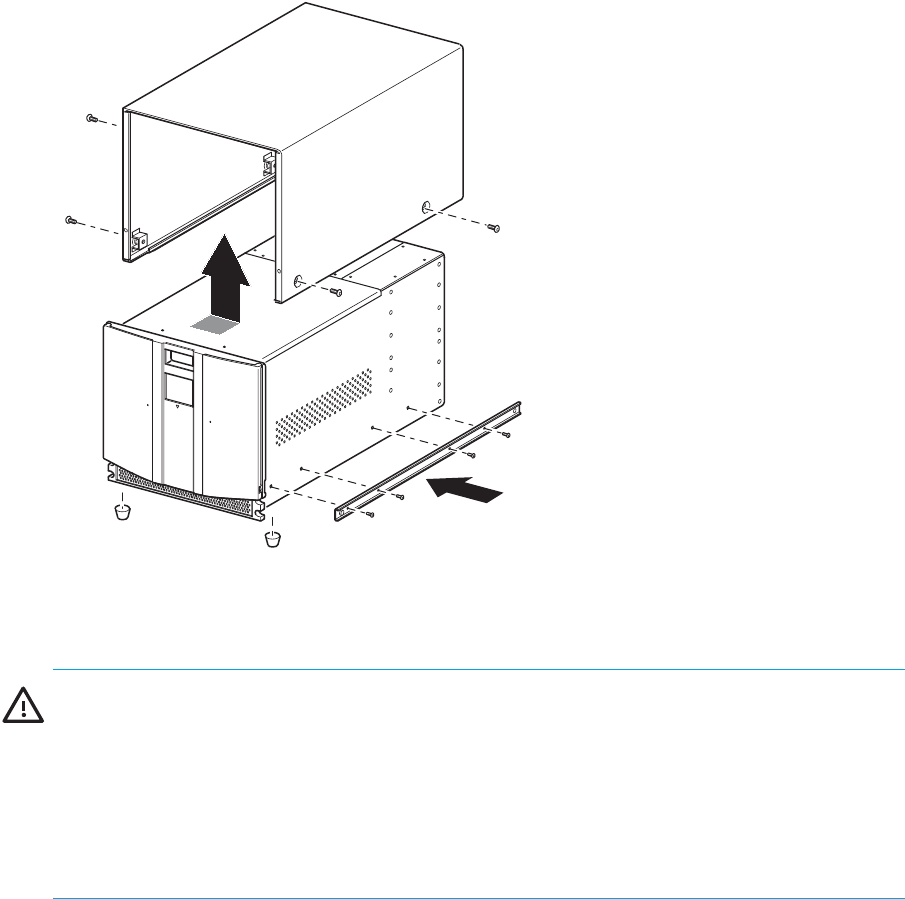
Figure 11 Converting a tabletop model (four-drive model shown)
Setting Up the Rackmount Model
WARNING! To reduce the risk of personal injury or damage to the equipment, be sure that:
• The leveling jacks are extended to the floor.
• The full weight of the rack rests on the leveling jacks.
• In single rack installations, the stabilizing feet are attached to the rack.
• In multiple rack installations, the racks are coupled.
• Only one rack component is extended at any time. A rack may become unstable if more than
one rack component is extended for any reason.
Setting up the rackmount model requires a template, rack enclosure slide rails, and two people or a
mechanical lift to physically install the library in a rack enclosure.
To set up the rackmount model:
1. Use the template that shipped with the library to mark the location of the mounting hardware on
the mounting rails of the rack enclosure (see Figure 12). The black dots along the sides of the
template indicate the top of a U.